





How to Make the Perfect Marble Cake
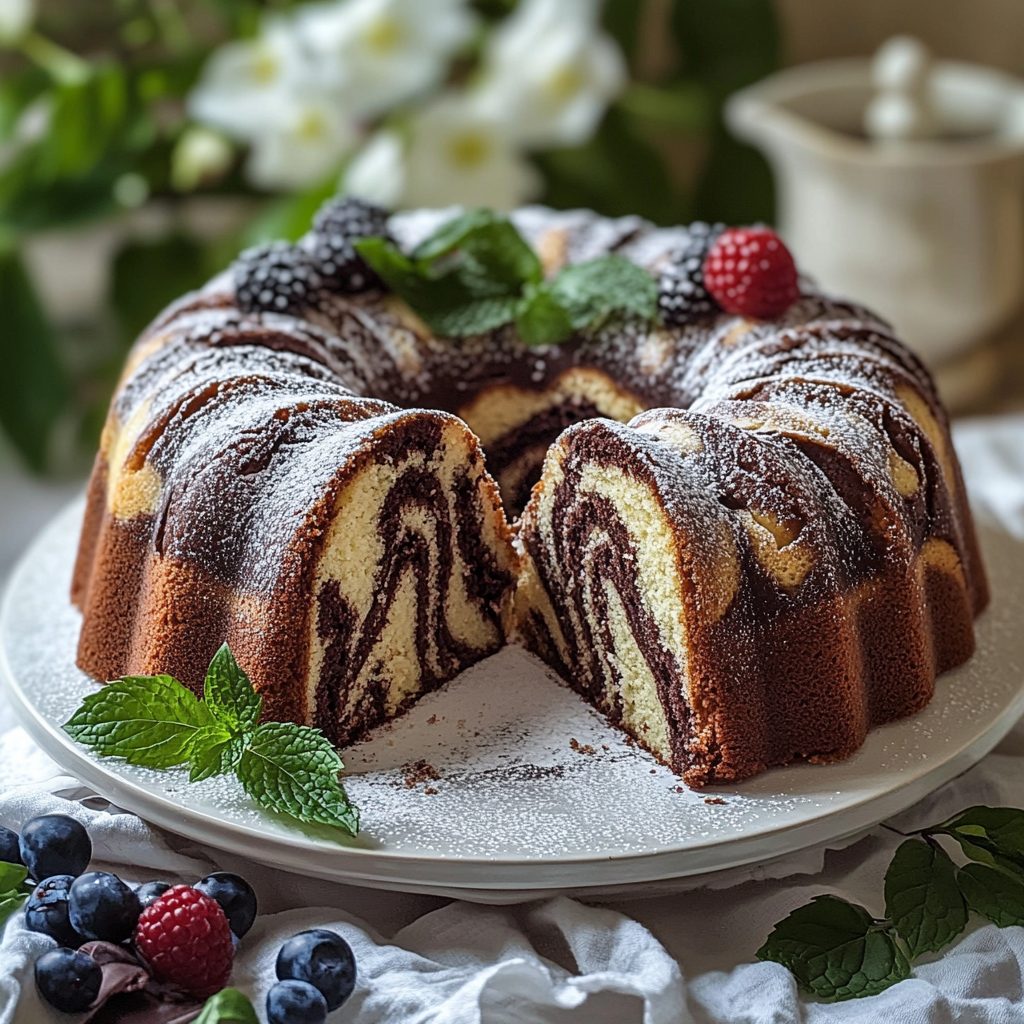
Making a Marble Cake is like painting a masterpiece in your kitchen. The blend of rich chocolate and sweet vanilla creates a delightful treat that’s as pleasing to the eye as it is to the palate. Let’s dive into the step-by-step process to ensure your Marble Cake turns out perfectly every time.
Step 1 – Prep Your Ingredients Quickly
Before you start, gather all your ingredients. Having everything ready not only saves time but also makes the baking process smoother. I often find that when I have my ingredients organized, I can focus on the fun part—mixing and creating!
Step 2 – Begin Cooking
First, preheat your oven to 350°F (175°C). This step is crucial as it ensures your cake bakes evenly. While the oven heats, grease and flour your 9×5-inch loaf pan or a 9-inch round cake pan. This will help your Marble Cake slide out effortlessly once it’s baked.
Step 3 – Combine Ingredients and Cook
In a medium bowl, whisk together the flour, baking powder, baking soda, and salt. In a large mixing bowl, cream the softened butter and sugar until it’s light and fluffy—about 3-4 minutes. The texture should be airy, almost like a cloud! Add the eggs one at a time, mixing well after each addition, and stir in the vanilla extract. Gradually add the dry ingredients to the butter mixture, alternating with the buttermilk. The batter should be smooth and slightly thick, inviting you to dive in!
Step 4 – Final Touches & Serving Suggestions
Now comes the fun part! In a separate bowl, mix the cocoa powder with hot water to create a smooth chocolate mixture. Take about one-third of the vanilla batter and mix it with the chocolate mixture. Spoon alternating dollops of the vanilla and chocolate batters into your prepared pan. Use a knife or skewer to gently swirl the batters together, creating that beautiful marbled effect. Remember, don’t overmix—this is where the magic happens!
Bake your Marble Cake in the preheated oven for 45-50 minutes. The aroma will fill your kitchen, making it hard to resist! Once a toothpick inserted into the center comes out clean, allow the cake to cool in the pan for 10 minutes before transferring it to a wire rack to cool completely. Enjoy the anticipation as you wait for your masterpiece to cool!
Introduction to Marble Cake
Life can be a whirlwind, especially for busy adults juggling work, family, and personal time. That’s why I love Marble Cake—it’s the perfect blend of convenience and indulgence. Imagine slicing into a cake that showcases a beautiful marbled design, revealing swirls of rich chocolate and sweet vanilla. Each bite is a delightful dance of flavors that brings a smile to your face. Whether you’re hosting a gathering or simply treating yourself after a long day, this Marble Cake is a delicious way to savor life’s little moments. Let’s explore how to create this delightful dessert together!
Why You’ll Love This Delicious Low-Carb Marble Cake Recipe
This Marble Cake is not just a feast for the eyes; it’s a celebration of flavors that fits perfectly into a busy lifestyle. As someone who often finds myself racing against the clock, I appreciate recipes that deliver both taste and simplicity. This cake is a delightful way to indulge without the guilt, making it a fantastic option for health-conscious individuals.
One of the best parts about this Marble Cake is its versatility. You can whip it up in under an hour, making it an ideal choice for last-minute gatherings or a sweet treat after dinner. The combination of chocolate and vanilla flavors creates a harmonious balance that appeals to everyone, from kids to adults. Plus, the marbled design adds a touch of elegance, making it perfect for any occasion.
What truly sets this recipe apart is its low-carb nature. By using simple, wholesome ingredients, I can enjoy a slice without worrying about my carb intake. It’s a win-win situation! Whether you’re following a keto diet or just looking to cut back on sugar, this Marble Cake allows you to indulge in a classic dessert while staying on track with your health goals.
So, if you’re ready to impress your family and friends with a stunning dessert that’s easy to make and delicious to eat, this Marble Cake is the answer. Let’s get baking!
Ingredients You’ll Need for This Recipe
Gathering the right ingredients is essential for creating a delicious Marble Cake. Here’s what you’ll need:
- 2 cups all-purpose flour: This forms the base of your cake, providing structure and texture.
- 1 ½ teaspoons baking powder: This leavening agent helps the cake rise, giving it a light and fluffy texture.
- ½ teaspoon baking soda: Works alongside the baking powder to ensure your cake rises perfectly.
- ½ teaspoon salt: Enhances the flavors and balances the sweetness of the cake.
- ½ cup unsalted butter, softened: Adds richness and moisture, making the cake tender.
- 1 cup granulated sugar: Sweetens the cake and contributes to its delightful texture.
- 3 large eggs: These provide structure and stability, helping the cake hold its shape.
- 1 teaspoon vanilla extract: Infuses the cake with a warm, sweet flavor that complements the chocolate.
- 1 cup buttermilk: Adds moisture and a slight tang, resulting in a tender crumb.
- ½ cup unsweetened cocoa powder: This is what gives your cake its rich chocolate flavor.
- ¼ cup hot water: Helps to dissolve the cocoa powder, creating a smooth chocolate mixture.
For those looking to customize, consider these optional ingredients:
- ½ cup chocolate chips: For an extra chocolatey kick, fold these into the batter.
- Unsweetened applesauce: Substitute half of the butter for a lighter version of the cake.
Now that you have your ingredients ready, let’s move on to the fun part—baking your Marble Cake! You can find the exact measurements and instructions at the end of this section for easy printing.
How to Make the Perfect Marble Cake
Making a Marble Cake is like painting a masterpiece in your kitchen. The blend of rich chocolate and sweet vanilla creates a delightful treat that’s as pleasing to the eye as it is to the palate. Let’s dive into the step-by-step process to ensure your Marble Cake turns out perfectly every time.
Step 1 – Prep Your Ingredients Quickly
Before you start, gather all your ingredients. Having everything ready not only saves time but also makes the baking process smoother. I often find that when I have my ingredients organized, I can focus on the fun part—mixing and creating!
Step 2 – Begin Cooking
First, preheat your oven to 350°F (175°C). This step is crucial as it ensures your cake bakes evenly. While the oven heats, grease and flour your 9×5-inch loaf pan or a 9-inch round cake pan. This will help your Marble Cake slide out effortlessly once it’s baked.
Step 3 – Combine Ingredients and Cook
In a medium bowl, whisk together the flour, baking powder, baking soda, and salt. In a large mixing bowl, cream the softened butter and sugar until it’s light and fluffy—about 3-4 minutes. The texture should be airy, almost like a cloud! Add the eggs one at a time, mixing well after each addition, and stir in the vanilla extract. Gradually add the dry ingredients to the butter mixture, alternating with the buttermilk. The batter should be smooth and slightly thick, inviting you to dive in!
Step 4 – Final Touches & Serving Suggestions
Now comes the fun part! In a separate bowl, mix the cocoa powder with hot water to create a smooth chocolate mixture. Take about one-third of the vanilla batter and mix it with the chocolate mixture. Spoon alternating dollops of the vanilla and chocolate batters into your prepared pan. Use a knife or skewer to gently swirl the batters together, creating that beautiful marbled effect. Remember, don’t overmix—this is where the magic happens!
Bake your Marble Cake in the preheated oven for 45-50 minutes. The aroma will fill your kitchen, making it hard to resist! Once a toothpick inserted into the center comes out clean, allow the cake to cool in the pan for 10 minutes before transferring it to a wire rack to cool completely. Enjoy the anticipation as you wait for your masterpiece to cool!
Expert Tips to Ensure Marble Cake Success
Creating the perfect Marble Cake is all about attention to detail and a few handy tricks. Here are my top tips to ensure your cake turns out beautifully every time:
- Room Temperature Ingredients: Make sure your butter, eggs, and buttermilk are at room temperature. This helps them blend more easily, resulting in a smoother batter.
- Don’t Overmix: When combining the batters, be gentle! Overmixing can lead to a dense cake. Just swirl until you see the marbled effect.
- Use Quality Cocoa Powder: The flavor of your Marble Cake hinges on the cocoa powder. Opt for high-quality unsweetened cocoa for a richer chocolate taste.
- Check for Doneness: Ovens can vary, so start checking your cake a few minutes before the recommended baking time. A toothpick should come out clean or with a few moist crumbs.
- Cool Properly: Allow your cake to cool in the pan for 10 minutes before transferring it to a wire rack. This prevents it from breaking apart.
- Store Correctly: To keep your Marble Cake fresh, store it in an airtight container at room temperature for up to three days, or refrigerate for longer shelf life.
- Experiment with Flavors: Don’t hesitate to add your twist! Try different extracts like almond or orange for a unique flavor profile.
With these tips in your back pocket, you’ll be well on your way to baking a Marble Cake that’s not only delicious but also visually stunning!
Essential Kitchen Tools for This Marble Cake Recipe
Having the right kitchen tools can make all the difference when baking your Marble Cake. Here’s a list of essential tools you’ll need, along with some alternatives:
- Mixing Bowls: A set of various sizes is ideal. Glass or stainless steel bowls are great for mixing ingredients.
- Measuring Cups: Use both dry and liquid measuring cups for accurate ingredient measurements. A set with both types is a must!
- Measuring Spoons: Essential for precise measurements of baking powder, baking soda, and other small quantities.
- Electric Mixer: A stand mixer or hand mixer will save you time and effort when creaming butter and sugar.
- Rubber Spatula: Perfect for scraping down the sides of your mixing bowl and folding in ingredients without deflating the batter.
- 9×5-inch Loaf Pan or 9-inch Round Cake Pan: Choose one based on your preferred cake shape. Both work well for this recipe.
- Cooling Rack: Allows your Marble Cake to cool evenly, preventing sogginess on the bottom.
- Knife or Skewer: For swirling the batters together and checking for doneness.
With these tools at your disposal, you’ll be well-equipped to create a stunning Marble Cake that’s sure to impress!
Delicious Variations to Customize Your Marble Cake
One of the joys of baking a Marble Cake is the endless possibilities for customization. Whether you want to enhance the flavor or cater to specific dietary needs, here are some delightful variations to consider:
- Chocolate Chip Marble Cake: For an extra burst of chocolatey goodness, fold in ½ cup of chocolate chips into the batter. The melted chips will create pockets of rich flavor that complement the marbled design beautifully.
- Nutty Delight: Add ½ cup of chopped nuts, such as walnuts or pecans, to the batter for a delightful crunch. The nuts add texture and a nutty flavor that pairs wonderfully with both chocolate and vanilla.
- Fruit-Infused Marble Cake: Incorporate ½ cup of fresh berries or diced fruits like strawberries or raspberries into the batter. This will not only add a pop of color but also a refreshing fruity taste that brightens the cake.
- Different Extracts: Experiment with various extracts to change the flavor profile. Almond extract can add a lovely nutty aroma, while orange or lemon extract can provide a zesty twist that complements the sweetness of the cake.
- Gluten-Free Option: Substitute the all-purpose flour with a gluten-free flour blend. This allows those with gluten sensitivities to enjoy a delicious Marble Cake without compromising on taste.
- Lower Sugar Version: Use a sugar substitute like erythritol or stevia to reduce the sugar content. This is a great option for those following a low-carb or keto diet while still enjoying a sweet treat.
- Vegan Marble Cake: Replace the eggs with flaxseed meal (1 tablespoon of flaxseed mixed with 2.5 tablespoons of water per egg) and use a plant-based butter alternative. This way, you can enjoy a Marble Cake that’s both delicious and vegan-friendly!
These variations not only allow you to tailor the Marble Cake to your taste but also make it a versatile dessert for any occasion. So, feel free to get creative and make this recipe your own!
Best Marble Cake-Friendly Sides & Beverage Pairings
Pairing your Marble Cake with the right sides and beverages can elevate your dessert experience. Here are some easy and delightful options that complement the rich flavors of the cake:
- Fresh Berries: A side of mixed berries, such as strawberries, blueberries, and raspberries, adds a refreshing contrast to the sweetness of the cake.
- Whipped Cream: Light and airy whipped cream provides a creamy texture that balances the dense cake beautifully.
- Vanilla Ice Cream: A scoop of vanilla ice cream melts into the warm cake, creating a deliciously indulgent treat.
- Chocolate Sauce: Drizzling warm chocolate sauce over a slice of Marble Cake enhances the chocolate flavor and adds a decadent touch.
- Espresso or Coffee: A cup of rich espresso or freshly brewed coffee pairs perfectly, cutting through the sweetness and enhancing the cake’s flavors.
- Herbal Tea: A soothing cup of herbal tea, like chamomile or mint, offers a calming contrast to the cake’s richness.
- Milk or Almond Milk: A glass of cold milk or almond milk is a classic pairing that complements the cake’s flavors and adds a nostalgic touch.
These sides and beverages not only enhance the enjoyment of your Marble Cake but also create a delightful experience for your guests. Enjoy experimenting with these pairings!
FAQs About Making Marble Cake at Home
As you embark on your Marble Cake journey, you might have a few questions. Here are some common queries and their answers to help you along the way:
- Can I use a different type of flour for my Marble Cake?
Absolutely! You can substitute all-purpose flour with a gluten-free flour blend for a gluten-free Marble Cake. Just ensure the blend contains xanthan gum for the best texture. - How should I store my Marble Cake?
To keep your Marble Cake fresh, store it in an airtight container at room temperature for up to three days. For longer storage, refrigerate it, and it can last up to a week. - Can I make this Marble Cake ahead of time?
Yes! You can bake the Marble Cake a day in advance. Just let it cool completely, wrap it tightly in plastic wrap, and store it at room temperature until you’re ready to serve. - What can I substitute for buttermilk in this recipe?
If you don’t have buttermilk on hand, you can make a quick substitute by mixing 1 cup of milk with 1 tablespoon of vinegar or lemon juice. Let it sit for about 5 minutes before using it in your Marble Cake. - Can I freeze my Marble Cake?
Yes! To freeze your Marble Cake, wrap it tightly in plastic wrap and then in aluminum foil. It can be frozen for up to three months. Thaw it in the refrigerator before serving.
Final Thoughts on This Easy Marble Cake
As I reflect on this delightful Marble Cake, I can’t help but feel excited for you to try it! The combination of chocolate and vanilla creates a symphony of flavors that’s sure to please everyone at your table. Whether you’re baking for a special occasion or simply treating yourself, this recipe is a wonderful way to indulge without the guilt. I encourage you to share your baking adventures and any personal twists you add to the recipe. Let’s celebrate the joy of baking together—your Marble Cake masterpiece awaits!
Print
Marble Cake: Discover the Delightful Recipe Today!
- Total Time: 1 hour 10 minutes
- Yield: 8 servings 1x
- Diet: Vegetarian
Description
A delightful Marble Cake that combines vanilla and chocolate flavors in a beautiful marbled design.
Ingredients
- 2 cups all-purpose flour
- 1 ½ teaspoons baking powder
- ½ teaspoon baking soda
- ½ teaspoon salt
- ½ cup unsalted butter, softened
- 1 cup granulated sugar
- 3 large eggs
- 1 teaspoon vanilla extract
- 1 cup buttermilk
- ½ cup unsweetened cocoa powder
- ¼ cup hot water
Instructions
- Preheat your oven to 350°F (175°C). Grease and flour a 9×5-inch loaf pan or a 9-inch round cake pan.
- In a medium bowl, whisk together the flour, baking powder, baking soda, and salt. Set aside.
- In a large mixing bowl, cream the softened butter and sugar together until light and fluffy, about 3-4 minutes. Add the eggs one at a time, mixing well after each addition. Stir in the vanilla extract.
- Gradually add the dry ingredients to the butter mixture, alternating with the buttermilk. Begin and end with the flour mixture, mixing until just combined.
- In a separate bowl, combine the cocoa powder and hot water to create a smooth chocolate mixture. Take about one-third of the vanilla batter and mix it with the chocolate mixture until well combined.
- Spoon alternating dollops of the vanilla and chocolate batters into the prepared pan. Use a knife or a skewer to gently swirl the batters together, creating a marbled effect. Be careful not to overmix.
- Bake in the preheated oven for 45-50 minutes, or until a toothpick inserted into the center comes out clean. Allow the cake to cool in the pan for 10 minutes before transferring it to a wire rack to cool completely.
Notes
- For a richer flavor, consider adding ½ cup of chocolate chips to the batter.
- To make a lighter version, substitute half of the butter with unsweetened applesauce.
- Prep Time: 20 minutes
- Cook Time: 50 minutes
- Category: Dessert
- Method: Baking
- Cuisine: American
Nutrition
- Serving Size: 1 slice
- Calories: 250
- Sugar: 14g
- Sodium: 200mg
- Fat: 12g
- Saturated Fat: 7g
- Unsaturated Fat: 3g
- Trans Fat: 0g
- Carbohydrates: 32g
- Fiber: 1g
- Protein: 4g
- Cholesterol: 70mg


