





How to Make the Perfect Cheesecake (New York Style)
Making a cheesecake (New York style) at home is a delightful experience that fills your kitchen with the sweet aroma of baking. I love how this recipe combines simplicity with indulgence, making it perfect for busy health-conscious adults like us. Let’s dive into the step-by-step process to create this creamy masterpiece!
Step 1 – Prep Your Ingredients Quickly
Before you start, it’s crucial to have all your ingredients at room temperature. This ensures a smooth and creamy filling without lumps. I usually take my cream cheese and eggs out of the fridge about an hour before I begin. Trust me, this little step makes a world of difference!
Step 2 – Begin Cooking
First, let’s tackle the crust. In a medium bowl, combine the graham cracker crumbs, 1/2 cup granulated sugar, and melted butter. Mix until it resembles wet sand. Press this mixture firmly into the bottom of your greased 9-inch springform pan. Bake it in a preheated oven at 325°F (160°C) for 10 minutes. The smell of the crust baking is simply heavenly!
Step 3 – Combine Ingredients and Cook
Now, onto the filling! In a large mixing bowl, beat the softened cream cheese with an electric mixer on medium speed until it’s smooth and creamy—about 2-3 minutes. Gradually add 1 cup of sugar and vanilla extract, mixing until well combined. Add the eggs one at a time, mixing on low speed after each addition. This is where you want to be gentle; overmixing can lead to cracks in your cheesecake!
Next, stir in the sour cream, flour, and salt until everything is smooth. Pour this luscious cream cheese mixture over your cooled crust, and get ready for the magic to happen!
Step 4 – Final Touches & Serving Suggestions
Bake your cheesecake in the preheated oven for 60-70 minutes. You’ll know it’s done when the edges are set, and the center is slightly jiggly. Once baked, turn off the oven and crack the door open, allowing the cheesecake to cool gradually for about an hour. This step is key to preventing cracks!
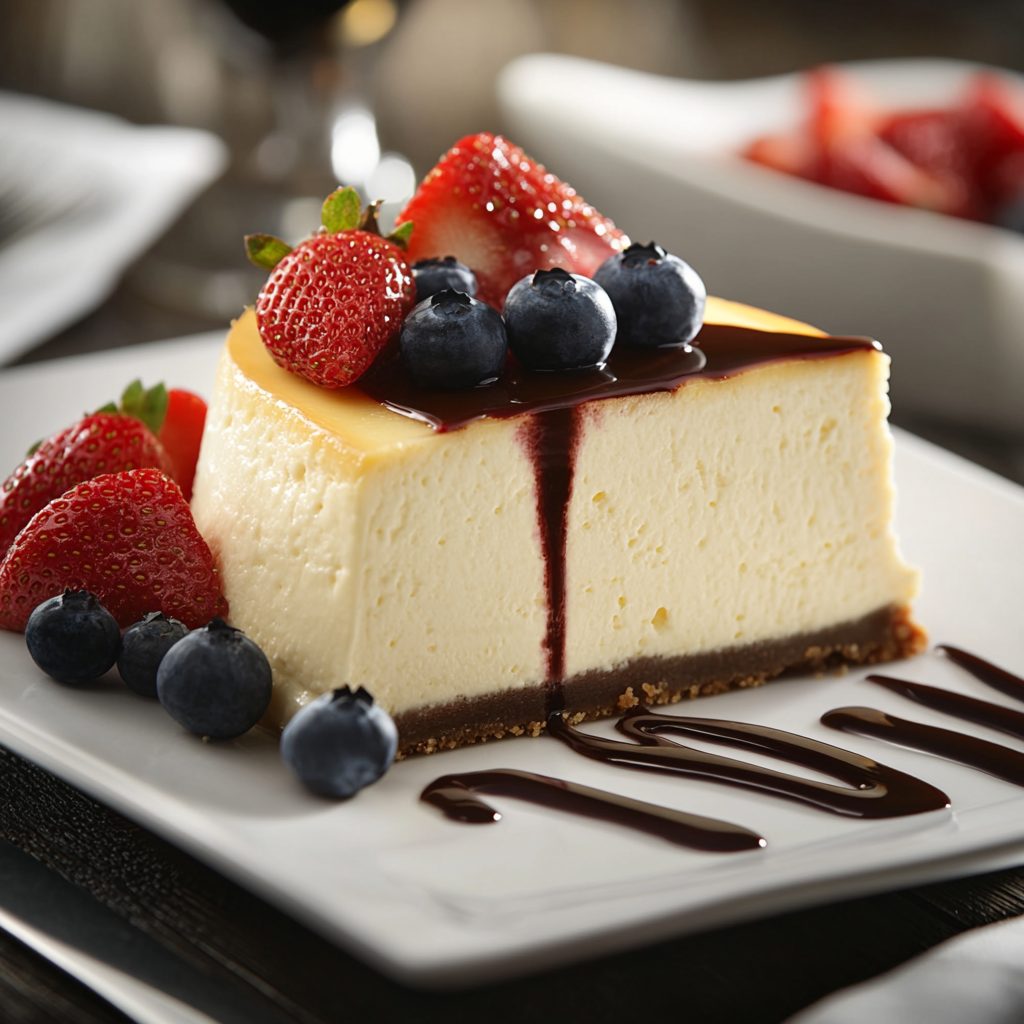
After it cools, let it reach room temperature before refrigerating for at least 4 hours, preferably overnight. When you’re ready to serve, consider garnishing with fresh fruit or a drizzle of chocolate for an extra touch of indulgence. Enjoy every creamy bite of your homemade cheesecake (New York style)!
Introduction to Cheesecake (New York Style)
Ah, the classic cheesecake (New York style)—a dessert that embodies indulgence in every creamy bite! This rich and velvety cheesecake is a staple in American kitchens, known for its smooth texture and delightful flavor. The moment you take a slice, you’re greeted with a luscious creaminess that melts in your mouth, making it hard to resist.
For busy health-conscious adults like us, this cheesecake is more than just a treat; it’s a satisfying way to indulge without the guilt. With its simple ingredients and straightforward preparation, it fits perfectly into our hectic lives. Whether you’re hosting a gathering or simply craving something sweet after a long day, this cheesecake delivers both comfort and joy. Plus, it’s a fantastic way to impress family and friends with minimal effort!
Why You’ll Love This Delicious Low-Carb Cheesecake Recipe
One of the best things about making a cheesecake (New York style) at home is the sheer convenience it offers. With just a handful of ingredients and a little bit of time, you can create a dessert that feels like a luxurious treat. I often find myself whipping this up on a Sunday afternoon, knowing that I’ll have a delightful dessert ready for the week ahead. It’s perfect for those busy nights when you want something sweet without the hassle of complicated recipes.
This recipe is not only simple but also incredibly satisfying. The creamy texture and rich flavor make it a standout at any gathering. I’ve served this cheesecake at birthday parties, holiday dinners, and even casual get-togethers, and it never fails to impress. Friends and family rave about how delicious it is, and I love that I can enjoy a slice without straying from my low-carb lifestyle.
Moreover, the versatility of this cheesecake allows you to customize it for any occasion. Whether you want to add a fruity topping or keep it classic, it’s a dessert that adapts beautifully. The delightful taste and ease of preparation make this cheesecake (New York style) a favorite in my kitchen, and I’m sure it will become a beloved recipe in yours as well!
Ingredients You’ll Need for This Recipe
To create the perfect cheesecake (New York style), you’ll need a few essential ingredients that come together to form a rich and creamy delight. Here’s what you’ll need:
- Graham Cracker Crumbs: Provides a sweet and crunchy crust that perfectly complements the creamy filling.
- Granulated Sugar: Sweetens both the crust and the filling, enhancing the overall flavor.
- Unsalted Butter: Binds the crust together, giving it a rich taste and texture.
- Cream Cheese: The star ingredient, delivering that signature rich and creamy filling we all love.
- Sour Cream: Adds a delightful tanginess and creaminess that elevates the cheesecake.
- Vanilla Extract: Enhances the flavor profile, making each bite more aromatic and delicious.
- Eggs: Provides structure and richness, ensuring a smooth and stable filling.
- All-Purpose Flour: Helps stabilize the filling, giving it the perfect texture.
- Salt: Balances the sweetness, bringing out the flavors of the other ingredients.
For those looking to customize their cheesecake, consider adding optional ingredients like fresh fruit toppings—think strawberries or blueberries—or a splash of citrus zest for a refreshing twist. These additions can elevate your cheesecake (New York style) to new heights, making it even more irresistible!
How to Make the Perfect Cheesecake (New York Style)
Making a cheesecake (New York style) at home is a delightful experience that fills your kitchen with the sweet aroma of baking. I love how this recipe combines simplicity with indulgence, making it perfect for busy health-conscious adults like us. Let’s dive into the step-by-step process to create this creamy masterpiece!
Step 1 – Prep Your Ingredients Quickly
Before you start, it’s crucial to have all your ingredients at room temperature. This ensures a smooth and creamy filling without lumps. I usually take my cream cheese and eggs out of the fridge about an hour before I begin. Trust me, this little step makes a world of difference!
Step 2 – Begin Cooking
First, let’s tackle the crust. In a medium bowl, combine the graham cracker crumbs, 1/2 cup granulated sugar, and melted butter. Mix until it resembles wet sand. Press this mixture firmly into the bottom of your greased 9-inch springform pan. Bake it in a preheated oven at 325°F (160°C) for 10 minutes. The smell of the crust baking is simply heavenly!
Step 3 – Combine Ingredients and Cook
Now, onto the filling! In a large mixing bowl, beat the softened cream cheese with an electric mixer on medium speed until it’s smooth and creamy—about 2-3 minutes. Gradually add 1 cup of sugar and vanilla extract, mixing until well combined. Add the eggs one at a time, mixing on low speed after each addition. This is where you want to be gentle; overmixing can lead to cracks in your cheesecake!
Next, stir in the sour cream, flour, and salt until everything is smooth. Pour this luscious cream cheese mixture over your cooled crust, and get ready for the magic to happen!
Step 4 – Final Touches & Serving Suggestions
Bake your cheesecake in the preheated oven for 60-70 minutes. You’ll know it’s done when the edges are set, and the center is slightly jiggly. Once baked, turn off the oven and crack the door open, allowing the cheesecake to cool gradually for about an hour. This step is key to preventing cracks!
After it cools, let it reach room temperature before refrigerating for at least 4 hours, preferably overnight. When you’re ready to serve, consider garnishing with fresh fruit or a drizzle of chocolate for an extra touch of indulgence. Enjoy every creamy bite of your homemade cheesecake (New York style)!
Expert Tips to Ensure Keto Cooking Success
Creating a perfect cheesecake (New York style) is an art, and I’ve gathered some expert tips to help you achieve the best results. These simple yet effective strategies can make all the difference in your baking journey!
- Use Room Temperature Ingredients: This is a game-changer! Having your cream cheese, eggs, and sour cream at room temperature allows for easier mixing, resulting in a smoother filling. I usually take them out of the fridge about an hour before I start baking.
- Avoid Overmixing: While it’s tempting to whip the filling into a frenzy, overmixing can lead to cracks in your cheesecake. Mix just until combined, especially after adding the eggs. This gentle approach ensures a creamy texture without compromising the integrity of your cheesecake.
- Let the Cheesecake Cool Gradually: After baking, turn off the oven and crack the door open, allowing your cheesecake to cool slowly inside. This gradual cooling process helps prevent unsightly cracks from forming on the surface. Patience is key here!
By following these tips, you’ll be well on your way to mastering the art of making a delicious cheesecake (New York style). Happy baking!
Essential Kitchen Tools for This Cheesecake Recipe
To create a flawless cheesecake (New York style), having the right kitchen tools is essential. Here’s a list of the necessary tools that will make your baking experience smooth and enjoyable:
- 9-inch Springform Pan: This is crucial for easy removal of your cheesecake. If you don’t have a springform pan, a regular round cake pan can work, but be prepared for a bit more effort when it comes to serving.
- Electric Mixer: A handheld or stand mixer will help you achieve a smooth filling without lumps. If you don’t have one, a whisk can work, but it will require more elbow grease!
- Mixing Bowls: A set of mixing bowls in various sizes is perfect for combining your ingredients. Glass or stainless steel bowls are great options, as they’re durable and easy to clean.
- Spatula: A silicone or rubber spatula is ideal for scraping down the sides of your mixing bowl, ensuring that all ingredients are well incorporated. If you don’t have a spatula, a wooden spoon can serve as a substitute.
- Oven Thermometer: This tool ensures that your oven is at the correct temperature for baking. If you don’t have one, just be sure to preheat your oven properly and keep an eye on your cheesecake as it bakes.
With these essential tools in hand, you’ll be well-equipped to create a delicious cheesecake (New York style) that will impress everyone at your next gathering!
Delicious Variations to Customize Your Cheesecake
One of the best things about a cheesecake (New York style) is its versatility. You can easily customize it to suit your taste or the occasion. Here are some delightful variations that I love to experiment with:
- Fruit Toppings: Fresh fruit can elevate your cheesecake to a whole new level. Consider adding a vibrant layer of strawberries, blueberries, or raspberries on top before serving. The burst of flavor from the fruit pairs beautifully with the creamy filling, creating a refreshing contrast that’s hard to resist.
- Citrus Twist: For a zesty kick, try adding lemon juice and zest to your filling. This citrus twist brightens the flavor profile and adds a refreshing element that balances the richness of the cheesecake. Just a tablespoon of lemon juice and a teaspoon of zest can make a world of difference!
- Chocolate Swirl: If you’re a chocolate lover like me, incorporating melted chocolate into the filling is a must-try. Simply melt some dark chocolate and swirl it into the cream cheese mixture before pouring it over the crust. This creates a decadent chocolate cheesecake that’s sure to impress!
These variations not only add unique flavors but also make your cheesecake (New York style) visually stunning. Feel free to mix and match these ideas to create your perfect dessert masterpiece!
Best Keto-Friendly Sides & Beverage Pairings
When it comes to enjoying your cheesecake (New York style), pairing it with the right sides and beverages can elevate the experience to new heights. Here are some easy, keto-friendly options that complement the rich flavors of your cheesecake:
- Keto Coffee: A rich, creamy coffee is the perfect beverage to enjoy alongside your cheesecake. I love brewing a cup of freshly ground coffee and adding a splash of heavy cream or unsweetened almond milk. The warmth and depth of the coffee beautifully balance the sweetness of the cheesecake, making each bite even more satisfying.
- Sugar-Free Whipped Cream: For a light topping option, consider making your own sugar-free whipped cream. Simply whip heavy cream with a sugar substitute like erythritol or stevia until soft peaks form. This fluffy addition adds a delightful texture and a touch of sweetness that pairs perfectly with the creamy cheesecake.
- Low-Carb Berries: Fresh berries are a fantastic side to serve with your cheesecake. Opt for low-carb options like strawberries, blackberries, or raspberries. Their natural tartness complements the richness of the cheesecake, providing a refreshing contrast that enhances the overall dessert experience.
These keto-friendly sides and beverages not only enhance the flavors of your cheesecake (New York style) but also keep your dessert experience aligned with your health-conscious lifestyle. Enjoy the delightful combination!
FAQs About Making Cheesecake (New York Style) at Home
As you embark on your cheesecake-making journey, you might have a few questions. Here are some common queries I’ve encountered, along with my answers to help you achieve cheesecake perfection!
- Can I make this cheesecake ahead of time? Absolutely! In fact, making your cheesecake (New York style) a day in advance is a great idea. It allows the flavors to meld beautifully and ensures a firmer texture. Just be sure to refrigerate it properly after it cools to room temperature.
- How do I prevent cracks in my cheesecake? Cracks can be a common issue, but there are a few tricks to avoid them. First, make sure to mix your filling gently and avoid overmixing, especially after adding the eggs. Additionally, allow your cheesecake to cool gradually in the oven with the door slightly ajar. This gradual cooling helps prevent sudden temperature changes that can cause cracks.
- What’s the best way to store leftovers? To keep your leftover cheesecake (New York style) fresh, cover it tightly with plastic wrap or aluminum foil and store it in the refrigerator. It should last for about 5-7 days. If you want to keep it longer, consider freezing individual slices. Just wrap them well and store them in an airtight container. Thaw in the fridge before enjoying!
With these FAQs answered, you’re well on your way to mastering the art of making a delicious cheesecake (New York style). Happy baking!
Final Thoughts on This Easy Keto-Friendly Cheesecake (New York Style)
As I reflect on the joy of making this cheesecake (New York style), I can’t help but smile at the memories it creates. There’s something truly special about gathering friends and family around the table, sharing slices of this creamy delight, and watching their faces light up with each bite. It’s more than just a dessert; it’s a celebration of togetherness and indulgence.
I encourage you to try this recipe and experience the magic for yourself. Whether it’s for a special occasion or just a sweet treat after a long day, this cheesecake is sure to impress. Don’t forget to share your experiences and any creative twists you add to the recipe! I love hearing how others make it their own, and it fosters a wonderful sense of community among fellow home cooks.
So, roll up your sleeves, gather your ingredients, and let the baking begin! I can’t wait for you to enjoy every creamy, dreamy bite of your homemade cheesecake (New York style). Happy baking!
Print
Cheesecake (New York style) Recipe You Can’t Resist!
- Total Time: 4 hours 30 minutes
- Yield: 12 servings 1x
- Diet: Vegetarian
Description
A classic New York style cheesecake that is rich, creamy, and utterly irresistible.
Ingredients
- 2 cups graham cracker crumbs
- 1/2 cup granulated sugar
- 1/2 cup unsalted butter, melted
- 4 (8-ounce) packages cream cheese, softened
- 1 cup granulated sugar
- 1 teaspoon vanilla extract
- 4 large eggs
- 1 cup sour cream
- 1 tablespoon all-purpose flour
- 1/4 teaspoon salt
Instructions
- Preheat your oven to 325°F (160°C). Grease a 9-inch springform pan with butter or non-stick spray.
- In a medium bowl, combine the graham cracker crumbs, 1/2 cup sugar, and melted butter. Mix until well combined. Press the mixture firmly into the bottom of the prepared springform pan to form the crust. Bake for 10 minutes, then remove from the oven and let cool.
- In a large mixing bowl, beat the softened cream cheese with an electric mixer on medium speed until smooth and creamy, about 2-3 minutes.
- Gradually add 1 cup sugar and vanilla extract, mixing until well combined.
- Add the eggs one at a time, mixing on low speed after each addition until just combined. Be careful not to overmix.
- Stir in the sour cream, flour, and salt until smooth.
- Pour the cream cheese mixture over the cooled crust in the springform pan.
- Bake in the preheated oven for 60-70 minutes, or until the edges are set and the center is slightly jiggly.
- Turn off the oven and crack the oven door, letting the cheesecake cool in the oven for 1 hour to prevent cracking.
- Remove from the oven and let it cool to room temperature. Refrigerate for at least 4 hours, preferably overnight, before serving.
Notes
- For a fruit topping, consider adding a layer of fresh strawberries or blueberries on top before serving.
- To add a twist, mix in 1/4 cup of lemon juice and zest for a refreshing citrus flavor.
- Prep Time: 30 minutes
- Cook Time: 70 minutes
- Category: Dessert
- Method: Baking
- Cuisine: American
Nutrition
- Serving Size: 1 slice
- Calories: 410
- Sugar: 7g
- Sodium: 0mg
- Fat: 36g
- Saturated Fat: 0g
- Unsaturated Fat: 0g
- Trans Fat: 0g
- Carbohydrates: 7g
- Fiber: 0g
- Protein: 7g
- Cholesterol: 0mg


