





How to Make the Perfect Onigiri
Making Onigiri (rice balls) at home is a delightful experience that combines simplicity with creativity. I love how this recipe allows me to craft a delicious snack or meal in just a few steps. Let’s dive into the process of creating these tasty rice balls!
Step 1 – Prep Your Ingredients Quickly
Start by rinsing the sushi rice under cold water until the water runs clear. This step is crucial as it removes excess starch, ensuring your Onigiri has that perfect sticky texture. Drain the rice well, and while you’re at it, measure out 2 ½ cups of water. This will be the magic potion that transforms your rice into a fluffy delight!
Step 2 – Begin Cooking
In a medium saucepan, combine the rinsed rice and water. Bring it to a boil over medium-high heat, then reduce the heat to low. Cover the pot and let it simmer for 18-20 minutes. You’ll know it’s ready when the water is absorbed, and the rice is tender. The aroma wafting through your kitchen will be irresistible!
Step 3 – Combine Ingredients and Cook
Once the rice is cooked, remove it from heat and let it sit, covered, for 10 minutes. In a small bowl, mix the rice vinegar, sugar, and salt until dissolved. Gently fold this mixture into the warm rice, being careful not to mash the grains. This step adds a delightful tang to your Onigiri. Allow the rice to cool to a manageable temperature before shaping.
Step 4 – Final Touches & Serving Suggestions
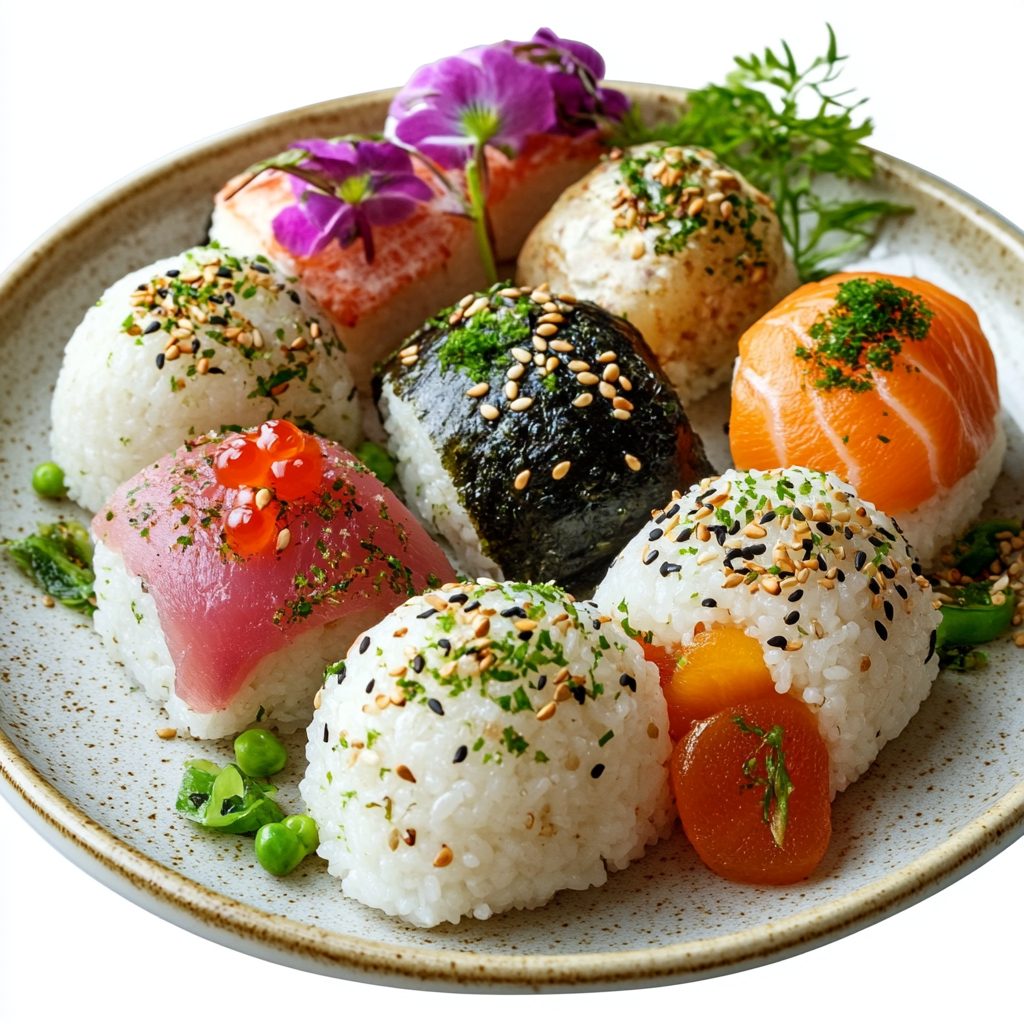
When the rice is cool enough to handle, wet your hands with water to prevent sticking. Take a handful of rice (about 1/3 cup) and flatten it slightly in your palm. Place a teaspoon of your chosen filling in the center, then mold the rice around the filling to form a triangle or oval shape. Wrap a strip of nori around the base of each rice ball or serve it on the side for a crunchy texture. Repeat with the remaining rice and fillings, and voilà! Your homemade Onigiri is ready to be enjoyed.
Introduction to Onigiri (Rice Balls)
Onigiri, or rice balls, are a beloved traditional Japanese snack that I find incredibly easy to make at home. These delightful little packages of flavor are not only delicious but also versatile, making them a perfect addition to any meal or snack time. Whether you’re a busy professional or a parent juggling multiple responsibilities, Onigiri fits seamlessly into your lifestyle.
What I love most about Onigiri is their convenience. They can be prepared in advance, making them ideal for meal prep. Just grab one from the fridge, and you have a quick, satisfying snack ready to go! Plus, the customizable fillings mean you can cater to your taste preferences or dietary needs, ensuring that every bite is just right for you.
Using fresh ingredients in your Onigiri not only enhances the flavor but also boosts the nutritional value. With options like cooked salmon, pickled plum, or seasoned vegetables, you can create a healthy snack that’s packed with protein and essential nutrients. So, let’s embrace the joy of making Onigiri and discover how easy it is to bring a taste of Japan into our kitchens!
Why You’ll Love This Delicious Low-Carb Rice Ball Recipe
One of the best things about making Onigiri (rice balls) at home is the simplicity of preparation. With just a few ingredients and steps, you can create a delightful snack that bursts with flavor. The moment you take your first bite, you’ll understand why these little rice balls are a favorite in Japanese cuisine. The combination of sticky sushi rice and your chosen filling creates a satisfying texture that’s hard to resist!
What truly excites me about Onigiri is their versatility. Whether you’re following a keto diet, looking for vegetarian options, or simply want to cater to picky eaters, Onigiri can adapt to any dietary preference. You can fill them with anything from savory cooked salmon to tangy pickled plum or even a creamy tuna salad. This makes them perfect for various occasions, whether it’s a quick lunch, a picnic snack, or a fun party appetizer.
Moreover, the fun of personalizing your Onigiri is endless! I love experimenting with different fillings and toppings, allowing my creativity to shine. You can mix and match flavors, add spices, or even incorporate seasonal ingredients. This not only keeps things exciting but also ensures that every batch of Onigiri is uniquely yours. So, gather your ingredients and let’s get started on this delicious journey!
Ingredients You’ll Need for This Recipe
To create your delicious Onigiri (rice balls), you’ll need a few essential ingredients that come together to form this delightful snack. Here’s what you’ll need:
- Sushi rice: The base for Onigiri, providing the perfect sticky texture that holds everything together.
- Water: Necessary for cooking the rice to achieve that fluffy consistency.
- Rice vinegar: Adds flavor and helps season the rice, giving it that authentic taste.
- Sugar and salt: Enhance the overall taste of the rice, balancing the flavors beautifully.
- Nori: Seaweed sheets that add flavor and a crunchy texture, making each bite even more enjoyable.
- Filling options:
- Cooked salmon: A protein-rich option that brings a savory depth to your Onigiri.
- Pickled plum (umeboshi): Adds a tangy flavor that contrasts wonderfully with the rice.
- Tuna salad: A classic filling for a creamy texture that’s always a crowd-pleaser.
- Cooked vegetables: A healthy, vegetarian option that can include edamame, carrots, or any seasonal veggies you love.
Feel free to get creative! You can experiment with optional ingredients and alternatives for customization, such as adding sesame seeds or furikake for extra flavor, or even trying grilled chicken or avocado for a fusion twist. The possibilities are endless!
How to Make the Perfect Onigiri
Making Onigiri (rice balls) at home is a delightful experience that combines simplicity with creativity. I love how this recipe allows me to craft a delicious snack or meal in just a few steps. Let’s dive into the process of creating these tasty rice balls!
Step 1 – Prep Your Ingredients Quickly
Start by rinsing the sushi rice under cold water until the water runs clear. This step is crucial as it removes excess starch, ensuring your Onigiri has that perfect sticky texture. Drain the rice well, and while you’re at it, measure out 2 ½ cups of water. This will be the magic potion that transforms your rice into a fluffy delight!
Step 2 – Begin Cooking
In a medium saucepan, combine the rinsed rice and water. Bring it to a boil over medium-high heat, then reduce the heat to low. Cover the pot and let it simmer for 18-20 minutes. You’ll know it’s ready when the water is absorbed, and the rice is tender. The aroma wafting through your kitchen will be irresistible!
Step 3 – Combine Ingredients and Cook
Once the rice is cooked, remove it from heat and let it sit, covered, for 10 minutes. In a small bowl, mix the rice vinegar, sugar, and salt until dissolved. Gently fold this mixture into the warm rice, being careful not to mash the grains. This step adds a delightful tang to your Onigiri. Allow the rice to cool to a manageable temperature before shaping.
Step 4 – Final Touches & Serving Suggestions
When the rice is cool enough to handle, wet your hands with water to prevent sticking. Take a handful of rice (about 1/3 cup) and flatten it slightly in your palm. Place a teaspoon of your chosen filling in the center, then mold the rice around the filling to form a triangle or oval shape. Wrap a strip of nori around the base of each rice ball or serve it on the side for a crunchy texture. Repeat with the remaining rice and fillings, and voilà! Your homemade Onigiri is ready to be enjoyed.
Expert Tips to Ensure Keto Cooking Success
As I’ve navigated the world of keto cooking, I’ve discovered a few expert tips that can elevate your Onigiri (rice balls) game. These simple yet effective strategies will help you achieve perfect results every time!
- Use a rice cooker for consistent results: If you have a rice cooker, I highly recommend using it! It takes the guesswork out of cooking sushi rice, ensuring that it’s perfectly fluffy and sticky every time. Just follow the manufacturer’s instructions, and you’ll be on your way to rice ball perfection.
- Experiment with different fillings for variety: Don’t be afraid to get creative! The beauty of Onigiri lies in its versatility. Try different fillings like grilled chicken, avocado, or even a spicy tuna mix. Each variation can bring a new flavor profile to your rice balls, keeping your meals exciting and fresh.
- Keep hands wet to prevent sticking while shaping: This is a game-changer! Wetting your hands with water before handling the rice will prevent it from sticking to your fingers. It makes shaping the Onigiri much easier and ensures that you can mold them into beautiful triangles or ovals without a mess.
By incorporating these tips into your Onigiri-making process, you’ll not only enhance the flavor and presentation but also enjoy a smoother cooking experience. Happy cooking!
Essential Kitchen Tools for This Keto Recipe
To make your Onigiri (rice balls) effortlessly, having the right kitchen tools on hand is essential. Here’s a list of the must-have items that will make your cooking experience smooth and enjoyable:
- Rice cooker (optional): While not necessary, a rice cooker can simplify the process and ensure perfectly cooked sushi rice every time.
- Medium saucepan: Ideal for cooking the sushi rice, allowing it to steam and become fluffy.
- Mixing bowl: Use this for combining the rice vinegar, sugar, and salt with your cooked rice.
- Measuring cups and spoons: Accurate measurements are key to achieving the right texture and flavor in your Onigiri.
- Plastic wrap (for shaping): This can be handy for shaping your rice balls, especially if you want to create uniform sizes.
With these tools at your disposal, you’ll be well-equipped to create delicious Onigiri that will impress your family and friends!
Delicious Variations to Customize Your Keto Dish
One of the most exciting aspects of making Onigiri (rice balls) is the endless possibilities for customization. I love how a simple rice ball can transform into a unique culinary creation with just a few tweaks. Here are some delicious variations to consider:
- Add sesame seeds or furikake: For an extra burst of flavor, sprinkle some toasted sesame seeds or furikake (a Japanese rice seasoning) into the rice mixture. This not only enhances the taste but also adds a delightful crunch that elevates your Onigiri.
- Try grilled chicken or avocado: If you’re looking for a fusion twist, consider using grilled chicken or creamy avocado as fillings. The savory chicken pairs beautifully with the rice, while avocado adds a rich, buttery texture that’s simply irresistible.
- Create vegetarian options: Onigiri is a fantastic canvas for various vegetables. You can fill them with seasoned sautéed mushrooms, roasted bell peppers, or even a medley of stir-fried greens. This not only caters to vegetarian diets but also packs in extra nutrients!
These variations allow you to tailor your Onigiri to suit your taste preferences and dietary needs. So, don’t hesitate to get creative in the kitchen! Each batch can be a new adventure, and I can’t wait to hear about the unique combinations you come up with!
Best Keto-Friendly Sides & Beverage Pairings
To elevate your Onigiri (rice balls) experience, pairing them with the right sides and beverages can make all the difference. Here are some easy, keto-friendly options that complement the flavors of your rice balls beautifully:
- Cucumber salad with sesame dressing: This refreshing salad adds a crunchy texture and a light, nutty flavor that pairs perfectly with the savory Onigiri.
- Miso soup: A warm bowl of miso soup serves as a comforting side that enhances the umami flavors of your rice balls, making for a satisfying meal.
- Green tea: This classic beverage not only complements the Japanese theme but also offers a refreshing palate cleanser between bites.
- Sparkling water: For a bubbly refreshment, sparkling water is a great choice. You can even add a slice of lemon or lime for a zesty twist!
These sides and beverages not only enhance your Onigiri experience but also keep your meal light and keto-friendly. Enjoy your culinary adventure!
FAQs About Making Onigiri at Home
As I’ve explored the delightful world of Onigiri (rice balls), I’ve come across some common questions that many home cooks have. Here are a few FAQs to help you on your Onigiri-making journey!
- What type of rice is best for Onigiri?
The best rice for Onigiri is sushi rice, also known as short-grain rice. Its sticky texture is perfect for holding the rice balls together, making it ideal for this traditional Japanese snack. - Can I make Onigiri ahead of time?
Absolutely! You can prepare Onigiri in advance and store them in an airtight container in the refrigerator for up to 2 days. Just be sure to wrap them in plastic wrap to keep them fresh. - How do I store leftover Onigiri?
To store leftover Onigiri, place them in an airtight container in the fridge. If you want to keep them from drying out, you can wrap each rice ball in plastic wrap. Enjoy them within two days for the best taste and texture!
These FAQs should help clarify any uncertainties you may have about making Onigiri at home. Happy cooking!
Final Thoughts on This Easy Keto-Friendly Onigiri
As I wrap up this journey into the world of Onigiri (rice balls), I can’t help but feel excited for you to try making these delightful snacks at home. The process is not only simple but also incredibly rewarding. Each bite of your homemade Onigiri will transport you to Japan, filled with flavors and textures that are sure to please your palate.
What I love most about Onigiri is their versatility. You can customize them to fit your dietary preferences, whether you’re following a keto lifestyle or simply looking for a healthy snack. The possibilities are endless, and I encourage you to experiment with different fillings and flavors. Who knows? You might just create a new favorite!
So, gather your ingredients, roll up your sleeves, and dive into the fun of making Onigiri. I can’t wait to hear about your experiences and the unique variations you come up with. Please share your thoughts and creations in the comments below. Let’s inspire each other on this delicious culinary adventure!
Print
Onigiri (rice balls): Discover Easy Homemade Perfection!
- Total Time: 35 minutes
- Yield: 4 servings 1x
- Diet: Vegetarian
Description
Onigiri (Japanese Rice Balls) are delicious and easy to make at home, perfect for a snack or meal.
Ingredients
- 2 cups sushi rice
- 2 1/2 cups water
- 1/4 cup rice vinegar
- 2 tablespoons sugar
- 1 teaspoon salt
- Nori (seaweed sheets), cut into strips
- Filling options:
- 1/2 cup cooked salmon, flaked
- 1/2 cup pickled plum (umeboshi), pitted and chopped
- 1/2 cup tuna salad (canned tuna mixed with mayonnaise)
- 1/2 cup cooked and seasoned vegetables (like edamame or carrots)
Instructions
- Rinse the sushi rice under cold water until the water runs clear. Drain well.
- In a medium saucepan, combine the rinsed rice and water. Bring to a boil over medium-high heat, then reduce the heat to low, cover, and simmer for 18-20 minutes, or until the rice is tender and the water is absorbed.
- Remove from heat and let it sit, covered, for 10 minutes.
- In a small bowl, mix the rice vinegar, sugar, and salt until dissolved.
- Gently fold this mixture into the cooked rice, being careful not to mash the grains. Allow the rice to cool to a manageable temperature.
- Once the rice is cool enough to handle, wet your hands with water to prevent sticking.
- Take a handful of rice (about 1/3 cup) and flatten it slightly in your palm.
- Place a teaspoon of your chosen filling in the center, then mold the rice around the filling to form a triangle or oval shape.
- Wrap a strip of nori around the base of each rice ball or serve it on the side.
- Repeat with the remaining rice and fillings.
- Serve immediately or store in an airtight container in the refrigerator for up to 2 days.
Notes
- For a fun twist, try adding sesame seeds or furikake (Japanese rice seasoning) to the rice mixture for extra flavor.
- You can also experiment with different fillings, such as grilled chicken, avocado, or even cheese for a fusion version.
- Prep Time: 15 minutes
- Cook Time: 20 minutes
- Category: Snack
- Method: Boiling
- Cuisine: Japanese
Nutrition
- Serving Size: 1 onigiri
- Calories: 250
- Sugar: 2g
- Sodium: 300mg
- Fat: 2g
- Saturated Fat: 0g
- Unsaturated Fat: 1g
- Trans Fat: 0g
- Carbohydrates: 45g
- Fiber: 1g
- Protein: 6g
- Cholesterol: 0mg


