





Why You’ll Love This Delicious Low-Carb Mooncake Recipe
As a busy home cook, I know how challenging it can be to find recipes that are both delicious and easy to prepare. This low-carb mooncake recipe is a game-changer! Not only do these mooncakes satisfy your sweet tooth, but they also fit perfectly into a health-conscious lifestyle.
Imagine the joy of biting into a soft, chewy mooncake filled with rich red bean paste, all while knowing you’re indulging in a treat that won’t derail your diet. The best part? You can whip these up in under an hour, making them a fantastic option for last-minute gatherings or festive celebrations.
These mooncakes are incredibly versatile. Whether you’re celebrating the Mid-Autumn Festival or simply want to impress your friends at a dinner party, they’re sure to delight. Plus, you can customize the fillings to suit your taste, making them a fun project to tackle with family or friends.
So, roll up your sleeves and get ready to create mooncakes that will not only tantalize your taste buds but also bring a sense of accomplishment to your kitchen. Trust me, once you try this recipe, you’ll be hooked!
Introduction to Mooncakes
Mooncakes hold a special place in Chinese culture, symbolizing unity and family reunion, especially during the Mid-Autumn Festival. These delightful pastries are not just a treat; they represent the joy of gathering with loved ones under the full moon, sharing stories, and savoring delicious food together. Making mooncakes at home is a cherished tradition that allows you to connect with this rich heritage while adding your personal touch to each creation.
As I embarked on my mooncake-making journey, I discovered the joy of crafting these beautiful desserts from scratch. The process is not only rewarding but also a wonderful way to bond with family and friends. So, let’s dive into the world of mooncakes and create something truly special!
Why You’ll Love This Delicious Low-Carb Mooncake Recipe
As a busy home cook, I know how challenging it can be to find recipes that are both delicious and easy to prepare. This low-carb mooncake recipe is a game-changer! Not only do these mooncakes satisfy your sweet tooth, but they also fit perfectly into a health-conscious lifestyle.
Imagine the joy of biting into a soft, chewy mooncake filled with rich red bean paste, all while knowing you’re indulging in a treat that won’t derail your diet. The best part? You can whip these up in under an hour, making them a fantastic option for last-minute gatherings or festive celebrations.
These mooncakes are incredibly versatile. Whether you’re celebrating the Mid-Autumn Festival or simply want to impress your friends at a dinner party, they’re sure to delight. Plus, you can customize the fillings to suit your taste, making them a fun project to tackle with family or friends.
So, roll up your sleeves and get ready to create mooncakes that will not only tantalize your taste buds but also bring a sense of accomplishment to your kitchen. Trust me, once you try this recipe, you’ll be hooked!
Ingredients You’ll Need for This Recipe
Gathering the right ingredients is crucial for making delicious mooncakes that will impress your family and friends. Here’s what you’ll need:
- 2 cups all-purpose flour: This forms the base of your mooncake dough, providing structure and texture.
- 1/2 cup golden syrup: This sweet syrup adds moisture and a rich flavor, essential for that classic mooncake taste.
- 1/4 cup vegetable oil: This helps keep the dough tender and adds a subtle richness.
- 1/4 teaspoon alkaline water: This ingredient enhances the dough’s elasticity, giving your mooncakes a delightful chewiness.
- 1/2 cup red bean paste (or lotus seed paste): The star filling! Choose red bean for a traditional taste or lotus seed for a unique twist.
- 1/4 cup salted egg yolks (optional, about 2 yolks): These add a savory depth to the sweetness, creating a perfect balance.
- 1/4 cup chopped nuts (optional): For added crunch and flavor, feel free to mix in your favorite nuts.
- 1 egg (for egg wash): This gives your mooncakes a beautiful golden finish when baked.
For those looking to experiment, consider using matcha powder in the dough for a vibrant green hue and earthy flavor. You can also swap out the fillings for chocolate or fruit preserves to cater to different tastes.
Now that you have your ingredients ready, let’s move on to the fun part—making these delightful mooncakes!
How to Make the Perfect Mooncakes
Making mooncakes is a delightful experience that fills your kitchen with warmth and sweet aromas. Follow these simple steps to create mooncakes that will impress everyone!
Step 1 – Prep Your Ingredients Quickly
Before diving into the mixing, take a moment to gather all your ingredients. Having everything organized not only saves time but also makes the cooking process smoother. Picture yourself with all the ingredients laid out like a painter’s palette, ready to create a masterpiece. This preparation ensures you won’t be scrambling for that elusive egg or flour while your dough is waiting!
Step 2 – Begin Cooking
Start by combining the all-purpose flour, golden syrup, vegetable oil, and alkaline water in a mixing bowl. As you mix, feel the dough come together, transforming from a sticky mess into a smooth ball. This is where the magic happens! Once mixed, cover the dough with plastic wrap and let it rest for 30 minutes. This resting period is crucial; it allows the gluten to relax, resulting in a tender mooncake that melts in your mouth.
Step 3 – Combine Ingredients and Cook
After the dough has rested, it’s time to shape your mooncakes. Divide the dough into 8 equal pieces, rolling each into a ball and then flattening it into a disc. The anticipation builds as you place about 1 tablespoon of red bean paste in the center of each disc. If you’re using salted egg yolks, gently nestle half a yolk on top of the paste. Now, fold the dough over the filling and pinch to seal it tightly. This step is vital—make sure there are no leaks, or your mooncakes might burst during baking!
Step 4 – Final Touches & Serving Suggestions
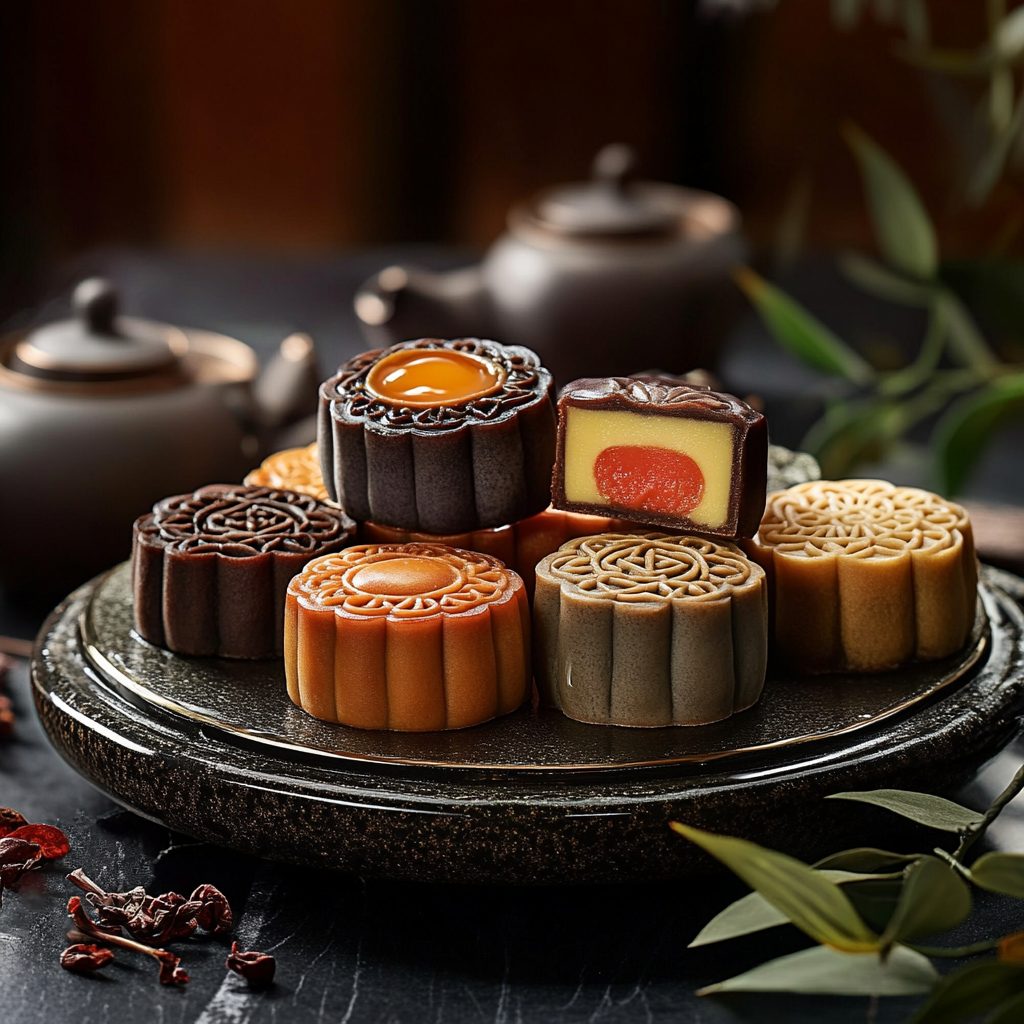
Once your mooncakes are shaped, lightly dust a mooncake mold with flour and press the filled dough ball into it. The satisfying click as you release the mooncake from the mold is a small victory! Place them on a baking sheet lined with parchment paper. Brush a thin layer of beaten egg over the tops for that golden finish. Bake in a preheated oven at 350°F (175°C) for 20-25 minutes, until they turn a beautiful golden brown. Let them cool on a wire rack, and for the best flavor, allow them to rest for at least 24 hours before serving. This waiting period allows the flavors to meld beautifully, making each bite a delightful experience!
Expert Tips to Ensure Mooncake Cooking Success
Creating the perfect mooncakes can be a rewarding experience, but a few expert tips can elevate your baking game. Here are some actionable insights to ensure your mooncakes turn out beautifully every time:
- Use Quality Ingredients: The flavor of your mooncakes largely depends on the quality of your ingredients. Opt for fresh red bean paste and high-quality flour for the best results.
- Don’t Skip the Resting Time: Allowing the dough to rest is crucial for achieving the right texture. This step helps the gluten relax, resulting in a tender mooncake.
- Experiment with Fillings: While red bean paste is traditional, don’t hesitate to try different fillings like chocolate, fruit preserves, or even matcha. This adds a personal touch to your mooncakes.
- Check Your Oven Temperature: Ovens can vary, so it’s wise to use an oven thermometer. Baking at the right temperature ensures even cooking and prevents burning.
- Store Properly: To keep your mooncakes fresh, store them in an airtight container at room temperature for up to a week. For longer storage, consider refrigerating them.
- Practice Makes Perfect: If your first batch doesn’t turn out as expected, don’t be discouraged! Baking is a learning process, and each attempt will bring you closer to perfection.
- Use a Light Hand with the Egg Wash: When brushing the egg wash, apply a thin layer to avoid a soggy top. This will give your mooncakes a beautiful, shiny finish.
By following these tips, you’ll be well on your way to mastering the art of mooncake making. Enjoy the process, and don’t forget to share your delicious creations with family and friends!
Essential Kitchen Tools for This Mooncake Recipe
Having the right tools on hand can make your mooncake-making experience smoother and more enjoyable. Here’s a list of essential kitchen tools you’ll need:
- Mooncake Mold: This is crucial for shaping your mooncakes. If you don’t have a traditional mold, you can use a small cookie cutter or even shape them by hand.
- Mixing Bowls: A set of mixing bowls in various sizes will help you combine your ingredients easily. Opt for glass or stainless steel for durability.
- Rolling Pin: A rolling pin is essential for flattening the dough into discs. If you don’t have one, a clean wine bottle can work in a pinch!
- Baking Sheet: Use a sturdy baking sheet lined with parchment paper to prevent sticking and ensure even baking.
- Pastry Brush: A pastry brush is perfect for applying the egg wash, giving your mooncakes that beautiful golden finish.
- Wire Rack: After baking, a wire rack allows your mooncakes to cool evenly, preventing sogginess.
- Measuring Cups and Spoons: Accurate measurements are key in baking, so having a reliable set of measuring cups and spoons is essential.
With these tools at your disposal, you’ll be well-equipped to create stunning mooncakes that will impress everyone at your next gathering!
Delicious Variations to Customize Your Mooncake Dish
One of the most exciting aspects of making mooncakes is the opportunity to customize them to suit your taste preferences. Here are some delightful variations that will elevate your mooncake experience:
- Matcha Mooncakes: For a unique twist, incorporate 1-2 tablespoons of matcha powder into your dough. This not only adds a vibrant green color but also infuses a subtle earthy flavor that pairs beautifully with sweet fillings.
- Chocolate Mooncakes: If you’re a chocolate lover, consider using chocolate ganache or chocolate paste as your filling. You can even mix cocoa powder into the dough for a rich, chocolatey treat that’s sure to satisfy your cravings.
- Fruit Preserves: Swap out traditional fillings for your favorite fruit preserves, such as mango, strawberry, or raspberry. The fruity sweetness will add a refreshing contrast to the mooncake’s rich dough.
- Nuts and Seeds: Enhance the texture of your mooncakes by adding chopped nuts or seeds to the filling. Almonds, walnuts, or sesame seeds can provide a delightful crunch and additional flavor.
- Spiced Mooncakes: Experiment with spices like cinnamon, nutmeg, or even ginger in your dough or filling. This can create a warm, comforting flavor profile that’s perfect for fall or winter celebrations.
- Vegan Mooncakes: For a plant-based version, substitute the egg wash with a mixture of almond milk and maple syrup. Use vegan-friendly fillings like sweetened coconut or fruit purees to keep it entirely vegan.
These variations not only allow you to express your creativity but also cater to different dietary preferences. So, don’t hesitate to experiment and find the perfect combination that delights your taste buds!
Best Mooncake-Friendly Sides & Beverage Pairings
To elevate your mooncake experience, consider pairing them with complementary sides and beverages. Here are some delightful options that will enhance the flavors of your homemade mooncakes:
- Jasmine Tea: The floral notes of jasmine tea beautifully complement the sweetness of mooncakes, creating a harmonious balance.
- Oolong Tea: This semi-oxidized tea offers a rich, complex flavor that pairs wonderfully with the chewy texture of mooncakes.
- Chrysanthemum Tea: A light and refreshing herbal tea, chrysanthemum tea adds a subtle sweetness that enhances the overall experience.
- Fruit Platter: Serve a colorful assortment of fresh fruits like lychee, mango, and pomegranate to add a refreshing contrast to the rich flavors of the mooncakes.
- Sesame Balls: These crispy, chewy treats filled with sweet red bean paste make for a delightful side that complements the mooncake experience.
- Steamed Dumplings: Light and savory dumplings can serve as a perfect appetizer, balancing the sweetness of the mooncakes.
- Almond Cookies: These crunchy cookies provide a nutty flavor that pairs well with the soft texture of mooncakes, making for a delightful dessert spread.
By incorporating these sides and beverages, you’ll create a well-rounded and enjoyable mooncake experience that your family and friends will love!
FAQs About Making Mooncakes at Home
As you embark on your mooncake-making journey, you might have a few questions. Here are some common concerns and their answers to help you along the way:
- Can I store mooncakes, and how long do they last?
Yes, you can store mooncakes in an airtight container at room temperature for up to a week. For longer storage, consider refrigerating them, which can extend their freshness for up to two weeks. - What can I use instead of golden syrup?
If you don’t have golden syrup, you can substitute it with light corn syrup or honey. However, keep in mind that the flavor may vary slightly. - Can I make mooncakes without a mold?
Absolutely! If you don’t have a mooncake mold, you can shape the mooncakes by hand. Use a fork to create a decorative pattern on top for a charming touch. - What are some popular fillings for mooncakes?
Traditional fillings include red bean paste and lotus seed paste. However, you can get creative with chocolate, fruit preserves, or even matcha for a unique twist! - How do I know when my mooncakes are done baking?
Your mooncakes are ready when they turn a beautiful golden brown color, usually after 20-25 minutes in the oven. Keep an eye on them to prevent overbaking!
Final Thoughts on This Easy Keto-Friendly Mooncake
As I wrap up this delightful journey into the world of mooncakes, I encourage you to give this easy keto-friendly recipe a try. The joy of creating these beautiful pastries in your own kitchen is truly unmatched. Not only will you savor the delicious flavors, but you’ll also create lasting memories with family and friends.
So, roll up your sleeves, gather your loved ones, and embark on this culinary adventure together. I can’t wait to hear about your mooncake-making experiences! Share your creations and any unique twists you add to the recipe. Let’s celebrate the joy of cooking and the magic of mooncakes together!
Print
Mooncakes that Will Delight Your Taste Buds Today!
- Total Time: 55 minutes
- Yield: 8 mooncakes 1x
- Diet: Vegetarian
Description
Delicious homemade mooncakes that are perfect for any occasion.
Ingredients
- 2 cups all-purpose flour
- 1/2 cup golden syrup
- 1/4 cup vegetable oil
- 1/4 teaspoon alkaline water
- 1/2 cup red bean paste (or lotus seed paste)
- 1/4 cup salted egg yolks (optional, about 2 yolks)
- 1/4 cup chopped nuts (optional)
- 1 egg (for egg wash)
Instructions
- In a mixing bowl, combine the all-purpose flour, golden syrup, vegetable oil, and alkaline water. Mix until a smooth dough forms. Cover the dough with plastic wrap and let it rest for 30 minutes.
- Preheat the oven to 350°F (175°C).
- Divide the dough into 8 equal pieces (about 2 ounces each). Roll each piece into a ball and flatten it into a disc.
- Place about 1 tablespoon of red bean paste in the center of each disc. If using salted egg yolks, place half a yolk on top of the paste, then fold the dough over the filling and pinch to seal. Roll the filled dough back into a ball.
- Lightly dust a mooncake mold with flour. Place the filled dough ball into the mold and press down firmly to shape it. Gently remove the mooncake from the mold and place it on a baking sheet lined with parchment paper.
- Repeat the process with the remaining dough and filling.
- Beat the egg in a small bowl and brush a thin layer over the top of each mooncake.
- Bake in the preheated oven for 20-25 minutes, or until golden brown. Remove from the oven and let cool on a wire rack.
- For the best flavor, allow the mooncakes to rest for at least 24 hours before serving. This helps the flavors to meld.
Notes
- For a different flavor, try using matcha powder in the dough or incorporate different fillings such as chocolate or fruit preserves.
- If you don’t have a mooncake mold, you can shape the mooncakes by hand and use a fork to create a decorative pattern on top.
- Prep Time: 30 minutes
- Cook Time: 25 minutes
- Category: Dessert
- Method: Baking
- Cuisine: Chinese
Nutrition
- Serving Size: 1 mooncake
- Calories: 250
- Sugar: 0g
- Sodium: 0mg
- Fat: 10g
- Saturated Fat: 0g
- Unsaturated Fat: 0g
- Trans Fat: 0g
- Carbohydrates: 35g
- Fiber: 0g
- Protein: 5g
- Cholesterol: 0mg


