





How to Make the Perfect Mochi Ice Cream
Making mochi ice cream at home is a delightful experience that combines creativity with a touch of culinary magic. I love how this recipe transforms simple ingredients into a chewy, creamy treat that’s perfect for any occasion. Let’s dive into the step-by-step process, ensuring you can whip up this delicious dessert even on your busiest days!
Step 1 – Prep Your Ingredients Quickly
Before you start, gather all your ingredients. Having everything ready makes the process smoother and more enjoyable. Trust me, when you’re in the kitchen, the last thing you want is to be scrambling for that elusive bag of sweet rice flour!
Step 2 – Begin Cooking
In a medium bowl, combine the sweet rice flour, water, and granulated sugar. Whisk until the mixture is smooth and free of lumps. This is where the magic begins! Transfer the mixture to a microwave-safe bowl, cover it with plastic wrap, and leave a small vent for steam to escape. Microwave on high for 1 minute, then stir. You’ll notice the mixture starting to thicken, which is a good sign!
Step 3 – Combine Ingredients and Cook
After stirring, microwave for another minute. Stir again, and then give it one last 30-second burst in the microwave. The mixture should be thick and sticky, resembling a soft dough. Remove it from the microwave and stir in the vanilla extract. The aroma will be heavenly! Let it cool for about 10 minutes, allowing it to set just enough to handle.
Step 4 – Final Touches & Serving Suggestions
Dust a clean surface with cornstarch or potato starch to prevent sticking. Turn the mochi mixture out onto the surface and dust the top with more starch. Roll it out to about 1/4 inch thick, and use a cookie cutter or glass to cut out circles. Place a scoop of softened ice cream in the center of each circle, fold the edges over, and pinch to seal. The finished mochi ice cream balls should look like little pouches of joy! Place them on a parchment-lined plate and freeze for at least 2 hours to firm up. Enjoy your homemade treat!
Introduction to Mochi Ice Cream
As a busy home cook, I know how challenging it can be to find time for delicious treats that fit into a health-conscious lifestyle. That’s where mochi ice cream comes in! This delightful dessert combines the chewy texture of mochi with your favorite ice cream flavors, making it a perfect indulgence for any occasion. Plus, it’s easy to customize, allowing you to create a keto-friendly version that satisfies your sweet tooth without the guilt. Let’s explore how to make this delightful treat that’s sure to impress your family and friends!
Why You’ll Love This Delicious Low-Carb Dessert
If you’re like me, juggling a busy schedule while trying to maintain a healthy lifestyle can feel overwhelming. That’s why I adore mochi ice cream! This delightful dessert is not only a treat for the taste buds but also a convenient option for those of us who crave something sweet without the guilt.
The beauty of mochi ice cream lies in its simplicity. With just a few ingredients, you can create a dessert that’s both chewy and creamy, offering a unique texture that’s hard to resist. Imagine biting into a soft, pillowy layer of mochi, only to discover a burst of your favorite ice cream flavor inside. It’s a delightful surprise that never fails to bring a smile to my face!
Moreover, this homemade treat is incredibly versatile. You can easily customize it to suit your dietary preferences, making it a fantastic option for anyone following a low-carb or keto lifestyle. Whether you prefer classic vanilla, rich chocolate, or fruity sorbet, the possibilities are endless. Plus, making it at home means you can control the ingredients, ensuring that every bite is as wholesome as it is delicious.
In a world where convenience often trumps quality, mochi ice cream stands out as a quick and satisfying dessert that doesn’t compromise on taste. It’s perfect for those late-night cravings or as a sweet ending to a busy day. Trust me, once you try making this delightful treat, you’ll wonder how you ever lived without it!
Ingredients You’ll Need for This Recipe
Gathering the right ingredients is essential for creating the perfect mochi ice cream. Here’s what you’ll need:
- 2 cups sweet rice flour (mochi flour) – This is the star of the show! It gives mochi its signature chewy texture.
- 1 cup water – Essential for mixing with the flour to create that sticky dough.
- 1/4 cup granulated sugar – Adds just the right amount of sweetness to balance the flavors.
- 1/2 teaspoon vanilla extract – A splash of vanilla enhances the overall taste, making it even more delightful.
- 1 pint ice cream (your choice of flavor, softened) – This is where you can get creative! Choose your favorite flavor to fill the mochi.
- Cornstarch or potato starch for dusting – Prevents the mochi from sticking to surfaces and helps with handling.
For those looking to mix things up, consider these optional ingredients:
- Sorbet – For a fruity twist, swap out ice cream for sorbet, perfect for a refreshing treat.
- Matcha powder – Adding a bit of matcha to the mochi dough can give it a unique flavor and a beautiful green hue.
With these ingredients on hand, you’re all set to create a delicious batch of mochi ice cream that’s sure to impress!
Printable Measurements:
- 2 cups sweet rice flour
- 1 cup water
- 1/4 cup granulated sugar
- 1/2 teaspoon vanilla extract
- 1 pint ice cream (softened)
- Cornstarch or potato starch for dusting
How to Make the Perfect Mochi Ice Cream
Making mochi ice cream at home is a delightful experience that combines creativity with a touch of culinary magic. I love how this recipe transforms simple ingredients into a chewy, creamy treat that’s perfect for any occasion. Let’s dive into the step-by-step process, ensuring you can whip up this delicious dessert even on your busiest days!
Step 1 – Prep Your Ingredients Quickly
Before you start, gather all your ingredients. Having everything ready makes the process smoother and more enjoyable. Trust me, when you’re in the kitchen, the last thing you want is to be scrambling for that elusive bag of sweet rice flour!
Step 2 – Begin Cooking
In a medium bowl, combine the sweet rice flour, water, and granulated sugar. Whisk until the mixture is smooth and free of lumps. This is where the magic begins! Transfer the mixture to a microwave-safe bowl, cover it with plastic wrap, and leave a small vent for steam to escape. Microwave on high for 1 minute, then stir. You’ll notice the mixture starting to thicken, which is a good sign!
Step 3 – Combine Ingredients and Cook
After stirring, microwave for another minute. Stir again, and then give it one last 30-second burst in the microwave. The mixture should be thick and sticky, resembling a soft dough. Remove it from the microwave and stir in the vanilla extract. The aroma will be heavenly! Let it cool for about 10 minutes, allowing it to set just enough to handle.
Step 4 – Final Touches & Serving Suggestions
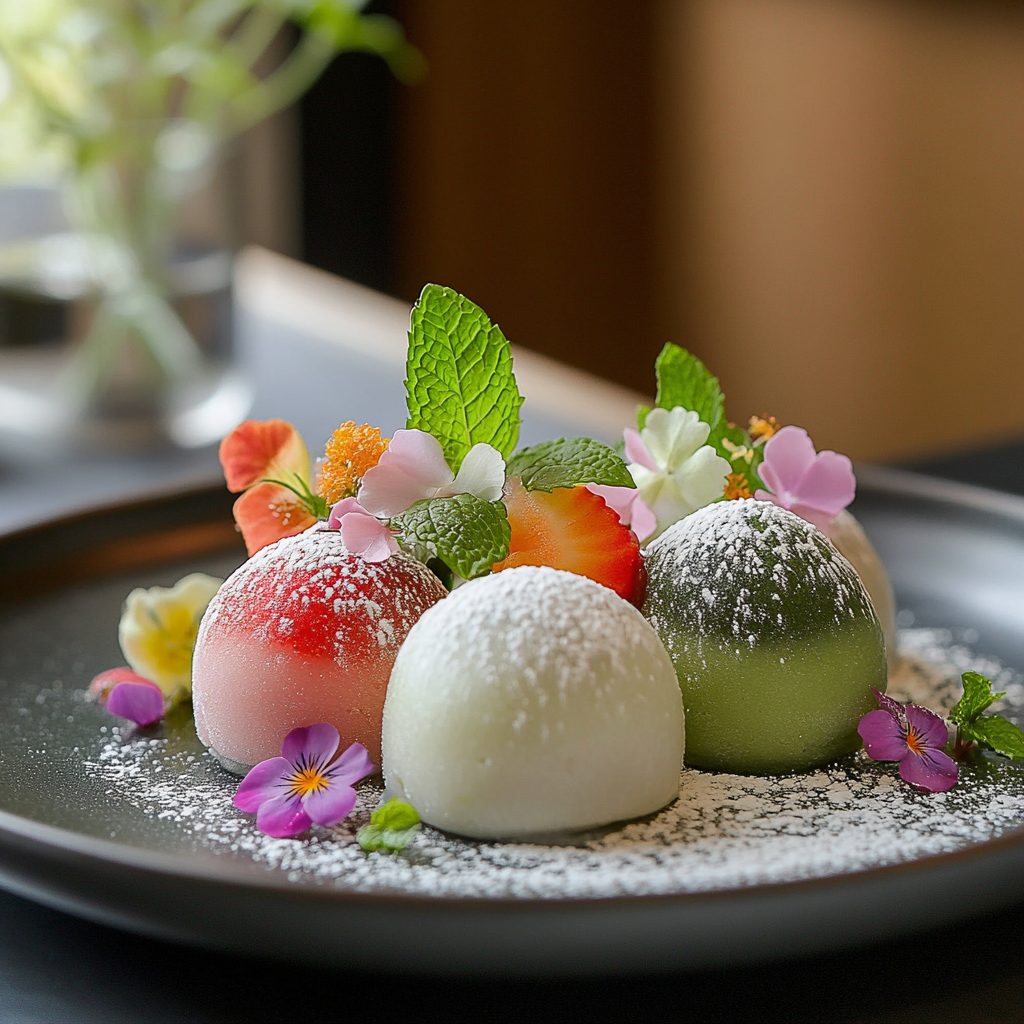
Dust a clean surface with cornstarch or potato starch to prevent sticking. Turn the mochi mixture out onto the surface and dust the top with more starch. Roll it out to about 1/4 inch thick, and use a cookie cutter or glass to cut out circles. Place a scoop of softened ice cream in the center of each circle, fold the edges over, and pinch to seal. The finished mochi ice cream balls should look like little pouches of joy! Place them on a parchment-lined plate and freeze for at least 2 hours to firm up. Enjoy your homemade treat!
Expert Tips to Ensure Mochi Ice Cream Success
- Use the Right Flour: Make sure to use sweet rice flour (mochi flour) for that authentic chewy texture. Regular rice flour won’t give you the same results!
- Don’t Rush the Cooling: Allow the mochi mixture to cool adequately before handling. This prevents burns and makes it easier to shape.
- Keep It Dusty: Generously dust your work surface and the mochi with cornstarch or potato starch. This prevents sticking and makes the process much smoother.
- Experiment with Flavors: Don’t hesitate to mix in flavors like matcha or cocoa powder into the mochi dough for a fun twist!
- Work Quickly: Once the mochi is rolled out, work quickly to fill and seal the ice cream. The dough can become sticky if it sits too long.
- Seal Well: Ensure the edges of the mochi are pinched tightly to prevent the ice cream from leaking out during freezing.
- Freeze Properly: After shaping, freeze the mochi ice cream balls on a parchment-lined plate to keep them from sticking together.
- Serve with Style: For a beautiful presentation, dust the finished mochi ice cream with a little extra cornstarch before serving.
Essential Kitchen Tools for This Mochi Dessert
- Microwave-safe Bowl: A sturdy bowl for mixing and microwaving the mochi mixture. Alternatively, you can use a glass bowl.
- Whisk: A simple whisk to combine the ingredients smoothly. A fork can also work in a pinch!
- Plastic Wrap: To cover the bowl while microwaving, ensuring steam escapes. You can use a microwave-safe lid if you have one.
- Rolling Pin: For rolling out the mochi dough evenly. If you don’t have one, a clean wine bottle can serve as a great substitute.
- Cookie Cutter or Glass: To cut out perfect circles of mochi. Any round object with a smooth edge will do!
- Parchment Paper: To line your plate for freezing the mochi ice cream balls, preventing them from sticking.
- Spatula: A silicone spatula is ideal for transferring the mochi mixture and scooping out the ice cream.
Delicious Variations to Customize Your Homemade Treat
One of the best things about making mochi ice cream at home is the endless possibilities for customization! Here are some delightful variations to consider, ensuring that every batch is uniquely yours:
- Fruity Sorbet: Swap out traditional ice cream for your favorite sorbet. Mango, raspberry, or lemon sorbet can add a refreshing twist, perfect for hot summer days.
- Matcha Madness: Incorporate matcha powder into the mochi dough for a vibrant green color and a subtle earthy flavor. It pairs beautifully with vanilla or coconut ice cream.
- Chocolate Lovers: Mix cocoa powder into the mochi dough for a rich chocolate flavor. Pair it with mint chocolate chip ice cream for a decadent treat!
- Nutty Delight: Add finely chopped nuts, like almonds or pistachios, into the mochi mixture for a delightful crunch. This adds texture and a nutty flavor that complements the creaminess of the ice cream.
- Spiced Up: Experiment with spices like cinnamon or cardamom in the mochi dough for a warm, aromatic flavor. This works wonderfully with vanilla or chai-flavored ice cream.
- Fruit Fillings: Instead of ice cream, try filling the mochi with fresh fruit or fruit puree. Strawberries, blueberries, or even a dollop of yogurt can create a lighter, refreshing dessert.
- Vegan Option: For a vegan-friendly version, use coconut milk ice cream or any plant-based ice cream. The mochi dough remains the same, ensuring a delicious treat for everyone!
With these variations, you can easily tailor your mochi ice cream to suit your taste preferences and dietary needs. The only limit is your imagination, so have fun experimenting!
Best Sides & Beverage Pairings for Mochi Ice Cream
To elevate your mochi ice cream experience, consider pairing it with these delightful sides and beverages. Each option complements the chewy, creamy texture of the mochi, making for a well-rounded dessert experience:
- Fresh Fruit: Slices of strawberries, mangoes, or kiwi add a refreshing contrast to the rich ice cream.
- Matcha Tea: A warm cup of matcha tea enhances the flavors of the mochi and provides a soothing balance.
- Chocolate Sauce: Drizzle some warm chocolate sauce over your mochi ice cream for an indulgent touch.
- Coconut Flakes: Toasted coconut flakes sprinkled on top add a delightful crunch and tropical flavor.
- Green Tea: A chilled glass of green tea pairs beautifully, offering a light and refreshing complement.
- Almond Cookies: Serve with crispy almond cookies for a delightful textural contrast and nutty flavor.
- Fruit Sorbet: A scoop of fruit sorbet on the side can enhance the fruity flavors of your mochi ice cream.
These pairings not only enhance the overall experience but also allow you to explore new flavor combinations. Enjoy your mochi ice cream with these delightful accompaniments for a truly memorable treat!
FAQs About Making Mochi Ice Cream at Home
- Can I use regular rice flour instead of sweet rice flour for mochi ice cream?
No, sweet rice flour (mochi flour) is essential for achieving the chewy texture of mochi ice cream. Regular rice flour won’t provide the same results. - How long can I store homemade mochi ice cream?
You can store mochi ice cream in the freezer for up to 2 weeks. Just make sure to keep it in an airtight container to prevent freezer burn. - What ice cream flavors work best for mochi ice cream?
The beauty of mochi ice cream is its versatility! Classic flavors like vanilla, chocolate, and strawberry work wonderfully, but feel free to experiment with unique flavors like green tea or mango. - Can I make mochi ice cream dairy-free?
Absolutely! Simply use a dairy-free ice cream or sorbet as your filling. The mochi dough remains the same, making it a great option for those with dietary restrictions. - Is mochi ice cream suitable for a keto diet?
While traditional mochi ice cream contains sugar, you can easily adapt the recipe by using a sugar substitute in the dough and choosing low-carb ice cream options to make it keto-friendly.
Final Thoughts on This Easy Keto-Friendly Mochi Ice Cream
Creating your own mochi ice cream at home is not just a fun culinary adventure; it’s a chance to indulge in a delightful treat that fits your health-conscious lifestyle. I love how this recipe allows for creativity while keeping things simple and satisfying. Whether you’re enjoying it after a long day or sharing it with loved ones, each bite is a reminder that healthy eating can be delicious and enjoyable. So, roll up your sleeves, gather your ingredients, and dive into making this keto-friendly delight. Trust me, once you take that first bite, you’ll be hooked!
Print
Mochi Ice Cream: Discover This Easy Homemade Treat!
- Total Time: 2 hours 23 minutes
- Yield: 6 servings 1x
- Diet: Vegetarian
Description
Mochi Ice Cream is a delightful homemade treat that combines the chewy texture of mochi with your favorite ice cream flavors.
Ingredients
- 2 cups sweet rice flour (mochi flour)
- 1 cup water
- 1/4 cup granulated sugar
- 1/2 teaspoon vanilla extract
- 1 pint ice cream (your choice of flavor, softened)
- Cornstarch or potato starch for dusting
Instructions
- In a medium bowl, combine the sweet rice flour, water, and granulated sugar. Whisk until smooth.
- Transfer the mixture to a microwave-safe bowl and cover with plastic wrap, leaving a small vent.
- Microwave on high for 1 minute. Stir, then microwave for another minute.
- Stir again, then microwave for an additional 30 seconds until the mixture is thick and sticky.
- Remove from the microwave and stir in the vanilla extract. Let it cool for about 10 minutes.
- Dust a clean surface with cornstarch or potato starch. Turn the mochi mixture out onto the surface and dust the top with more starch.
- Roll it out to about 1/4 inch thick.
- Cut the mochi into circles using a cookie cutter or a glass, about 3 inches in diameter.
- Scoop small balls of softened ice cream and place them in the center of each mochi circle.
- Fold the edges of the mochi over the ice cream and pinch to seal.
- Place the finished mochi ice cream balls on a plate lined with parchment paper and freeze for at least 2 hours to firm up.
Notes
- For a fruity twist, try using sorbet instead of ice cream.
- You can also mix in some matcha powder into the mochi dough for a unique flavor.
- Prep Time: 20 minutes
- Cook Time: 3 minutes
- Category: Dessert
- Method: Microwave
- Cuisine: Japanese
Nutrition
- Serving Size: 1 mochi ice cream ball
- Calories: 150
- Sugar: 10g
- Sodium: 50mg
- Fat: 5g
- Saturated Fat: 3g
- Unsaturated Fat: 2g
- Trans Fat: 0g
- Carbohydrates: 25g
- Fiber: 0g
- Protein: 2g
- Cholesterol: 10mg


