





How to Make the Perfect Dorayaki
Making Dorayaki is a delightful experience that brings the flavors of Japan right into your kitchen. I love how simple yet rewarding this recipe is, especially when you’re short on time but still want to impress. Let’s dive into the step-by-step process of creating these fluffy pancake sandwiches!
Step 1 – Prep Your Ingredients Quickly
Before you start cooking, it’s essential to have everything ready. Measure out your ingredients and have them within reach. This not only speeds up the cooking process but also ensures you won’t forget anything. Trust me, there’s nothing worse than realizing you’ve missed an ingredient halfway through!
Step 2 – Begin Cooking
In a mixing bowl, whisk together the all-purpose flour, granulated sugar, baking powder, baking soda, and salt. In another bowl, beat the eggs, then add the milk, honey, and vanilla extract. Mix well until combined. Gradually pour the wet ingredients into the dry ingredients, stirring gently until just combined. Let the batter rest for about 10 minutes. This resting time is crucial for achieving that fluffy texture we all love!
Step 3 – Combine Ingredients and Cook
Now, it’s time to heat your non-stick skillet over medium-low heat. Lightly grease it with butter or oil. Pour about 1/4 cup of batter onto the skillet for each pancake. Watch as bubbles form on the surface—this is your cue to flip! Cook for another 1-2 minutes until golden brown. The aroma wafting through your kitchen will be irresistible!
Step 4 – Final Touches & Serving Suggestions
To assemble your Dorayaki, spread a generous amount of sweet red bean paste on one pancake, then top it with another pancake to create a delightful sandwich. Serve them warm for the best experience. I love to enjoy mine with a cup of green tea, making it a perfect afternoon treat!
Introduction to Dorayaki
Dorayaki is a beloved Japanese treat that has captured the hearts of many with its fluffy texture and sweet filling. Imagine biting into two soft, pancake-like cakes, gently hugging a luscious layer of sweet red bean paste. It’s a delightful experience that feels like a warm hug on a plate!
As a busy home cook, I understand the struggle of finding time to whip up something special. That’s why making Dorayaki at home is such a fantastic option. In just under 30 minutes, you can create these delightful pancake sandwiches that are not only satisfying but also customizable to suit your taste. Whether you’re craving something sweet or looking to impress guests, Dorayaki is the perfect solution for health-conscious adults seeking quick yet delicious recipes.
Why You’ll Love This Delicious Low-Carb Dorayaki Recipe
One of the best things about making Dorayaki is the sheer convenience. In under 30 minutes, you can whip up a batch of these fluffy pancake sandwiches. As someone who juggles a busy schedule, I appreciate recipes that don’t demand hours in the kitchen. With Dorayaki, you can satisfy your sweet tooth without sacrificing precious time!
Another reason to love this recipe is its versatility. The fillings are where you can truly get creative! While traditional sweet red bean paste is a classic choice, you can easily swap it out for Nutella, whipped cream, or even fresh fruit. This adaptability makes Dorayaki suitable for various taste preferences, whether you’re catering to kids or indulging in a personal craving.
Finally, the balance of flavors and textures in Dorayaki is simply irresistible. The soft, fluffy pancakes provide a delightful contrast to the sweet, creamy filling. Each bite is a harmonious blend of sweetness and texture that leaves you wanting more. It’s no wonder that Dorayaki has become a crowd-pleaser, perfect for gatherings or a cozy afternoon treat!
Ingredients You’ll Need for This Recipe
To create the perfect Dorayaki, you’ll need a few essential ingredients that come together to form these delightful pancake sandwiches. Here’s what you’ll need:
- All-purpose flour: This provides the base for the pancakes, giving them that soft and fluffy texture we all love.
- Granulated sugar: Adds just the right amount of sweetness to the batter, making each bite a treat.
- Baking powder & baking soda: These leavening agents work together to ensure your pancakes rise beautifully and achieve that fluffy consistency.
- Salt: A pinch of salt enhances the overall flavor, balancing the sweetness perfectly.
- Eggs: They bind the ingredients together and add richness to the batter, contributing to the overall texture.
- Milk: This ingredient contributes moisture to the batter, ensuring your pancakes are tender and delicious.
- Honey: A natural sweetener that adds a touch of flavor and helps keep the pancakes moist.
- Vanilla extract: This aromatic addition elevates the flavor profile, making your Dorayaki even more delightful.
- Sweet red bean paste: The traditional filling that gives Dorayaki its signature taste; feel free to swap it for Nutella or fresh fruit for a fun twist!
- Butter or oil: Used for cooking, ensuring your pancakes don’t stick to the skillet and achieve that perfect golden-brown color.
Don’t worry; I’ll provide exact measurements for each ingredient at the end of the recipe for your convenience!
How to Make the Perfect Dorayaki
Making Dorayaki is a delightful experience that brings the flavors of Japan right into your kitchen. I love how simple yet rewarding this recipe is, especially when you’re short on time but still want to impress. Let’s dive into the step-by-step process of creating these fluffy pancake sandwiches!
Step 1 – Prep Your Ingredients Quickly
Before you start cooking, it’s essential to have everything ready. Measure out your ingredients and have them within reach. This not only speeds up the cooking process but also ensures you won’t forget anything. Trust me, there’s nothing worse than realizing you’ve missed an ingredient halfway through!
Step 2 – Begin Cooking
In a mixing bowl, whisk together the all-purpose flour, granulated sugar, baking powder, baking soda, and salt. In another bowl, beat the eggs, then add the milk, honey, and vanilla extract. Mix well until combined. Gradually pour the wet ingredients into the dry ingredients, stirring gently until just combined. Let the batter rest for about 10 minutes. This resting time is crucial for achieving that fluffy texture we all love!
Step 3 – Combine Ingredients and Cook
Now, it’s time to heat your non-stick skillet over medium-low heat. Lightly grease it with butter or oil. Pour about 1/4 cup of batter onto the skillet for each pancake. Watch as bubbles form on the surface—this is your cue to flip! Cook for another 1-2 minutes until golden brown. The aroma wafting through your kitchen will be irresistible!
Step 4 – Final Touches & Serving Suggestions
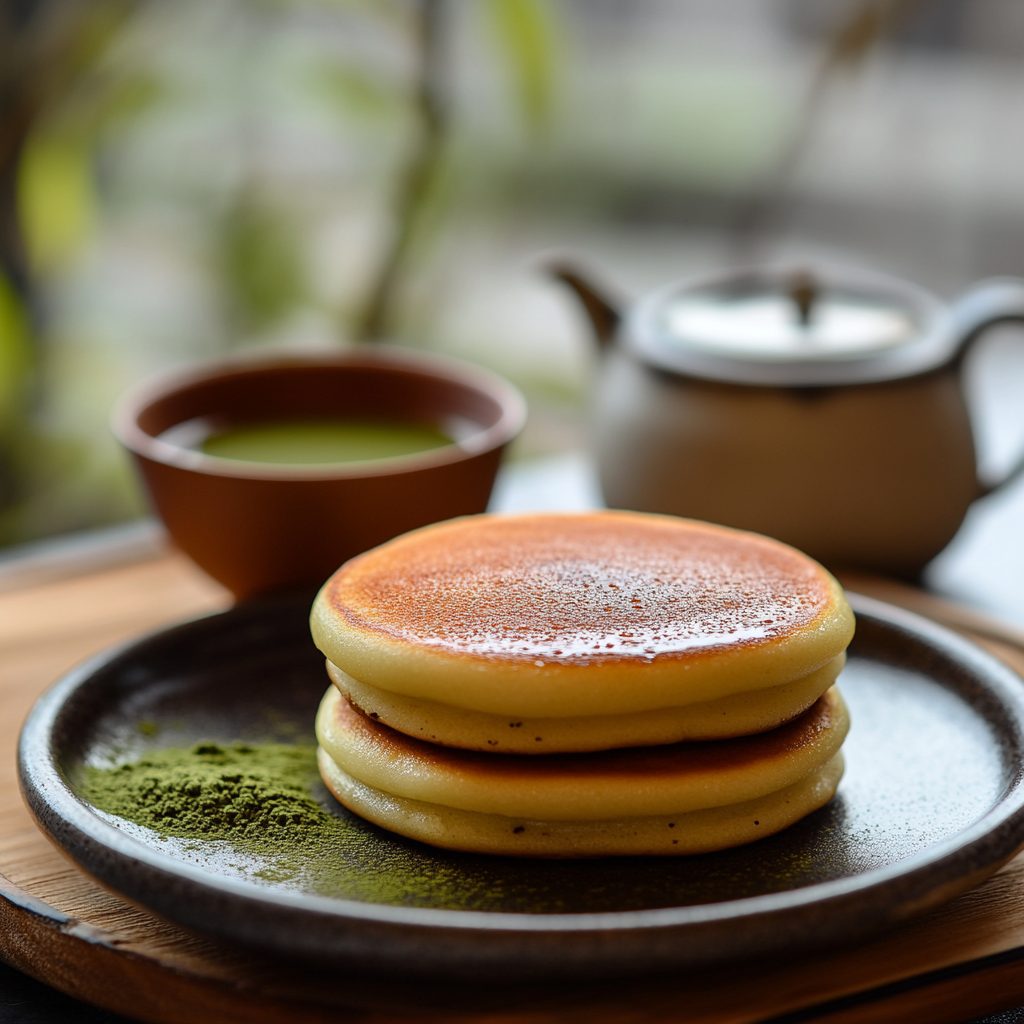
To assemble your Dorayaki, spread a generous amount of sweet red bean paste on one pancake, then top it with another pancake to create a delightful sandwich. Serve them warm for the best experience. I love to enjoy mine with a cup of green tea, making it a perfect afternoon treat!
Expert Tips to Ensure Keto Cooking Success
Creating the perfect Dorayaki is all about the little details. Here are some expert tips that I’ve gathered from my own kitchen adventures to help you achieve the best results:
- Use a non-stick skillet: This is essential for easy flipping. A non-stick surface ensures that your pancakes slide right off without tearing, giving you that beautiful, fluffy finish.
- Experiment with different fillings: While sweet red bean paste is traditional, don’t hesitate to get creative! Try Nutella, whipped cream, or even fresh fruit. Each filling brings a unique flavor that can transform your Dorayaki experience.
- Adjust cooking time based on stove heat: Every stove is different, so keep an eye on your pancakes as they cook. If they’re browning too quickly, lower the heat. Perfectly cooked Dorayaki should be golden brown and fluffy, not burnt!
By following these tips, you’ll be well on your way to mastering the art of making Dorayaki. Enjoy the process, and don’t forget to share your delicious creations with friends and family!
Essential Kitchen Tools for This Keto Recipe
To make your Dorayaki experience as smooth as possible, having the right kitchen tools is essential. Here’s a list of the necessary tools you’ll need:
- Mixing bowls: A set of various sizes will help you easily combine your ingredients.
- Whisk: Perfect for mixing the batter until smooth and fluffy.
- Non-stick skillet or griddle: This is crucial for cooking your pancakes without sticking. If you don’t have a non-stick option, a well-seasoned cast-iron skillet can work too!
- Measuring cups and spoons: Accurate measurements are key to achieving the perfect batter consistency.
- Spatula: A flexible spatula is ideal for flipping your pancakes without damaging them.
Having these tools on hand will make your cooking process efficient and enjoyable. Happy cooking!
Delicious Variations to Customize Your Keto Dish
One of the best things about Dorayaki is its versatility. You can easily adapt this delightful recipe to suit various dietary needs and flavor preferences. Here are some delicious variations to consider:
- Use almond flour: For a gluten-free option, substitute all-purpose flour with almond flour. This not only makes your Dorayaki gluten-free but also adds a nutty flavor that pairs beautifully with sweet fillings.
- Incorporate matcha powder: If you’re looking for a unique twist, try adding a tablespoon of matcha powder to your batter. This will give your pancakes a vibrant green color and a subtle earthy flavor that’s simply delightful!
- Offer savory filling options: For those who prefer a savory take, consider fillings like cream cheese, avocado, or even a spicy tuna mix. These savory variations can turn your Dorayaki into a satisfying meal rather than just a dessert.
These variations not only cater to different dietary preferences but also keep your Dorayaki experience exciting and fresh. Don’t hesitate to experiment and find your favorite combination!
Best Keto-Friendly Sides & Beverage Pairings
When enjoying your homemade Dorayaki, pairing them with the right sides and beverages can elevate your experience to a whole new level. Here are some easy, keto-friendly options that complement the fluffy pancakes beautifully:
- Fresh berries or a fruit salad: A handful of fresh berries, like strawberries or blueberries, adds a burst of flavor and a pop of color to your plate. Their natural sweetness pairs perfectly with the rich filling of the Dorayaki.
- Green tea or matcha latte: Sipping on a warm cup of green tea or a creamy matcha latte enhances the overall experience. The earthy notes of green tea balance the sweetness of the pancakes, making for a refreshing combination.
- Whipped cream or yogurt for dipping: For an extra indulgent touch, serve your Dorayaki with a side of whipped cream or a dollop of Greek yogurt. This adds a creamy texture that complements the fluffy pancakes and sweet filling.
These sides and beverages not only enhance the flavors of your Dorayaki but also keep your meal light and satisfying. Enjoy experimenting with these pairings to find your perfect match!
FAQs About Making Dorayaki at Home
As you embark on your Dorayaki-making journey, you might have a few questions. Here are some common queries I’ve encountered, along with concise answers to help you out:
- Can I make Dorayaki ahead of time? Absolutely! You can prepare the batter in advance and store it in the refrigerator for up to 24 hours. Just give it a gentle stir before cooking. If you’ve already cooked the pancakes, they can be stored in an airtight container in the fridge for up to three days. Just reheat them on a skillet or in the microwave before serving.
- What can I use instead of red bean paste? If red bean paste isn’t your thing, don’t worry! You can substitute it with a variety of fillings. Nutella, whipped cream, fresh fruit, or even a savory filling like cream cheese or avocado work wonderfully. The possibilities are endless!
- How do I store leftover Dorayaki? To keep your leftover Dorayaki fresh, place them in an airtight container. You can store them in the refrigerator for up to three days. For longer storage, consider freezing them. Just make sure to separate each pancake with parchment paper to prevent sticking. When you’re ready to enjoy them, simply thaw and reheat!
These FAQs should help you navigate any concerns you might have while making your delicious Dorayaki. Enjoy the process and happy cooking!
Final Thoughts on This Easy Keto-Friendly Dorayaki
As I wrap up this delightful journey into the world of Dorayaki, I can’t help but reflect on the joy these fluffy pancake sandwiches bring. There’s something truly special about creating a dish that not only satisfies your sweet tooth but also allows for creativity in the kitchen. Making Dorayaki is more than just cooking; it’s about sharing moments with loved ones, whether it’s a cozy afternoon treat or a fun dessert for a gathering.
I encourage you to try this recipe and experience the magic of Dorayaki for yourself. Don’t hesitate to experiment with different fillings and flavors that resonate with your taste buds. The beauty of this dish lies in its versatility, making it a canvas for your culinary creativity.
Once you’ve made your Dorayaki, I’d love to hear about your experiences! Share your creations, variations, and any tips you discover along the way. Together, we can foster a sense of community around this delightful dish, celebrating the joy of cooking and the pleasure of sharing delicious food. Happy cooking!
Print
Dorayaki: Discover the Ultimate Fluffy Pancake Recipe!
- Total Time: 25 minutes
- Yield: 4 servings 1x
- Diet: Vegetarian
Description
Fluffy Japanese pancake sandwiches filled with sweet red bean paste.
Ingredients
- 1 cup all-purpose flour
- 1/2 cup granulated sugar
- 1 teaspoon baking powder
- 1/2 teaspoon baking soda
- 1/4 teaspoon salt
- 2 large eggs
- 1/2 cup milk
- 1 tablespoon honey
- 1 teaspoon vanilla extract
- 1 cup sweet red bean paste (or any filling of your choice)
- Butter or oil for cooking
Instructions
- In a mixing bowl, whisk together the flour, sugar, baking powder, baking soda, and salt.
- In another bowl, beat the eggs, then add the milk, honey, and vanilla extract, mixing well.
- Gradually combine the wet ingredients with the dry ingredients, stirring until just combined. Let the batter rest for about 10 minutes.
- Heat a non-stick skillet or griddle over medium-low heat and lightly grease it with butter or oil.
- Pour about 1/4 cup of batter onto the skillet for each pancake. Cook until bubbles form on the surface, about 2-3 minutes, then flip and cook for another 1-2 minutes until golden brown. Repeat with the remaining batter.
- To assemble, spread a generous amount of sweet red bean paste on one pancake, then top with another pancake to create a sandwich. Serve warm.
Notes
- For a fluffier texture, separate the egg whites and yolks, beat the whites until stiff peaks form, and fold them into the batter before cooking.
- You can substitute the sweet red bean paste with Nutella, whipped cream, or fresh fruit for a different flavor.
- Prep Time: 10 minutes
- Cook Time: 15 minutes
- Category: Dessert
- Method: Griddle
- Cuisine: Japanese
Nutrition
- Serving Size: 1 pancake sandwich
- Calories: 250
- Sugar: 15g
- Sodium: 200mg
- Fat: 8g
- Saturated Fat: 3g
- Unsaturated Fat: 5g
- Trans Fat: 0g
- Carbohydrates: 35g
- Fiber: 1g
- Protein: 6g
- Cholesterol: 70mg


