How to Make the Perfect Fried Ice Cream
Making Fried Ice Cream – Mexico is a delightful adventure that combines the joy of cooking with the thrill of indulging in a crispy, creamy treat. I promise, this recipe is not only easy but also incredibly rewarding. Let’s dive into the steps to create this mouthwatering dessert!
Step 1 – Prep Your Ingredients Quickly
First things first, you’ll want to scoop out 2 cups of vanilla ice cream into four equal balls, about 1/2 cup each. Place these on a baking sheet lined with parchment paper. This step is crucial because it allows the ice cream to freeze solid, ensuring it holds its shape during frying. Pop them in the freezer for at least 2 hours. Trust me, the wait is worth it!
Step 2 – Begin Cooking
While your ice cream is firming up, it’s time to prepare the coating. In a shallow bowl, combine 1 cup of crushed cornflakes with 1 teaspoon of ground cinnamon. This mixture will give your Fried Ice Cream its signature crunch and flavor. In another bowl, whisk together 1/2 cup of all-purpose flour, 1 large egg, and 1 cup of milk until smooth. This batter will help the cornflake coating stick beautifully to the ice cream.
Step 3 – Combine Ingredients and Cook
Once your ice cream balls are frozen solid, it’s time to coat them. Dip each ball into the flour mixture first, ensuring it’s fully covered. Then, roll it in the cornflake mixture, pressing gently to coat evenly. This double-dipping technique is key to achieving that perfect crispy exterior. After coating, return the ice cream balls to the freezer for an additional 30 minutes. This extra chill will make frying a breeze!
Step 4 – Final Touches & Serving Suggestions
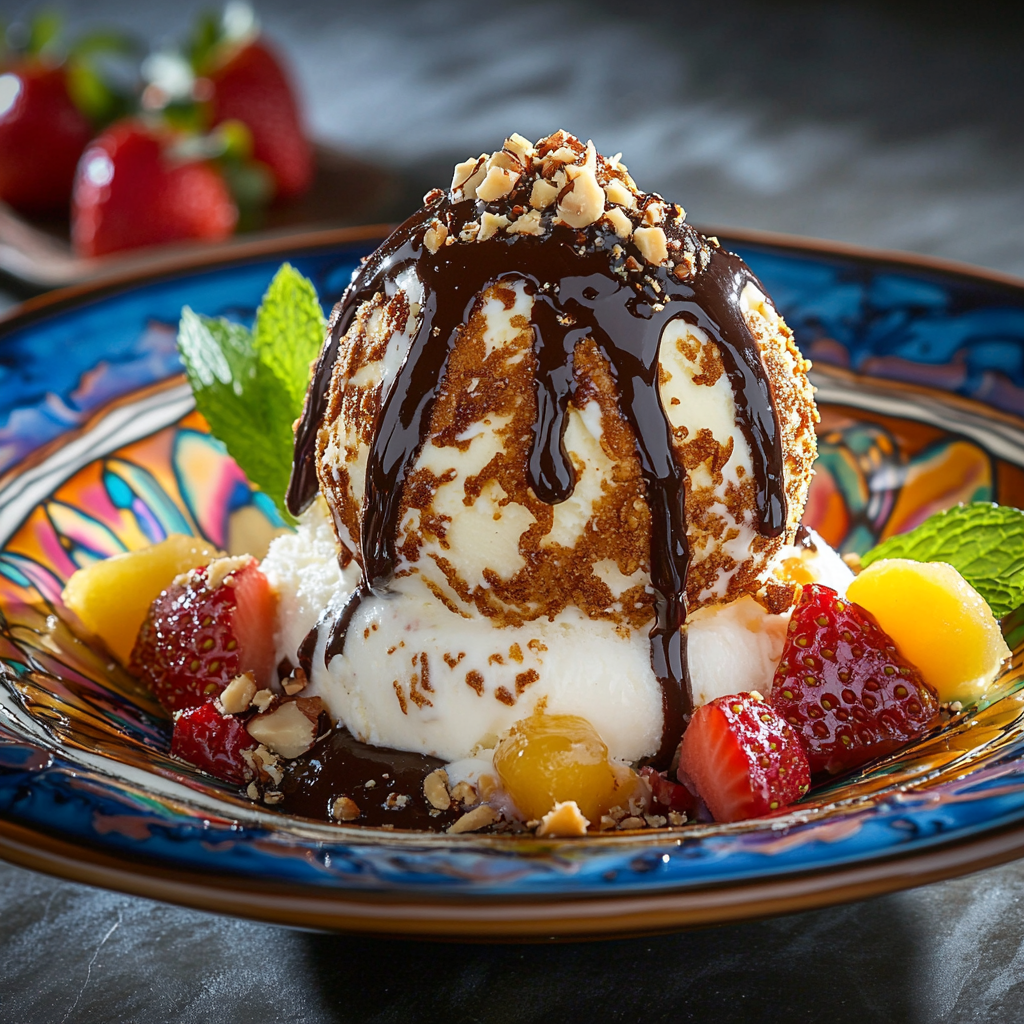
Now for the fun part! In a deep skillet or frying pan, heat about 2 inches of vegetable oil over medium-high heat until it reaches 350°F. Carefully place one or two ice cream balls in the hot oil and fry for about 10-15 seconds until they turn golden brown. Use a slotted spoon to remove them and let them drain on paper towels. Serve immediately, drizzled with chocolate syrup, topped with whipped cream, and garnished with a cherry. The contrast of hot and cold is simply divine!
Introduction to Fried Ice Cream – Mexico
Fried Ice Cream – Mexico is a beloved dessert that brings a delightful twist to traditional ice cream. Imagine the creamy, rich flavor of vanilla ice cream encased in a crispy, golden shell. It’s a treat that tantalizes your taste buds and leaves you craving more!
This dessert is not just about taste; it’s about the experience. The moment you take a bite, the contrast between the hot, crunchy exterior and the cold, smooth ice cream inside creates a symphony of textures that dance on your palate. It’s a culinary adventure that feels indulgent yet surprisingly simple to make.
As a busy home cook, I understand the challenges of juggling a hectic schedule while still wanting to impress family and friends with delicious treats. That’s where Fried Ice Cream comes in! This dessert can be prepared ahead of time, allowing you to serve it up quickly when the moment calls for something special. Whether it’s a weeknight treat or a festive gathering, this dessert is sure to wow your guests without keeping you in the kitchen for hours.
Why You’ll Love This Delicious Low-Carb Fried Ice Cream Recipe
One of the best things about making Fried Ice Cream – Mexico at home is the sheer convenience it offers. With just a few simple steps, you can whip up this delightful dessert that feels like a special treat. No need to wait in long lines at a restaurant or worry about whether it will be as good as you remember. You have complete control over the ingredients and the process, making it a fun and rewarding experience!
The taste of this Fried Ice Cream is nothing short of heavenly. Imagine the creamy vanilla ice cream melting in your mouth, perfectly complemented by the crispy, golden coating. It’s a flavor explosion that appeals to both kids and adults alike. I’ve seen my children’s eyes light up with joy when I serve this dessert, and I can’t help but smile knowing I’ve created a moment of happiness for them.
What I love most about this recipe is its simplicity. Even if you’re a beginner in the kitchen, you’ll find that the steps are straightforward and easy to follow. There’s no need for complicated techniques or fancy equipment. Just gather your ingredients, and you’re ready to go! This accessibility makes it a perfect choice for busy weeknights or spontaneous gatherings with friends.
Ingredients You’ll Need for This Recipe
To create the perfect Fried Ice Cream – Mexico, you’ll need a handful of essential ingredients that come together to make this delightful dessert. Here’s what you’ll need:
- 2 cups vanilla ice cream: The creamy base that provides a rich and smooth texture.
- 1 cup cornflakes, crushed: Adds the crispy coating that gives this dessert its signature crunch.
- 1 teaspoon ground cinnamon: Enhances flavor with a warm, aromatic touch.
- 1/2 cup all-purpose flour: Binds the coating, ensuring it sticks perfectly to the ice cream.
- 1 large egg: Helps the coating adhere and adds a bit of richness.
- 1 cup milk: For the batter, creating a smooth consistency for coating.
- Vegetable oil for frying: Essential for achieving that crispy texture we all love.
- Chocolate syrup (for drizzling): Adds sweetness and a decadent finish.
- Whipped cream (for topping): A classic finish that complements the dessert beautifully.
- Cherries (for garnish): A pop of color and flavor that makes the dish visually appealing.
Don’t worry; I’ll provide exact measurements at the end of the recipe for your convenience. Let’s get ready to indulge in this delicious treat!
How to Make the Perfect Fried Ice Cream
Making Fried Ice Cream – Mexico is a delightful adventure that combines the joy of cooking with the thrill of indulging in a crispy, creamy treat. I promise, this recipe is not only easy but also incredibly rewarding. Let’s dive into the steps to create this mouthwatering dessert!
Step 1 – Prep Your Ingredients Quickly
First things first, you’ll want to scoop out 2 cups of vanilla ice cream into four equal balls, about 1/2 cup each. Place these on a baking sheet lined with parchment paper. This step is crucial because it allows the ice cream to freeze solid, ensuring it holds its shape during frying. Pop them in the freezer for at least 2 hours. Trust me, the wait is worth it!
Step 2 – Begin Cooking
While your ice cream is firming up, it’s time to prepare the coating. In a shallow bowl, combine 1 cup of crushed cornflakes with 1 teaspoon of ground cinnamon. This mixture will give your Fried Ice Cream its signature crunch and flavor. In another bowl, whisk together 1/2 cup of all-purpose flour, 1 large egg, and 1 cup of milk until smooth. This batter will help the cornflake coating stick beautifully to the ice cream.
Step 3 – Combine Ingredients and Cook
Once your ice cream balls are frozen solid, it’s time to coat them. Dip each ball into the flour mixture first, ensuring it’s fully covered. Then, roll it in the cornflake mixture, pressing gently to coat evenly. This double-dipping technique is key to achieving that perfect crispy exterior. After coating, return the ice cream balls to the freezer for an additional 30 minutes. This extra chill will make frying a breeze!
Step 4 – Final Touches & Serving Suggestions
Now for the fun part! In a deep skillet or frying pan, heat about 2 inches of vegetable oil over medium-high heat until it reaches 350°F. Carefully place one or two ice cream balls in the hot oil and fry for about 10-15 seconds until they turn golden brown. Use a slotted spoon to remove them and let them drain on paper towels. Serve immediately, drizzled with chocolate syrup, topped with whipped cream, and garnished with a cherry. The contrast of hot and cold is simply divine!
Expert Tips to Ensure Keto Cooking Success
As a passionate home cook, I’ve learned a few tricks along the way to make my Fried Ice Cream – Mexico turn out perfectly every time. Here are some expert tips to ensure your cooking experience is smooth and successful:
- Use a thermometer to check oil temperature: This is crucial for achieving that golden-brown color and crispy texture. If the oil is too hot, the coating will burn before the ice cream has a chance to fry properly. Aim for a temperature of 350°F for the best results.
- Freeze ice cream balls longer for easier frying: The longer you freeze the ice cream balls, the firmer they will be. This makes them easier to handle and fry without melting too quickly. I recommend freezing them for at least 2 hours, but if you can manage a bit longer, even better!
- Experiment with different ice cream flavors for variety: While vanilla is a classic choice, don’t hesitate to get creative! Chocolate, strawberry, or even coffee-flavored ice cream can add a delightful twist to your Fried Ice Cream. Each flavor brings its own unique taste and can elevate this dessert to new heights.
By following these tips, you’ll not only enhance your cooking skills but also impress your family and friends with your delicious Fried Ice Cream – Mexico. Happy cooking!
Essential Kitchen Tools for This Fried Ice Cream Recipe
To make your Fried Ice Cream – Mexico a success, having the right kitchen tools is essential. Here’s a list of the necessary items you’ll need:
- Deep skillet or frying pan: A deep skillet is ideal for frying, as it allows for even cooking and prevents oil splatter. If you don’t have one, a regular frying pan can work, but be cautious about the oil depth.
- Slotted spoon: This handy tool is perfect for removing the fried ice cream balls from the hot oil. If you don’t have a slotted spoon, a regular spoon can suffice, but be careful to let excess oil drain off.
- Baking sheet: A baking sheet is essential for freezing the ice cream balls before frying. If you don’t have one, a large plate can work in a pinch.
- Parchment paper: Lining your baking sheet with parchment paper prevents the ice cream from sticking. If you’re out of parchment paper, lightly greasing the baking sheet can also do the trick.
- Mixing bowls: You’ll need a couple of mixing bowls for preparing the coating and batter. If you’re short on bowls, any large container can work as long as it’s easy to whisk in.
With these tools in hand, you’ll be well on your way to creating a delicious Fried Ice Cream – Mexico that will impress everyone at your table!
Delicious Variations to Customize Your Fried Ice Cream Dish
One of the best parts about making Fried Ice Cream – Mexico is the opportunity to get creative with flavors and ingredients. Here are some delicious variations to customize your dessert and cater to different tastes and dietary needs:
- Use chocolate or strawberry ice cream: For a delightful twist, swap out the vanilla ice cream for chocolate or strawberry. The rich, creamy chocolate will create a decadent experience, while strawberry adds a fruity freshness that’s simply irresistible.
- Add chopped nuts or shredded coconut: If you’re looking to enhance the texture, consider mixing in some chopped nuts or shredded coconut into the cornflake coating. This extra crunch not only elevates the flavor but also adds a delightful surprise with every bite.
- Consider dairy-free ice cream options: For those who are lactose intolerant or following a dairy-free diet, there are plenty of delicious dairy-free ice cream alternatives available. Coconut, almond, or cashew-based ice creams can provide a creamy base that works beautifully in this recipe.
These variations allow you to tailor your Fried Ice Cream – Mexico to suit your preferences and dietary needs, making it a versatile dessert that everyone can enjoy. So, don’t hesitate to experiment and find your perfect combination!
Best Keto-Friendly Sides & Beverage Pairings
When it comes to enjoying your Fried Ice Cream – Mexico, pairing it with the right sides and beverages can elevate the entire experience. Here are some easy, keto-friendly options that complement this delightful dessert perfectly:
- Fresh fruit salad: A refreshing side of fresh berries, such as strawberries, raspberries, and blackberries, can provide a burst of flavor without adding too many carbs. The natural sweetness of the fruit balances the richness of the Fried Ice Cream, making it a delightful addition to your meal.
- Low-carb chocolate mousse: For those who crave a little extra indulgence, a rich and creamy low-carb chocolate mousse is the perfect pairing. Made with unsweetened cocoa powder, heavy cream, and a keto-friendly sweetener, this dessert will satisfy your chocolate cravings while keeping your carb count low.
- Sparkling water with lime: To keep things light and refreshing, serve your Fried Ice Cream with a glass of sparkling water infused with fresh lime juice. This bubbly beverage cleanses the palate and adds a zesty twist that complements the dessert beautifully.
These keto-friendly sides and beverages not only enhance your dining experience but also keep your meal balanced and enjoyable. So, go ahead and treat yourself to this delicious Fried Ice Cream – Mexico, knowing you have the perfect accompaniments to make it even more special!
FAQs About Making Fried Ice Cream at Home
As you embark on your journey to create the perfect Fried Ice Cream – Mexico, you might have a few questions. Here are some common queries I’ve encountered, along with my answers to help you navigate this delicious dessert:
- Can I use different types of ice cream? Absolutely! While vanilla is a classic choice, feel free to experiment with chocolate, strawberry, or even coffee-flavored ice cream. Each flavor brings its own unique twist to the Fried Ice Cream experience, making it fun to try new combinations!
- How do I store leftover fried ice cream? If you happen to have any leftovers (which is rare!), store them in an airtight container in the freezer. However, keep in mind that the crispy coating may lose its crunch when reheated. For the best experience, I recommend enjoying them fresh!
- What’s the best oil for frying? For frying your Fried Ice Cream, vegetable oil is a great choice due to its high smoke point and neutral flavor. You can also use canola oil or peanut oil if you prefer. Just make sure the oil is hot enough (around 350°F) for that perfect crispy texture!
These FAQs should help clarify any uncertainties you may have as you prepare to make this delightful dessert. Enjoy the process, and happy cooking!
Final Thoughts on This Easy Keto-Friendly Fried Ice Cream
As I reflect on the joy of making Fried Ice Cream – Mexico at home, I can’t help but smile. This dessert is more than just a treat; it’s a celebration of flavors and textures that brings people together. The thrill of frying those ice cream balls and watching them transform into golden, crispy delights is an experience I cherish every time.
I encourage you to try this recipe and share it with your loved ones. Whether it’s a special occasion or just a weeknight craving, Fried Ice Cream is sure to impress. Don’t forget to experiment with different flavors and toppings to make it your own! I’d love to hear about your experiences and any creative twists you come up with. Let’s foster a community of passionate home cooks who celebrate the joy of cooking together!
So, roll up your sleeves, gather your ingredients, and dive into this delicious adventure. Happy cooking, and enjoy every bite of your homemade Fried Ice Cream – Mexico!
Print
Fried Ice Cream – Mexico: Discover This Tasty Delight!
- Total Time: 2 hours 30 minutes
- Yield: 4 servings 1x
- Diet: Vegetarian
Description
Fried Ice Cream is a delicious Mexican dessert that combines the creaminess of ice cream with a crispy outer layer, making it a delightful treat.
Ingredients
- 2 cups vanilla ice cream
- 1 cup cornflakes, crushed
- 1 teaspoon ground cinnamon
- 1/2 cup all-purpose flour
- 1 large egg
- 1 cup milk
- Vegetable oil for frying
- Chocolate syrup (for drizzling)
- Whipped cream (for topping)
- Cherries (for garnish)
Instructions
- Scoop the vanilla ice cream into 4 balls, approximately 1/2 cup each. Place them on a baking sheet lined with parchment paper and freeze for at least 2 hours or until solid.
- In a shallow bowl, combine the crushed cornflakes and ground cinnamon. In another bowl, whisk together the flour, egg, and milk until smooth.
- Remove the ice cream balls from the freezer. Dip each ball into the flour mixture, then roll it in the cornflake mixture, pressing gently to coat evenly. Repeat this process for all ice cream balls.
- Return the coated ice cream balls to the freezer for an additional 30 minutes to firm up.
- In a deep skillet or frying pan, heat about 2 inches of vegetable oil over medium-high heat until it reaches 350°F.
- Carefully place one or two ice cream balls in the hot oil and fry for about 10-15 seconds until golden brown. Use a slotted spoon to remove them and drain on paper towels.
- Serve immediately, drizzled with chocolate syrup, topped with whipped cream, and garnished with a cherry.
Notes
- For a different flavor, try using chocolate or strawberry ice cream instead of vanilla.
- Add a sprinkle of chopped nuts or shredded coconut to the cornflake mixture for extra crunch and flavor.
- Prep Time: 30 minutes
- Cook Time: 15 seconds
- Category: Dessert
- Method: Frying
- Cuisine: Mexican
Nutrition
- Serving Size: 1 serving
- Calories: 320
- Sugar: 0g
- Sodium: 0mg
- Fat: 15g
- Saturated Fat: 0g
- Unsaturated Fat: 0g
- Trans Fat: 0g
- Carbohydrates: 40g
- Fiber: 0g
- Protein: 5g
- Cholesterol: 0mg