





How to Make the Perfect Takoyaki
Making Takoyaki at home is a delightful experience that brings the flavors of Japan right to your kitchen. I remember the first time I tried my hand at this recipe; the aroma of the cooking batter filled my home, and I couldn’t wait to taste the crispy perfection. Let’s dive into the step-by-step process to create these delicious, savory balls!
Step 1 – Prep Your Ingredients Quickly
Before you start cooking, it’s essential to have all your ingredients prepped and ready. This not only saves time but also ensures a smooth cooking process. I like to chop my green onions and pickled ginger in advance, so everything is at my fingertips when I need it. Trust me, this little step makes a world of difference!
Step 2 – Begin Cooking
Start by whisking together the all-purpose flour, dashi stock, eggs, soy sauce, and mirin in a large mixing bowl. Let the batter rest for about 10 minutes; this is crucial for achieving that light, airy texture. While the batter rests, preheat your Takoyaki pan over medium heat and lightly grease each mold with vegetable oil. The sizzling sound as the oil hits the pan is music to my ears!
Step 3 – Combine Ingredients and Cook
Once your batter is ready, pour it into each mold, filling them about ¾ full. Now comes the fun part! Add a small amount of diced octopus, green onions, pickled ginger, and tempura scraps to each mold. Allow the batter to cook for about 2-3 minutes until the edges start to set. Using a skewer or chopsticks, carefully turn each ball a quarter turn. This allows the uncooked batter to flow into the mold, creating that perfect round shape.
Step 4 – Final Touches & Serving Suggestions
Continue cooking for another 2-3 minutes, turning the balls every minute until they are golden brown and crispy on the outside. The moment you see that beautiful color, you know you’re in for a treat! Remove the Takoyaki from the pan and place them on a serving plate. Drizzle with Takoyaki sauce and Japanese mayonnaise, then sprinkle with aonori and katsuobushi for an authentic touch. The first bite is always a moment of pure joy!
Introduction to Takoyaki
Takoyaki is more than just a dish; it’s a beloved Japanese street food that has captured the hearts and taste buds of many. These delightful little balls are known for their crispy exterior and savory filling, typically featuring tender pieces of octopus. Each bite is a burst of flavor, making Takoyaki a perfect snack or appetizer for any occasion.
As a busy home cook, I understand the challenges of juggling a hectic lifestyle while trying to maintain a healthy diet. That’s why I love this Takoyaki recipe—it’s not only quick to prepare but also allows for meal prep flexibility. You can whip up a batch in just 25 minutes, making it an ideal choice for those evenings when you want something delicious without spending hours in the kitchen. Plus, you can customize the fillings to suit your dietary preferences, ensuring that everyone at the table can enjoy this tasty treat!
Why You’ll Love This Delicious Low-Carb Takoyaki Recipe
Making Takoyaki at home is not just a culinary adventure; it’s a convenient way to enjoy a beloved Japanese street food right in your kitchen. I love how this recipe allows me to whip up a batch in just 25 minutes, making it perfect for busy weeknights or spontaneous gatherings. With a little prep, you can have these crispy balls ready to serve in no time!
The delightful taste and texture of homemade Takoyaki are sure to impress your family and friends. Each bite offers a satisfying crunch on the outside, followed by a warm, savory filling that bursts with flavor. I remember serving these to my friends during a game night, and their eyes lit up with joy after the first bite. It’s moments like these that remind me why I love cooking!
What’s more, this Takoyaki recipe is incredibly simple, making it accessible for cooks of all skill levels. Whether you’re a seasoned chef or just starting out, you’ll find the step-by-step instructions easy to follow. Plus, the ability to customize the fillings means you can cater to different tastes and dietary needs, ensuring everyone can enjoy this delicious treat. So, roll up your sleeves and get ready to create something special!
Ingredients You’ll Need for This Recipe
To create the perfect Takoyaki, you’ll need a handful of essential ingredients that come together to form a delightful flavor profile. Here’s what you’ll need:
- All-purpose flour: This serves as the base for the batter, giving it structure and a light texture.
- Dashi stock: A key ingredient that adds umami flavor; you can also use water if you prefer.
- Eggs: These bind the batter together, ensuring a cohesive mixture.
- Soy sauce: Enhances the overall flavor, adding a savory depth to the dish.
- Mirin (optional): This sweet rice wine adds a touch of sweetness, balancing the savory elements.
- Cooked octopus: The traditional filling that gives Takoyaki its signature taste and texture.
- Green onions: These add freshness and a delightful crunch to each bite.
- Pickled ginger: Provides a tangy contrast that brightens the flavors.
- Tempura scraps (tenkasu): These little bits add a wonderful texture, making each ball even more enjoyable.
- Vegetable oil: Essential for cooking, ensuring that your Takoyaki gets that crispy exterior.
Feel free to customize your Takoyaki with optional ingredients! For a vegetarian twist, consider substituting the octopus with diced mushrooms or cooked sweet potatoes. You can also experiment with different fillings like shrimp, cheese, or even kimchi for a unique flavor experience.
Don’t worry about memorizing the measurements just yet; I’ll provide exact amounts at the end of the recipe for your convenience!
How to Make the Perfect Takoyaki
Making Takoyaki at home is a delightful experience that brings the flavors of Japan right to your kitchen. I remember the first time I tried my hand at this recipe; the aroma of the cooking batter filled my home, and I couldn’t wait to taste the crispy perfection. Let’s dive into the step-by-step process to create these delicious, savory balls!
Step 1 – Prep Your Ingredients Quickly
Before you start cooking, it’s essential to have all your ingredients prepped and ready. This not only saves time but also ensures a smooth cooking process. I like to chop my green onions and pickled ginger in advance, so everything is at my fingertips when I need it. Trust me, this little step makes a world of difference!
Step 2 – Begin Cooking
Start by whisking together the all-purpose flour, dashi stock, eggs, soy sauce, and mirin in a large mixing bowl. Let the batter rest for about 10 minutes; this is crucial for achieving that light, airy texture. While the batter rests, preheat your Takoyaki pan over medium heat and lightly grease each mold with vegetable oil. The sizzling sound as the oil hits the pan is music to my ears!
Step 3 – Combine Ingredients and Cook
Once your batter is ready, pour it into each mold, filling them about ¾ full. Now comes the fun part! Add a small amount of diced octopus, green onions, pickled ginger, and tempura scraps to each mold. Allow the batter to cook for about 2-3 minutes until the edges start to set. Using a skewer or chopsticks, carefully turn each ball a quarter turn. This allows the uncooked batter to flow into the mold, creating that perfect round shape.
Step 4 – Final Touches & Serving Suggestions
Continue cooking for another 2-3 minutes, turning the balls every minute until they are golden brown and crispy on the outside. The moment you see that beautiful color, you know you’re in for a treat! Remove the Takoyaki from the pan and place them on a serving plate. Drizzle with Takoyaki sauce and Japanese mayonnaise, then sprinkle with aonori and katsuobushi for an authentic touch. The first bite is always a moment of pure joy!
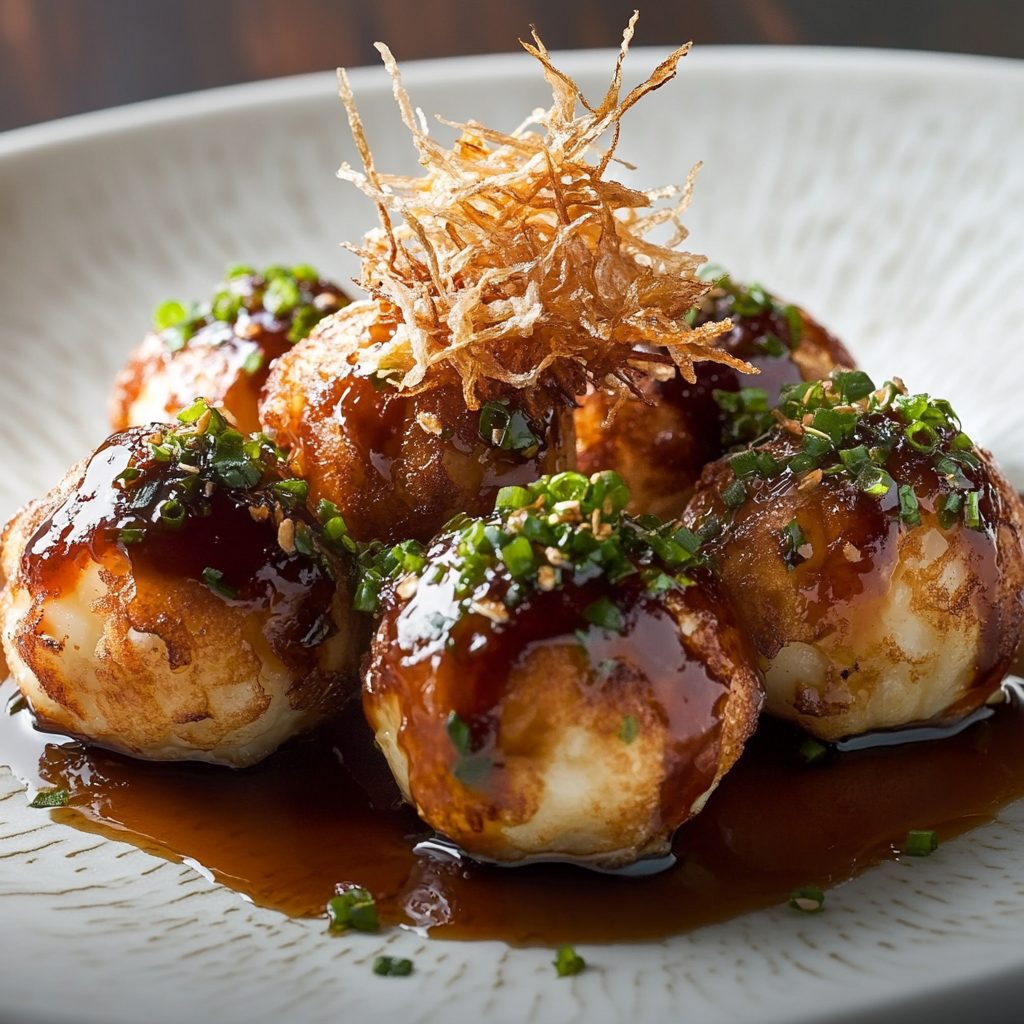
Expert Tips to Ensure Keto Cooking Success
As I’ve navigated the world of keto cooking, I’ve learned a few tricks that can elevate your Takoyaki game. Here are my top tips to ensure your Takoyaki turns out perfectly every time!
- Use a non-stick pan: Investing in a good non-stick Takoyaki pan can make a world of difference. It helps prevent the batter from sticking, allowing for easy removal and ensuring that your Takoyaki maintains its beautiful shape. Trust me, you’ll thank yourself when it’s time to flip those delicious balls!
- Experiment with different fillings: One of the joys of making Takoyaki is the ability to customize the fillings. While traditional octopus is fantastic, don’t hesitate to try out other options like shrimp, cheese, or even diced vegetables. Each variation brings a unique flavor profile, keeping your meals exciting and fresh!
- Adjust cooking times based on stove heat: Every stove is different, and the heat can vary significantly. Keep an eye on your Takoyaki as they cook, and adjust the cooking times accordingly. If you notice they’re browning too quickly, lower the heat slightly. The goal is to achieve that perfect golden-brown exterior while ensuring the inside is cooked through.
By following these tips, you’ll be well on your way to mastering the art of Takoyaki. Enjoy the process, and don’t be afraid to get creative in the kitchen!
Essential Kitchen Tools for This Keto Recipe
To make your Takoyaki experience as smooth as possible, having the right kitchen tools is essential. Here’s a list of the necessary tools you’ll need:
- Takoyaki pan: This is the star of the show! A dedicated Takoyaki pan is ideal, but if you don’t have one, you can use a muffin tin or a cast-iron skillet with rounded molds.
- Whisk: A good whisk is crucial for mixing the batter until it’s smooth and free of lumps. It’s a simple tool that makes a big difference!
- Skewers or chopsticks: These are essential for turning your Takoyaki balls as they cook. If you don’t have skewers, any long utensil will do, even a fork in a pinch!
- Measuring cups and spoons: Accurate measurements are key to achieving the perfect batter consistency, so make sure you have these handy.
If you find yourself lacking any of these specific tools, don’t worry! You can often improvise with what you have at home. For instance, a regular frying pan can work for cooking, and a fork can substitute for skewers. The most important thing is to enjoy the cooking process and have fun experimenting!
Delicious Variations to Customize Your Takoyaki Dish
One of the best things about making Takoyaki at home is the endless possibilities for customization. Whether you’re looking to cater to dietary preferences or simply want to try something new, these variations will keep your Takoyaki experience exciting!
- Vegetarian options: If you’re looking for a meat-free alternative, consider using diced mushrooms or cooked sweet potatoes as your filling. Both options provide a hearty texture and absorb the delicious flavors of the batter beautifully. I love using shiitake mushrooms for their rich umami taste!
- Unique fillings: Don’t be afraid to get creative! Shrimp adds a delightful seafood twist, while cheese can create a gooey, melty center that’s simply irresistible. For a spicy kick, try adding kimchi; its tangy flavor pairs wonderfully with the crispy exterior of the Takoyaki.
- Different sauces and toppings: While traditional Takoyaki sauce and Japanese mayonnaise are fantastic, you can experiment with other sauces to elevate your dish. A drizzle of sriracha or a sprinkle of sesame seeds can add an exciting flavor dimension. Additionally, consider garnishing with fresh herbs like cilantro or basil for a refreshing touch!
These variations not only allow you to tailor your Takoyaki to your taste but also make it a fun dish to share with friends and family. Each batch can be a new adventure, so don’t hesitate to mix and match fillings and toppings. Enjoy the process of creating your perfect Takoyaki!
Best Keto-Friendly Sides & Beverage Pairings
When it comes to enjoying your homemade Takoyaki, pairing it with the right sides and beverages can elevate your meal to a whole new level. Here are some easy, keto-friendly options that complement the savory flavors of Takoyaki beautifully!
- Cucumber salad with sesame dressing: This refreshing salad is a perfect side dish. The crispness of the cucumbers, combined with a light sesame dressing, adds a delightful crunch that balances the richness of the Takoyaki. Simply slice cucumbers thinly, toss them with sesame oil, soy sauce, and a sprinkle of sesame seeds for a quick and tasty salad.
- Miso soup: A warm bowl of miso soup is a classic Japanese side that pairs wonderfully with Takoyaki. It’s light yet flavorful, providing a comforting contrast to the crispy balls. You can easily make it by dissolving miso paste in hot water and adding tofu, seaweed, and green onions for extra flavor.
- Sparkling water with lemon: For a refreshing drink, opt for sparkling water with a splash of fresh lemon juice. This bubbly beverage cleanses the palate and adds a zesty touch that complements the savory notes of the Takoyaki. It’s a simple yet elegant choice that keeps your meal light and refreshing.
These sides and beverages not only enhance your Takoyaki experience but also keep your meal aligned with your keto lifestyle. Enjoy the delightful combination of flavors and textures as you savor each bite!
FAQs About Making Takoyaki at Home
As you embark on your Takoyaki-making journey, you might have a few questions. Here are some common queries I’ve encountered, along with my answers to help you navigate the process smoothly!
- Can I make Takoyaki without a special pan? Absolutely! While a Takoyaki pan is ideal for achieving that perfect round shape, you can use a muffin tin or a cast-iron skillet with rounded molds. Just ensure you grease the molds well to prevent sticking.
- How do I store leftover Takoyaki? If you have any leftovers (which is rare!), let them cool completely before storing them in an airtight container in the refrigerator. They can be kept for up to 2 days. To reheat, simply pop them in the oven or an air fryer for a few minutes to regain their crispiness.
- What are some good substitutes for octopus? If octopus isn’t your thing, don’t worry! You can use diced mushrooms, cooked shrimp, or even cheese for a delicious twist. Each option brings its own unique flavor and texture, so feel free to get creative!
- Can I make a gluten-free version of this recipe? Yes, you can! Substitute the all-purpose flour with a gluten-free flour blend. Just make sure to check the other ingredients, like soy sauce, for gluten-free options. This way, you can enjoy Takoyaki without compromising your dietary needs!
These FAQs should help clarify any uncertainties you may have as you prepare to make your own Takoyaki. Enjoy the process, and don’t hesitate to reach out if you have more questions!
Final Thoughts on This Easy Keto-Friendly Takoyaki
As I wrap up this journey into the world of Takoyaki, I can’t help but reflect on the joy it brings to my kitchen. There’s something incredibly satisfying about creating these crispy, savory balls from scratch. The aroma that fills the air, the anticipation as they cook, and the delight of sharing them with loved ones make it all worthwhile. Each bite is a reminder of the vibrant flavors of Japan, and I hope you experience that same joy!
I encourage you to try this easy keto-friendly Takoyaki recipe in your own home. Whether you’re hosting a gathering or simply treating yourself to a delicious snack, these little bites of happiness are sure to impress. Don’t forget to customize the fillings to suit your taste and dietary preferences—this is your culinary adventure!
As you embark on this Takoyaki-making journey, I’d love to hear about your experiences. Share your creations, variations, and any tips you discover along the way. Let’s foster a sense of community as we celebrate the art of cooking together. Happy cooking, and enjoy every crispy bite!
Print
Takoyaki: Discover the Secrets to Crispy Perfection!
- Total Time: 25 minutes
- Yield: Serves 4
- Diet: Vegetarian
Description
Crispy Takoyaki Balls
Ingredients
- 2 cups all-purpose flour
- 2 ½ cups dashi stock (or water)
- 2 large eggs
- 1 teaspoon soy sauce
- 1 teaspoon mirin (optional)
- 1 cup cooked octopus, diced
- ½ cup green onions, finely chopped
- ½ cup pickled ginger, chopped
- ½ cup tempura scraps (tenkasu)
- Vegetable oil, for cooking
For serving:
- Takoyaki sauce
- Japanese mayonnaise
- Aonori (seaweed flakes)
- Katsuobushi (bonito flakes)
Instructions
- In a large mixing bowl, whisk together the flour, dashi stock, eggs, soy sauce, and mirin until smooth. Let the batter rest for about 10 minutes.
- Preheat a takoyaki pan over medium heat and lightly grease each mold with vegetable oil.
- Pour the batter into each mold, filling them about ¾ full.
- Add a small amount of diced octopus, green onions, pickled ginger, and tempura scraps to each mold.
- Allow the batter to cook for about 2-3 minutes until the edges start to set.
- Using a skewer or chopsticks, carefully turn each ball a quarter turn to allow the uncooked batter to flow into the mold.
- Continue to cook for another 2-3 minutes, turning the balls every minute until they are golden brown and crispy on the outside.
- Remove the takoyaki from the pan and place them on a serving plate.
- Drizzle with takoyaki sauce and Japanese mayonnaise, then sprinkle with aonori and katsuobushi before serving.
Notes
- For a vegetarian version, substitute the octopus with diced mushrooms or cooked sweet potato.
- Experiment with different fillings like shrimp, cheese, or even kimchi for a unique twist on traditional takoyaki.
- Prep Time: 10 minutes
- Cook Time: 15 minutes
- Category: Appetizer
- Method: Pan-frying
- Cuisine: Japanese
Nutrition
- Serving Size: 1 serving
- Calories: 250
- Sugar: 0g
- Sodium: 0mg
- Fat: 15g
- Saturated Fat: 0g
- Unsaturated Fat: 0g
- Trans Fat: 0g
- Carbohydrates: 20g
- Fiber: 0g
- Protein: 10g
- Cholesterol: 0mg


