





How to Make the Perfect Oreo Ice Cream Cake
Creating an Oreo Ice Cream Cake is a delightful journey that combines simple steps with mouthwatering results. I love how this recipe allows me to indulge in a rich dessert while still keeping it manageable for my busy lifestyle. Let’s dive into the process!
Step 1 – Prep Your Ingredients Quickly
Before you start, gather all your ingredients. Having everything ready makes the process smoother and more enjoyable. Trust me, when you’re in the zone, it’s a game-changer to have your Oreo cookie crumbs, ice cream, and toppings at your fingertips!
Step 2 – Begin Cooking
First, preheat your oven to 350°F. In a medium bowl, combine the Oreo cookie crumbs with melted butter. The mixture should resemble wet sand. Press this mixture firmly into the bottom of a 9-inch springform pan to form a crust. Bake for 10 minutes, then let it cool completely. The aroma of baking Oreos is simply irresistible!
Step 3 – Combine Ingredients and Cook
Once your crust is cool, it’s time to layer the ice cream. Start with the softened vanilla ice cream, spreading it evenly over the crust. Use a spatula to smooth the top, then freeze for about 30 minutes until firm. After that, repeat the process with the chocolate ice cream. Each layer adds a new dimension of flavor, and the anticipation builds as you wait for it to freeze!
Step 4 – Final Touches & Serving Suggestions
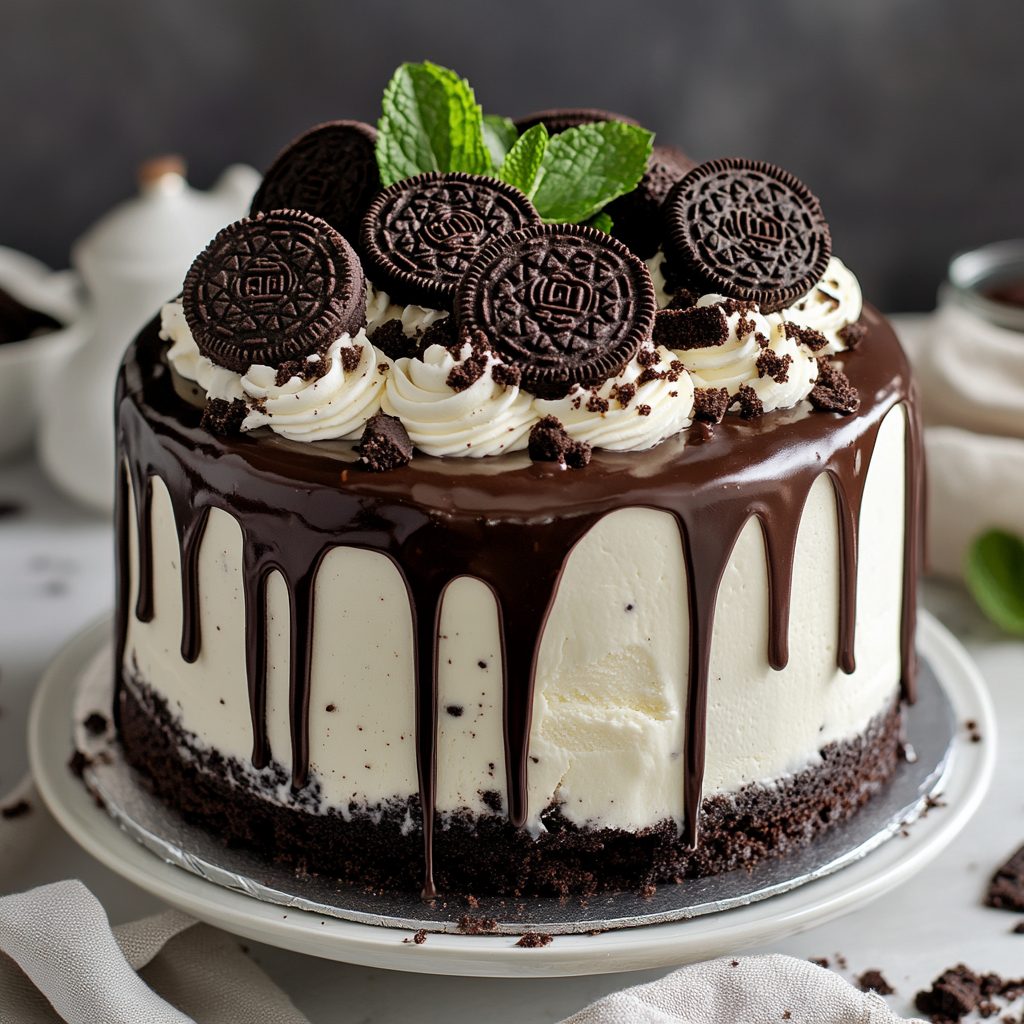
After the chocolate layer is firm, spread the whipped topping over the chocolate ice cream. Drizzle chocolate syrup on top and sprinkle with crushed Oreos for that extra crunch. Cover the cake with plastic wrap and freeze for at least 4 hours or overnight for the best results. When it’s time to serve, remove the sides of the springform pan, slice, and enjoy the delightful layers of your Oreo Ice Cream Cake!
Introduction to Oreo Ice Cream Cake
As a busy home cook, I know how challenging it can be to find time for dessert, especially when you want something that feels indulgent yet simple to make. That’s where my Oreo Ice Cream Cake comes in! This delightful treat combines the rich flavors of chocolate and vanilla ice cream with a crunchy Oreo crust, making it a perfect dessert for any occasion. Plus, it’s a fantastic way to satisfy your sweet tooth without spending hours in the kitchen. Let’s embrace the joy of creating this decadent cake that everyone will love!
Why You’ll Love This Delicious Low-Carb Dessert Recipe
This Oreo Ice Cream Cake is not just a dessert; it’s a celebration of flavors and textures that come together effortlessly. I adore how this recipe caters to my busy lifestyle while still delivering a show-stopping treat. The convenience of using store-bought ice cream and Oreo cookies means I can whip this up in no time, even on the most hectic days.
Imagine slicing into a cake that boasts layers of creamy vanilla and rich chocolate ice cream, all resting on a crunchy Oreo crust. Each bite is a delightful contrast of textures, with the smoothness of the ice cream meeting the satisfying crunch of the cookies. It’s a dessert that pleases both the eyes and the palate!
What I love most is the simplicity of the preparation. With just a few steps, you can create a dessert that looks and tastes like it came from a gourmet bakery. Plus, it’s perfect for gatherings, birthdays, or just a sweet treat after a long day. You can even customize it with your favorite toppings or ice cream flavors, making it a versatile option for any occasion.
In a world where time is precious, this Oreo Ice Cream Cake stands out as a quick yet indulgent dessert that everyone will rave about. Trust me, once you try it, you’ll be hooked!
Ingredients You’ll Need for This Recipe
Gathering the right ingredients is essential for creating a delicious Oreo Ice Cream Cake. Here’s what you’ll need:
- 2 cups Oreo cookie crumbs (about 24 cookies) – These form the crunchy base of your cake, providing that classic Oreo flavor.
- 1/2 cup unsalted butter, melted – This binds the cookie crumbs together, creating a rich and buttery crust.
- 1 quart vanilla ice cream, softened – The creamy vanilla layer adds a delightful contrast to the chocolate.
- 1 quart chocolate ice cream, softened – Rich and decadent, this layer is a chocolate lover’s dream.
- 1 cup whipped topping – This light and fluffy topping adds a beautiful finish to your cake.
- 1/2 cup chocolate syrup – Drizzling this on top enhances the chocolate flavor and adds a touch of sweetness.
- 1/2 cup crushed Oreos for topping – These provide an extra crunch and visual appeal to your finished cake.
For those looking to mix things up, consider these optional ingredients:
- Different ice cream flavors – Try cookies and cream or mint chocolate chip for a fun twist!
- Fudge or caramel sauce – Layering these between the ice cream adds an extra layer of flavor.
With these ingredients on hand, you’re ready to create a stunning Oreo Ice Cream Cake that will impress your family and friends. For your convenience, here are the exact measurements:
- 2 cups Oreo cookie crumbs
- 1/2 cup unsalted butter, melted
- 1 quart vanilla ice cream, softened
- 1 quart chocolate ice cream, softened
- 1 cup whipped topping
- 1/2 cup chocolate syrup
- 1/2 cup crushed Oreos for topping
How to Make the Perfect Oreo Ice Cream Cake
Creating an Oreo Ice Cream Cake is a delightful journey that combines simple steps with mouthwatering results. I love how this recipe allows me to indulge in a rich dessert while still keeping it manageable for my busy lifestyle. Let’s dive into the process!
Step 1 – Prep Your Ingredients Quickly
Before you start, gather all your ingredients. Having everything ready makes the process smoother and more enjoyable. Trust me, when you’re in the zone, it’s a game-changer to have your Oreo cookie crumbs, ice cream, and toppings at your fingertips!
Step 2 – Begin Cooking
First, preheat your oven to 350°F. In a medium bowl, combine the Oreo cookie crumbs with melted butter. The mixture should resemble wet sand. Press this mixture firmly into the bottom of a 9-inch springform pan to form a crust. Bake for 10 minutes, then let it cool completely. The aroma of baking Oreos is simply irresistible!
Step 3 – Combine Ingredients and Cook
Once your crust is cool, it’s time to layer the ice cream. Start with the softened vanilla ice cream, spreading it evenly over the crust. Use a spatula to smooth the top, then freeze for about 30 minutes until firm. After that, repeat the process with the chocolate ice cream. Each layer adds a new dimension of flavor, and the anticipation builds as you wait for it to freeze!
Step 4 – Final Touches & Serving Suggestions
After the chocolate layer is firm, spread the whipped topping over the chocolate ice cream. Drizzle chocolate syrup on top and sprinkle with crushed Oreos for that extra crunch. Cover the cake with plastic wrap and freeze for at least 4 hours or overnight for the best results. When it’s time to serve, remove the sides of the springform pan, slice, and enjoy the delightful layers of your Oreo Ice Cream Cake!
Expert Tips to Ensure Ice Cream Cake Success
- Use Softened Ice Cream: Make sure your ice cream is softened but not melted. This makes it easier to spread and layer without disturbing the crust.
- Freeze Between Layers: Don’t skip the freezing time between layers! This helps each layer set properly, ensuring a clean slice when you serve.
- Choose Quality Ingredients: Opt for high-quality ice cream and Oreos. The better the ingredients, the more delicious your cake will be!
- Customize Your Toppings: Feel free to get creative with toppings! Nuts, sprinkles, or fresh fruit can add a delightful twist to your cake.
- Let It Sit Before Serving: Allow the cake to sit at room temperature for about 10 minutes before slicing. This makes cutting easier and enhances the flavors.
- Store Properly: Keep any leftovers tightly covered in the freezer. This will help maintain the texture and flavor of your Oreo Ice Cream Cake.
Essential Kitchen Tools for This Ice Cream Cake Recipe
- 9-inch Springform Pan: This is crucial for easy removal of your Oreo Ice Cream Cake. If you don’t have one, a regular cake pan will work, but be prepared for a bit more effort when serving.
- Mixing Bowls: A set of medium and large mixing bowls will help you combine your ingredients efficiently. Glass or stainless steel bowls are great options.
- Spatula: A rubber or silicone spatula is perfect for spreading the ice cream layers smoothly. It’s also handy for scraping down the sides of your mixing bowls.
- Measuring Cups and Spoons: Accurate measurements are key to achieving the perfect balance of flavors in your cake. A set of dry and liquid measuring cups will ensure you get it right.
- Whisk: A whisk is useful for mixing the melted butter with the Oreo crumbs, ensuring an even consistency for your crust.
- Plastic Wrap: This is essential for covering your cake while it freezes, helping to prevent ice crystals from forming.
- Knife or Cake Slicer: A sharp knife or cake slicer will help you cut through the layers of your Oreo Ice Cream Cake cleanly, making for beautiful slices.
Delicious Variations to Customize Your Oreo Dessert
One of the best things about making an Oreo Ice Cream Cake is the endless possibilities for customization. Whether you want to switch up the flavors or cater to specific dietary needs, there’s a variation for everyone. Here are some fun ideas to inspire your creativity:
- Flavor Swaps: Instead of vanilla and chocolate, try using strawberry or mint chocolate chip ice cream. The fruity or minty flavors can add a refreshing twist to your cake!
- Nutty Delight: Incorporate crushed nuts like almonds or pecans into the layers for added crunch and flavor. Just sprinkle them between the ice cream layers or mix them into the whipped topping.
- Healthier Options: For a lighter version, use low-sugar or dairy-free ice cream. There are many delicious options available that don’t compromise on taste!
- Cheesecake Layer: Add a layer of no-bake cheesecake in between the ice cream layers. Simply mix cream cheese, sweetener, and whipped cream for a rich and creamy addition.
- Cookie Dough Surprise: Fold in some edible cookie dough into the ice cream layers for a fun surprise. It adds a delightful texture and flavor that everyone will love!
- Seasonal Flavors: Embrace the seasons by using flavors like pumpkin spice in the fall or peppermint during the holidays. These seasonal twists can make your cake even more special.
With these variations, you can create a unique Oreo Ice Cream Cake that suits your taste and dietary preferences. The sky’s the limit, so don’t hesitate to experiment and make it your own!
Best Dessert Sides & Beverage Pairings
To elevate your Oreo Ice Cream Cake experience, consider pairing it with delightful sides and beverages that complement its rich flavors. Here are some easy suggestions:
- Fresh Berries: A side of strawberries, raspberries, or blueberries adds a refreshing contrast to the sweetness of the cake.
- Chocolate-Covered Strawberries: These indulgent treats enhance the chocolate flavor and add a touch of elegance to your dessert spread.
- Mini Cheesecakes: Individual cheesecakes provide a creamy counterpart to the ice cream cake, perfect for those who love variety.
- Brownie Bites: Rich and fudgy brownie bites are a decadent addition that pairs beautifully with the creamy layers of your cake.
- Whipped Cream: A dollop of freshly whipped cream on the side can enhance the overall creaminess and add a light touch.
For beverages, consider these delightful options:
- Milk: A classic pairing, a glass of cold milk complements the flavors of the Oreo Ice Cream Cake perfectly.
- Chocolate Milkshake: For a double dose of indulgence, serve a chocolate milkshake alongside your cake.
- Espresso or Coffee: The rich, bold flavors of coffee balance the sweetness of the cake, making it a great after-dinner option.
- Fruit-Infused Water: A refreshing option, infuse water with slices of lemon, lime, or cucumber for a light and zesty drink.
- Sparkling Water: The effervescence of sparkling water can cleanse the palate and enhance the dessert experience.
These sides and beverages will not only complement your Oreo Ice Cream Cake but also create a delightful dessert experience for you and your guests!
FAQs About Making Oreo Ice Cream Cake at Home
As I’ve shared my love for the Oreo Ice Cream Cake, I often get questions about the process and tips for making it at home. Here are some of the most common inquiries I receive:
- Can I use different flavors of ice cream for my Oreo Ice Cream Cake?
Absolutely! Feel free to experiment with flavors like cookies and cream, mint chocolate chip, or even fruity options. The key is to choose flavors that you love! - How long does the Oreo Ice Cream Cake need to freeze?
For the best results, freeze your cake for at least 4 hours or overnight. This ensures that the layers set properly and makes slicing easier. - Can I make this cake ahead of time?
Yes! The Oreo Ice Cream Cake can be made a day or two in advance. Just keep it tightly covered in the freezer until you’re ready to serve. - What can I use instead of a springform pan?
If you don’t have a springform pan, a regular cake pan will work. Just be cautious when removing the cake, as it may require a bit more effort. - How do I store leftovers of the Oreo Ice Cream Cake?
To keep your cake fresh, wrap it tightly in plastic wrap or store it in an airtight container in the freezer. This will help maintain its texture and flavor.
Final Thoughts on This Easy Oreo Ice Cream Cake
As I reflect on my journey with this Oreo Ice Cream Cake, I can’t help but smile at the joy it brings to my family and friends. It’s more than just a dessert; it’s a sweet moment shared together, a celebration of flavors, and a reminder that indulgence doesn’t have to be complicated. I encourage you to try making this cake yourself! Whether it’s for a special occasion or just a treat after a long week, I promise it will be a hit. So, roll up your sleeves, gather your ingredients, and let the deliciousness unfold!
Print
Oreo Ice Cream Cake: A Decadent Treat to Savor!
- Total Time: 4 hours 30 minutes
- Yield: 10 servings 1x
- Diet: Vegetarian
Description
A delicious and decadent Oreo Ice Cream Cake that combines layers of vanilla and chocolate ice cream with a crunchy Oreo crust.
Ingredients
- 2 cups Oreo cookie crumbs (about 24 cookies)
- 1/2 cup unsalted butter, melted
- 1 quart vanilla ice cream, softened
- 1 quart chocolate ice cream, softened
- 1 cup whipped topping
- 1/2 cup chocolate syrup
- 1/2 cup crushed Oreos for topping
Instructions
- Preheat your oven to 350°F. In a medium bowl, combine the Oreo cookie crumbs and melted butter. Mix until the crumbs are evenly coated.
- Press the mixture firmly into the bottom of a 9-inch springform pan to form the crust. Bake for 10 minutes, then remove from the oven and let it cool completely.
- Once the crust is cool, spread the softened vanilla ice cream evenly over the crust. Smooth the top with a spatula and freeze for about 30 minutes until firm.
- After the vanilla layer is firm, spread the softened chocolate ice cream over the vanilla layer. Again, smooth the top and freeze for another 30 minutes.
- Once the chocolate layer is firm, spread the whipped topping over the chocolate ice cream. Drizzle chocolate syrup on top and sprinkle with crushed Oreos.
- Cover the cake with plastic wrap and freeze for at least 4 hours or overnight for best results.
- To serve, remove the sides of the springform pan, slice, and enjoy!
Notes
- For a fun twist, try using different flavors of ice cream, such as cookies and cream or mint chocolate chip.
- You can also add layers of fudge or caramel sauce between the ice cream layers for extra flavor.
- Prep Time: 20 minutes
- Cook Time: 10 minutes
- Category: Dessert
- Method: Baking and Freezing
- Cuisine: American
Nutrition
- Serving Size: 1 slice
- Calories: 320
- Sugar: 30g
- Sodium: 150mg
- Fat: 18g
- Saturated Fat: 10g
- Unsaturated Fat: 8g
- Trans Fat: 0g
- Carbohydrates: 30g
- Fiber: 1g
- Protein: 4g
- Cholesterol: 30mg


