





How to Make the Perfect Biscoff Cheesecake
Creating a Biscoff cheesecake is a delightful journey that combines simple steps with rich flavors. I love how this no-bake dessert allows me to indulge without spending hours in the kitchen. Let’s dive into the process, ensuring you can whip up this creamy delight with ease!
Step 1 – Prep Your Ingredients Quickly
Before you start, gather all your ingredients and let them come to room temperature. This little trick makes mixing a breeze, ensuring a smooth and creamy filling. Trust me, it’s worth the extra few minutes!
Step 2 – Begin Cooking
Now, let’s get our crust ready! In a mixing bowl, combine the crushed Biscoff cookies with melted butter and a sprinkle of ground cinnamon. Stir until the mixture resembles wet sand. The aroma of cinnamon will instantly transport you to a cozy kitchen!
Next, press this mixture firmly into the base of a 9-inch springform pan. I like to use the bottom of a measuring cup to get an even layer. Once it’s nicely packed, pop it in the refrigerator for about 15 minutes to set. This step is crucial for a sturdy crust!
Step 3 – Combine Ingredients and Cook
While the crust chills, let’s make the cheesecake filling. In a large bowl, whip the softened cream cheese with an electric mixer until it’s creamy and smooth. Gradually add the powdered sugar, mixing until fully blended. The sweetness will start to shine through!
Next, incorporate the Biscoff cookie spread, vanilla extract, and a splash of lemon juice. This combination creates a velvety texture that’s simply irresistible. In a separate bowl, whip the heavy cream until stiff peaks form. Gently fold this whipped cream into the Biscoff mixture, being careful not to deflate it. The lightness of the whipped cream is what makes this cheesecake so dreamy!
Step 4 – Final Touches & Serving Suggestions
Pour the luscious cheesecake filling over the chilled crust, smoothing the top with a spatula. Cover it up and let it chill in the refrigerator for at least 4 hours, or ideally overnight. This waiting game is tough, but the end result is worth it!
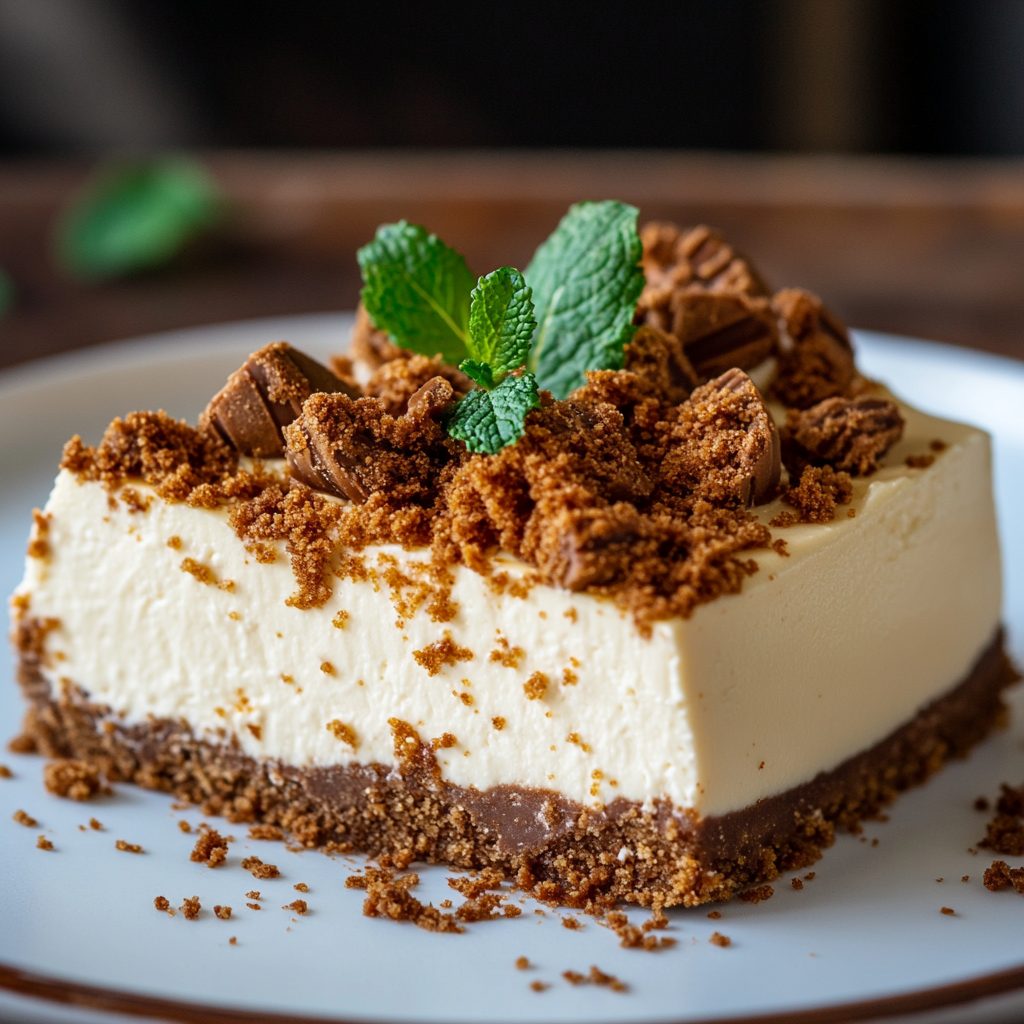
Before serving, sprinkle some extra crushed Biscoff cookies on top and drizzle with additional Biscoff cookie spread. The crunch and sweetness will elevate your cheesecake to a whole new level!
Introduction to Biscoff Cheesecake
Welcome to the world of Biscoff cheesecake, where creamy texture meets rich, indulgent flavors! This delightful dessert is a celebration of the beloved Biscoff cookie, transformed into a luscious cheesecake that’s sure to impress. Imagine sinking your fork into a velvety slice, the sweet notes of caramelized sugar and spices dancing on your palate. It’s pure bliss!
As a busy adult, I understand the struggle of balancing a hectic schedule while trying to maintain a healthy lifestyle. That’s why this no-bake Biscoff cheesecake is a game-changer. It requires minimal effort and time, allowing you to whip up a stunning dessert without sacrificing your precious hours. Perfect for those last-minute gatherings or a well-deserved personal treat, this recipe fits seamlessly into your routine.
What I love most about this Biscoff cheesecake is its indulgent yet simple nature. With just a handful of ingredients and straightforward steps, you can create a dessert that feels luxurious without the fuss. Whether you’re hosting friends or simply treating yourself, this cheesecake is bound to be a hit!
Why You’ll Love This Delicious Low-Carb Biscoff Cheesecake Recipe
If you’re looking for a dessert that combines convenience with indulgence, this low-carb Biscoff cheesecake is your answer! The beauty of a no-bake cheesecake lies in its simplicity. With minimal cooking time, you can have a stunning dessert ready to impress your guests or satisfy your sweet tooth.
The moment you take a bite of this cheesecake, the delightful taste of Biscoff cookies will transport you to a world of flavor. Their unique blend of caramelized sugar and spices elevates the cheesecake experience, making each slice a heavenly treat. It’s like a warm hug for your taste buds!
What I truly appreciate about this recipe is its accessibility. Whether you’re a novice baker or a seasoned pro, the straightforward steps make it easy to follow. You don’t need to be a culinary expert to create a dessert that looks and tastes gourmet. Plus, the ingredients are simple to find, allowing you to whip it up even on a busy weeknight.
So, if you’re ready to indulge in a creamy, dreamy Biscoff cheesecake that fits perfectly into your low-carb lifestyle, let’s get started! You’ll be amazed at how effortlessly you can create this delicious dessert.
Ingredients You’ll Need for This Recipe
To create this luscious Biscoff cheesecake, you’ll need a few essential ingredients that work together to deliver a creamy, dreamy dessert. Here’s what you’ll need:
- Cream cheese: This is the heart of the cheesecake, providing a rich and creamy base that makes every bite indulgent.
- Powdered sugar: Sweetens the filling, giving it that delightful sweetness that pairs perfectly with the Biscoff flavor.
- Heavy whipping cream: Adds lightness and texture, making the cheesecake airy and smooth.
- Vanilla extract: Enhances the overall flavor, bringing warmth and depth to the cheesecake.
- Biscoff cookie spread: Infuses the signature taste of Biscoff cookies, creating that irresistible flavor profile.
- Crushed Biscoff cookies: Forms the crust and adds a delightful crunch, complementing the creamy filling.
- Unsalted butter: Binds the crust ingredients together, ensuring a sturdy base for your cheesecake.
- Ground cinnamon: Adds warmth to the crust, enhancing the overall flavor experience.
- Lemon juice: Balances sweetness, providing a subtle tang that brightens the cheesecake.
For those looking to make a healthier twist, consider replacing half of the cream cheese with Greek yogurt. This substitution adds protein while keeping the cheesecake creamy!
Don’t worry; I’ll provide exact measurements for each ingredient at the end of the recipe for your convenience.
How to Make the Perfect Biscoff Cheesecake
Creating a Biscoff cheesecake is a delightful journey that combines simple steps with rich flavors. I love how this no-bake dessert allows me to indulge without spending hours in the kitchen. Let’s dive into the process, ensuring you can whip up this creamy delight with ease!
Step 1 – Prep Your Ingredients Quickly
Before you start, gather all your ingredients and let them come to room temperature. This little trick makes mixing a breeze, ensuring a smooth and creamy filling. Trust me, it’s worth the extra few minutes!
Step 2 – Begin Cooking
Now, let’s get our crust ready! In a mixing bowl, combine the crushed Biscoff cookies with melted butter and a sprinkle of ground cinnamon. Stir until the mixture resembles wet sand. The aroma of cinnamon will instantly transport you to a cozy kitchen!
Next, press this mixture firmly into the base of a 9-inch springform pan. I like to use the bottom of a measuring cup to get an even layer. Once it’s nicely packed, pop it in the refrigerator for about 15 minutes to set. This step is crucial for a sturdy crust!
Step 3 – Combine Ingredients and Cook
While the crust chills, let’s make the cheesecake filling. In a large bowl, whip the softened cream cheese with an electric mixer until it’s creamy and smooth. Gradually add the powdered sugar, mixing until fully blended. The sweetness will start to shine through!
Next, incorporate the Biscoff cookie spread, vanilla extract, and a splash of lemon juice. This combination creates a velvety texture that’s simply irresistible. In a separate bowl, whip the heavy cream until stiff peaks form. Gently fold this whipped cream into the Biscoff mixture, being careful not to deflate it. The lightness of the whipped cream is what makes this cheesecake so dreamy!
Step 4 – Final Touches & Serving Suggestions
Pour the luscious cheesecake filling over the chilled crust, smoothing the top with a spatula. Cover it up and let it chill in the refrigerator for at least 4 hours, or ideally overnight. This waiting game is tough, but the end result is worth it!
Before serving, sprinkle some extra crushed Biscoff cookies on top and drizzle with additional Biscoff cookie spread. The crunch and sweetness will elevate your cheesecake to a whole new level!
Expert Tips to Ensure Keto Cooking Success
As you embark on your journey to create the perfect Biscoff cheesecake, here are some expert tips that I’ve gathered over the years. These little nuggets of wisdom will help you achieve the best results and make your baking experience even more enjoyable!
- Use room temperature ingredients: Allowing your cream cheese and heavy cream to come to room temperature makes mixing a breeze. This ensures a smooth, lump-free filling that’s easy to work with. Trust me, it makes a world of difference!
- Chill the cheesecake overnight: While it’s tempting to dig in after just a few hours, letting your cheesecake chill overnight enhances its flavor and texture. The longer it sits, the more the flavors meld together, creating a truly decadent dessert.
- Experiment with different toppings: Don’t be afraid to get creative! Try adding fresh berries, a drizzle of sugar-free chocolate sauce, or even a sprinkle of chopped nuts for added crunch. Each variation can bring a new twist to your Biscoff cheesecake!
By following these tips, you’ll not only elevate your Biscoff cheesecake but also enjoy the process of making it. Happy baking!
Essential Kitchen Tools for This Keto Recipe
To make your Biscoff cheesecake a success, having the right kitchen tools on hand is essential. Here’s a list of the necessary tools you’ll need:
- 9-inch springform pan: This is crucial for easy removal of your cheesecake once it’s set. If you don’t have a springform pan, a regular pie dish can work, but it may be trickier to serve.
- Mixing bowls: A couple of different sizes will help you keep your ingredients organized while mixing. Glass or stainless steel bowls are great options.
- Electric mixer: This tool is a game-changer for whipping cream cheese and heavy cream. If you don’t have one, a whisk can work, but it will require more elbow grease!
- Spatula: A silicone spatula is perfect for folding in ingredients and scraping down the sides of your mixing bowls.
- Measuring cups and spoons: Accurate measurements are key to achieving the perfect cheesecake. A set of dry and liquid measuring cups will ensure you get it just right.
Having these tools ready will streamline your baking process, making it even more enjoyable. Happy baking!
Delicious Variations to Customize Your Keto Dish
One of the best things about this Biscoff cheesecake is its versatility! While the classic recipe is undeniably delicious, there are plenty of ways to customize it to suit your taste preferences. Here are some delightful variations to consider:
- Add melted chocolate: For a richer flavor, fold in 1/2 cup of melted sugar-free chocolate into the cheesecake mixture. This will create a decadent chocolate Biscoff cheesecake that’s sure to impress!
- Incorporate fruit purees: If you’re craving something fruity, try adding a swirl of fruit puree, like raspberry or strawberry, into the cheesecake filling before chilling. This not only adds a pop of color but also a refreshing twist to each bite.
- Use different flavored extracts: Experiment with various extracts, such as almond or coconut, to give your cheesecake a unique flavor profile. Just a teaspoon can transform the taste and make it even more exciting!
These variations allow you to get creative in the kitchen while still enjoying the creamy goodness of your Biscoff cheesecake. So, don’t hesitate to mix things up and make this dessert your own!
Best Keto-Friendly Sides & Beverage Pairings
To elevate your Biscoff cheesecake experience, consider pairing it with some delicious keto-friendly sides and beverages. These complementary options will enhance the flavors of your dessert while keeping your meal balanced and satisfying. Here are my top recommendations:
- Fresh berries: A handful of fresh raspberries or strawberries adds a refreshing contrast to the creamy cheesecake. Their natural sweetness and slight tartness create a delightful balance!
- Whipped cream or coconut cream: For an extra touch of indulgence, serve your cheesecake with a dollop of whipped cream or coconut cream. This adds richness and a luxurious texture that takes your dessert to the next level.
- Herbal teas or coffee: A warm cup of herbal tea or a rich coffee can enhance the dessert experience. The warmth of the beverage complements the coolness of the cheesecake, making each bite even more enjoyable.
These pairings not only enhance the flavors of your Biscoff cheesecake but also create a well-rounded dessert experience that you and your guests will love. Enjoy!
FAQs About Making Biscoff Cheesecake at Home
As you embark on your Biscoff cheesecake journey, you might have a few questions. Here are some common queries I’ve encountered, along with clear answers to help you navigate the process!
- Can I make this cheesecake ahead of time?
Absolutely! In fact, making the cheesecake a day in advance is a great idea. It allows the flavors to meld beautifully, resulting in a richer taste. Just be sure to cover it well in the refrigerator to keep it fresh! - How long does the cheesecake last in the fridge?
Your Biscoff cheesecake will stay fresh in the fridge for about 5 to 7 days. Just make sure to store it in an airtight container to maintain its creamy texture and flavor. - Can I freeze Biscoff cheesecake?
Yes, you can freeze your Biscoff cheesecake! Wrap it tightly in plastic wrap and then in aluminum foil to prevent freezer burn. It can last up to 2 months in the freezer. When you’re ready to enjoy it, simply thaw it in the refrigerator overnight.
These FAQs should help you feel more confident as you prepare your delicious Biscoff cheesecake. Happy baking!
Final Thoughts on This Easy Keto-Friendly Biscoff Cheesecake
As I reflect on the joy of making this Biscoff cheesecake, I can’t help but smile at the memories it creates. There’s something truly special about gathering friends and family around a table, sharing slices of this creamy delight, and watching their faces light up with each bite. It’s more than just a dessert; it’s a moment of connection, a celebration of flavors, and a testament to the joy of home cooking.
I encourage you to try this easy keto-friendly Biscoff cheesecake recipe. Whether you’re hosting a gathering or simply treating yourself after a long day, this dessert is sure to impress. Don’t forget to share your experiences and any creative twists you add to the recipe! I love hearing how others make it their own, and it fosters a wonderful sense of community among fellow home cooks.
So, roll up your sleeves, gather your ingredients, and let the magic of this Biscoff cheesecake unfold in your kitchen. Happy baking, and may your cheesecake adventures be as sweet as the dessert itself!
Print
Biscoff Cheesecake: Indulge in a Creamy Delight Today!
- Total Time: 4 hours 20 minutes
- Yield: 8 servings 1x
- Diet: Vegetarian
Description
Indulge in a creamy Biscoff cheesecake that combines the rich flavors of Biscoff cookies and a smooth cream cheese filling.
Ingredients
- 8 ounces cream cheese, softened
- 1 cup powdered sugar
- 1 cup heavy whipping cream
- 1 teaspoon vanilla extract
- 1 cup Biscoff cookie spread
- 1 cup Biscoff cookies, crushed (plus extra for garnish)
- 1/2 cup unsalted butter, melted
- 1 teaspoon ground cinnamon
- 1 tablespoon lemon juice
Instructions
- Prepare the crust by combining crushed Biscoff cookies with melted butter and cinnamon in a mixing bowl. Stir until it resembles wet sand.
- Press the mixture firmly into the base of a 9-inch springform pan and refrigerate for about 15 minutes to set.
- In a large bowl, whip the softened cream cheese with an electric mixer until creamy and smooth.
- Gradually add powdered sugar, mixing until fully blended.
- Incorporate Biscoff cookie spread, vanilla extract, and lemon juice, mixing until velvety.
- In another bowl, whip heavy cream until stiff peaks form, then carefully fold it into the Biscoff cream cheese mixture.
- Pour the cheesecake filling over the chilled crust and smooth the top with a spatula.
- Cover and refrigerate for a minimum of 4 hours, or ideally overnight.
- Before serving, sprinkle with additional crushed Biscoff cookies and drizzle with extra Biscoff cookie spread.
Notes
- For a fun twist, fold in 1/2 cup of melted chocolate into the cheesecake mixture.
- For a healthier alternative, replace half of the cream cheese with Greek yogurt.
- Prep Time: 20 minutes
- Cook Time: 0 minutes
- Category: Dessert
- Method: No-bake
- Cuisine: American
Nutrition
- Serving Size: 1 slice
- Calories: 350
- Sugar: 28g
- Sodium: 0mg
- Fat: 26g
- Saturated Fat: 0g
- Unsaturated Fat: 0g
- Trans Fat: 0g
- Carbohydrates: 28g
- Fiber: 0g
- Protein: 4g
- Cholesterol: 0mg


