How to Make the Perfect Crème Brûlée
Making Crème Brûlée at home is a delightful experience that combines simplicity with elegance. I remember the first time I attempted this classic French dessert; the anticipation of that first crack of caramelized sugar was exhilarating! Let’s dive into the step-by-step process to create the perfect custard that will impress your family and friends.
Step 1 – Prep Your Ingredients Quickly
Start by gathering all your ingredients. This will save you time and keep the process smooth. Preheat your oven to 325°F (160°C) while you prepare. I find that having everything ready makes the cooking experience much more enjoyable.
Step 2 – Begin Cooking
In a medium saucepan, combine the heavy cream and vanilla extract. Heat this mixture over medium heat until it’s just simmering. Be careful not to let it boil; you want to coax out the flavors without scalding the cream. The aroma that fills your kitchen at this stage is simply divine!
Step 3 – Combine Ingredients and Cook
In a mixing bowl, whisk together the egg yolks, granulated sugar, and a pinch of salt until the mixture is pale and slightly thickened. Gradually pour the warm cream mixture into the egg yolk mixture, whisking continuously. This step is crucial to prevent the eggs from scrambling. Strain the mixture through a fine-mesh sieve into a large measuring cup to ensure a silky smooth custard.
Step 4 – Final Touches & Serving Suggestions
Carefully pour the custard into your prepared ramekins, filling them about three-quarters full. Place the ramekins in a baking dish and fill the dish with hot water until it reaches halfway up the sides of the ramekins. Bake for 30-35 minutes, or until the edges are set but the center still jiggles slightly. Once baked, remove them from the water bath and let them cool to room temperature. Refrigerate for at least 2 hours, or overnight for the best results.
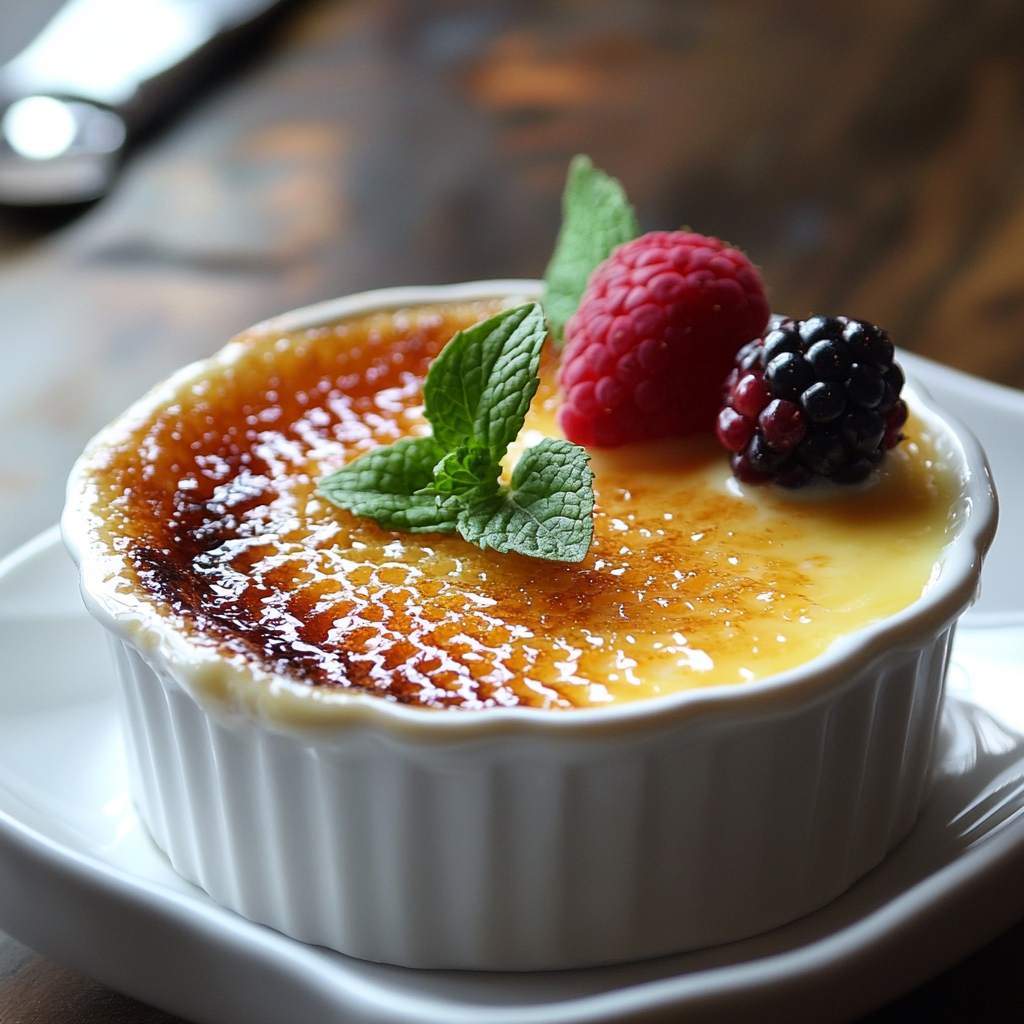
Before serving, sprinkle an even layer of brown sugar on top of each custard. Use a kitchen torch to caramelize the sugar until it’s golden and crispy. If you don’t have a torch, you can place the ramekins under a broiler for 1-2 minutes, but keep a close eye to avoid burning. The moment you crack that caramelized top is pure bliss!
Introduction to Crème Brûlée
Crème Brûlée is a classic French dessert that beautifully marries a rich, creamy custard with a crispy layer of caramelized sugar on top. The first time I tasted this indulgent treat, I was captivated by the contrast of textures—the smooth custard melting in my mouth, followed by the satisfying crack of the sugar crust. It’s a dessert that feels luxurious yet is surprisingly simple to make at home.
For busy health-conscious adults, Crème Brûlée offers a delightful escape from the everyday hustle. With just a handful of ingredients, you can create a dessert that not only satisfies your sweet tooth but also impresses your guests. The elegance of this dish makes it perfect for special occasions or a cozy night in. Plus, it’s a low-carb option that fits seamlessly into a keto lifestyle, allowing you to indulge without the guilt.
Why You’ll Love This Delicious Low-Carb Custard Recipe
Making Crème Brûlée at home is not just a culinary adventure; it’s a delightful experience that fits perfectly into a busy lifestyle. With just a few simple steps, you can whip up this elegant dessert without spending hours in the kitchen. I love how the recipe requires minimal prep time, allowing me to focus on other tasks while the custard bakes to perfection.
The taste and texture of this low-carb custard are simply divine. The creamy custard base is rich and velvety, while the caramelized sugar topping adds a satisfying crunch. Each spoonful is a harmonious blend of flavors that dance on your palate, making it a favorite among dessert lovers. I often find myself savoring the moment, relishing the contrast between the silky custard and the crispy top.
What’s more, serving homemade Crème Brûlée is a surefire way to impress your guests. It feels gourmet, yet it’s surprisingly easy to achieve. I remember hosting a dinner party where I served this dessert, and the compliments poured in! It’s a showstopper that elevates any meal, making your efforts in the kitchen truly shine.
Ingredients You’ll Need for This Recipe
Creating the perfect Crème Brûlée starts with gathering the right ingredients. Each component plays a vital role in achieving that rich, creamy custard topped with a delightful crunch. Here’s what you’ll need:
- 2 cups heavy cream: This is the foundation of your custard, providing a rich and creamy base that melts in your mouth.
- 1 teaspoon vanilla extract: Adds a warm, aromatic flavor that elevates the overall taste of the dessert.
- 5 large egg yolks: Essential for creating that silky custard texture; they bring richness and depth to the dish.
- 1/2 cup granulated sugar: Sweetens the custard, balancing the flavors beautifully.
- 1/4 cup brown sugar: Used for the caramelized topping, it adds a hint of molasses flavor and a lovely color.
- Pinch of salt: Enhances the overall flavor, making the sweetness pop.
For those looking to experiment, consider these optional ingredients:
- Chocolate: For a chocolate twist, melt 2 ounces of dark chocolate and whisk it into the cream mixture before combining with the egg yolks.
- Citrus zest: Infuse the cream with lemon or orange zest for a refreshing flavor profile.
- Spices: Add a dash of cinnamon or cardamom to the cream for a warm, spiced variation.
Exact measurements will be provided at the end of the recipe for your convenience, ensuring you have everything you need to create this delightful dessert!
How to Make the Perfect Crème Brûlée
Making Crème Brûlée at home is a delightful experience that combines simplicity with elegance. I remember the first time I attempted this classic French dessert; the anticipation of that first crack of caramelized sugar was exhilarating! Let’s dive into the step-by-step process to create the perfect custard that will impress your family and friends.
Step 1 – Prep Your Ingredients Quickly
Start by gathering all your ingredients. This will save you time and keep the process smooth. Preheat your oven to 325°F (160°C) while you prepare. I find that having everything ready makes the cooking experience much more enjoyable.
Step 2 – Begin Cooking
In a medium saucepan, combine the heavy cream and vanilla extract. Heat this mixture over medium heat until it’s just simmering. Be careful not to let it boil; you want to coax out the flavors without scalding the cream. The aroma that fills your kitchen at this stage is simply divine!
Step 3 – Combine Ingredients and Cook
In a mixing bowl, whisk together the egg yolks, granulated sugar, and a pinch of salt until the mixture is pale and slightly thickened. Gradually pour the warm cream mixture into the egg yolk mixture, whisking continuously. This step is crucial to prevent the eggs from scrambling. Strain the mixture through a fine-mesh sieve into a large measuring cup to ensure a silky smooth custard.
Step 4 – Final Touches & Serving Suggestions
Carefully pour the custard into your prepared ramekins, filling them about three-quarters full. Place the ramekins in a baking dish and fill the dish with hot water until it reaches halfway up the sides of the ramekins. Bake for 30-35 minutes, or until the edges are set but the center still jiggles slightly. Once baked, remove them from the water bath and let them cool to room temperature. Refrigerate for at least 2 hours, or overnight for the best results.
Before serving, sprinkle an even layer of brown sugar on top of each custard. Use a kitchen torch to caramelize the sugar until it’s golden and crispy. If you don’t have a torch, you can place the ramekins under a broiler for 1-2 minutes, but keep a close eye to avoid burning. The moment you crack that caramelized top is pure bliss!
Expert Tips to Ensure Keto Cooking Success
Creating the perfect Crème Brûlée is an art, and I’ve gathered some expert tips to help you achieve that silky custard and perfectly caramelized top. These insights have transformed my own cooking experience, and I’m excited to share them with you!
- Use a kitchen torch for even caramelization: A kitchen torch is your best friend when it comes to achieving that beautiful, crispy sugar layer. It allows for precise control, ensuring that the sugar caramelizes evenly without burning. If you don’t have one, a broiler works too, but keep a close eye on it!
- Don’t overcook the custard: The key to a silky texture is to avoid overcooking. The custard should be set around the edges but still slightly jiggly in the center when you take it out of the oven. This will ensure a creamy consistency once it’s chilled.
- Experiment with flavor infusions: While the classic vanilla flavor is delightful, don’t hesitate to get creative! Infuse your cream with different flavors like citrus zest, spices, or even a splash of your favorite liqueur. Each variation can bring a unique twist to your Crème Brûlée.
By following these tips, you’ll not only enhance your cooking skills but also elevate your Crème Brûlée to a whole new level. Enjoy the process, and remember, practice makes perfect!
Essential Kitchen Tools for This Keto Recipe
To create the perfect Crème Brûlée, having the right kitchen tools is essential. Here’s a list of the necessary items you’ll need to make this delightful dessert:
- Ramekins: These small dishes are perfect for baking and serving your custard. They come in various sizes, but I recommend using 6-ounce ramekins for the ideal portion.
- Mixing bowls: A couple of mixing bowls will help you combine your ingredients efficiently. Opt for glass or stainless steel for easy cleaning and durability.
- Whisk: A good whisk is crucial for mixing the egg yolks and sugar until they’re well combined and slightly thickened. A balloon whisk works best for this task.
- Fine-mesh sieve: This tool is essential for straining the custard mixture, ensuring a silky-smooth texture by removing any lumps or cooked egg bits.
- Kitchen torch or broiler: To achieve that beautiful caramelized sugar topping, a kitchen torch is ideal for precise control. If you don’t have one, a broiler can work as an alternative, but be sure to watch closely to prevent burning.
These tools will not only make your cooking process smoother but also enhance your overall experience in the kitchen. If you’re missing any of these items, don’t hesitate to get creative with alternatives—like using a regular oven-safe dish instead of ramekins or a fork in place of a whisk for mixing. Happy cooking!
Delicious Variations to Customize Your Keto Dish
One of the joys of making Crème Brûlée is the opportunity to experiment with flavors. While the classic vanilla version is undeniably delicious, I love to switch things up and create unique variations that surprise and delight my family and friends. Here are some of my favorite flavor twists to customize your keto dish:
- Chocolate-Infused Crème Brûlée: For all the chocolate lovers out there, this variation is a must-try! Simply melt 2 ounces of dark chocolate and whisk it into the warm cream mixture before combining it with the egg yolks. The result is a rich, decadent dessert that satisfies any chocolate craving while keeping it keto-friendly.
- Citrus-Flavored Options: Brighten up your Crème Brûlée with a refreshing citrus twist. Add the zest of one lemon or orange to the cream as it heats. This infusion adds a vibrant flavor that perfectly balances the richness of the custard. You can even mix and match citrus fruits for a delightful medley!
- Spiced Variations: If you’re in the mood for something warm and cozy, consider adding spices like cinnamon or cardamom to your cream. A pinch of ground cinnamon or a few crushed cardamom pods can elevate your Crème Brûlée to a whole new level, creating a comforting dessert that’s perfect for chilly evenings.
These variations not only add excitement to your dessert but also allow you to tailor the flavors to your preferences. I encourage you to get creative and experiment with different combinations. Who knows? You might just discover your new favorite version of Crème Brûlée!
Best Keto-Friendly Sides & Beverage Pairings
When it comes to enjoying your homemade Crème Brûlée, pairing it with the right sides and beverages can elevate the entire experience. Here are some delightful keto-friendly options that complement the rich, creamy custard beautifully:
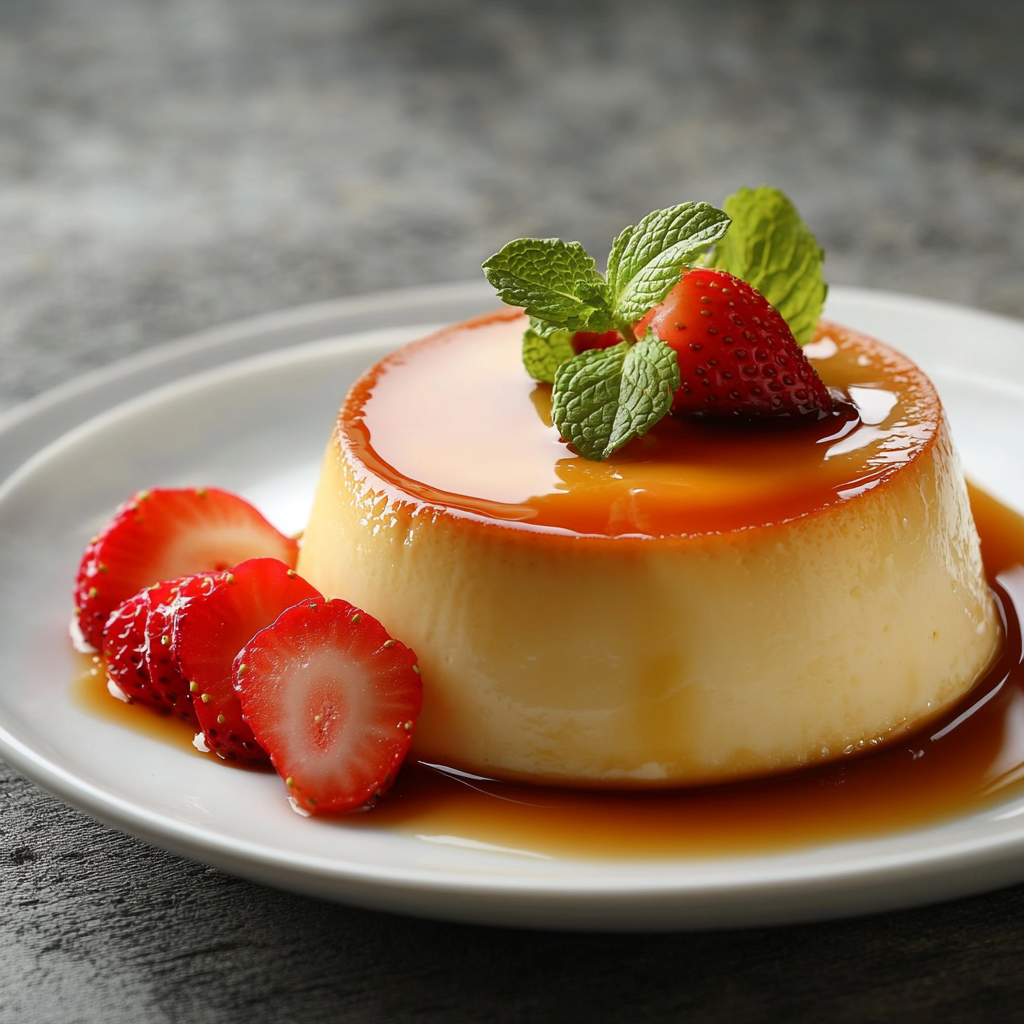
- Fresh Berries: A handful of fresh berries, such as raspberries or strawberries, adds a light and refreshing contrast to the richness of the Crème Brûlée. Their natural sweetness and slight tartness create a perfect balance, making each bite even more enjoyable.
- Whipped Cream: For those who crave extra indulgence, a dollop of unsweetened whipped cream can enhance the richness of your dessert. The airy texture and creamy flavor pair wonderfully with the silky custard, creating a luxurious treat that feels decadent yet remains keto-friendly.
- Herbal Teas or Coffee: To round out your dessert experience, consider serving a warm cup of herbal tea or coffee. The aromatic flavors of herbal teas, like chamomile or peppermint, can provide a soothing finish to your meal. Alternatively, a rich cup of coffee complements the sweetness of the Crème Brûlée perfectly, making it an ideal pairing for a cozy evening.
These sides and beverages not only enhance the flavors of your Crème Brûlée but also keep your meal aligned with your keto lifestyle. Enjoy experimenting with these pairings to find your perfect match!
FAQs About Making Crème Brûlée at Home
As I’ve delved into the world of Crème Brûlée, I’ve encountered a few common questions that many home cooks have. Here are some concise answers to help you navigate your own baking journey:
- Can I make Crème Brûlée ahead of time? Absolutely! In fact, making Crème Brûlée ahead of time is a great idea. You can prepare the custards a day in advance and refrigerate them. Just remember to caramelize the sugar topping right before serving for that perfect crispy finish.
- What’s the best way to store leftovers? If you have any leftovers, store them in the refrigerator without the caramelized sugar topping. Cover the ramekins with plastic wrap to keep them fresh. When you’re ready to enjoy them again, simply sprinkle on some brown sugar and caramelize the top.
- How do I know when the custard is done baking? The key to knowing when your Crème Brûlée is done is to look for the edges. They should be set, while the center should still have a slight jiggle. This indicates that the custard will firm up as it cools, resulting in that silky texture we all love.
These tips should help you feel more confident as you embark on your Crème Brûlée adventure. Enjoy the process, and don’t hesitate to reach out if you have more questions!
Final Thoughts on This Easy Keto-Friendly Crème Brûlée
As I reflect on the joy of making Crème Brûlée at home, I can’t help but smile at the memories created around this delightful dessert. The process of crafting this elegant custard is not just about the end result; it’s about the anticipation, the aromas wafting through the kitchen, and the satisfaction of cracking that caramelized sugar topping. Each spoonful is a reminder that we can indulge in delicious treats while staying true to our keto lifestyle.
I encourage you to try this recipe and experience the magic of homemade Crème Brûlée. Whether you’re impressing guests at a dinner party or treating yourself after a long day, this dessert is sure to bring a smile to your face. Don’t forget to share your experiences and any creative variations you come up with! Let’s foster a sense of community as we explore the world of keto cooking together. Happy baking!
Print
Crème Brûlée: Uncover the Secrets to Perfect Custard!
- Total Time: 2 hours 55 minutes
- Yield: 4 servings 1x
- Diet: Vegetarian
Description
A classic French dessert featuring a creamy custard base topped with a layer of caramelized sugar.
Ingredients
- 2 cups heavy cream
- 1 teaspoon vanilla extract
- 5 large egg yolks
- 1/2 cup granulated sugar
- 1/4 cup brown sugar (for topping)
- Pinch of salt
Instructions
- Preheat your oven to 325°F (160°C). Place four ramekins in a baking dish and set aside.
- In a saucepan over medium heat, combine the heavy cream and vanilla extract. Heat until just simmering, then remove from heat and let it cool slightly.
- In a mixing bowl, whisk together the egg yolks, granulated sugar, and salt until well combined and slightly pale in color.
- Gradually pour the warm cream mixture into the egg yolk mixture, whisking continuously to prevent the eggs from scrambling.
- Strain the mixture through a fine-mesh sieve into a large measuring cup or bowl to remove any lumps.
- Carefully pour the custard mixture into the prepared ramekins, filling them about three-quarters full.
- Fill the baking dish with hot water until it reaches halfway up the sides of the ramekins.
- Bake in the preheated oven for 30-35 minutes, or until the edges are set but the center is still slightly jiggly.
- Remove the ramekins from the water bath and let them cool to room temperature. Then refrigerate for at least 2 hours, or overnight for best results.
- Before serving, sprinkle an even layer of brown sugar on top of each custard. Use a kitchen torch to caramelize the sugar until golden and crispy. If you don’t have a torch, you can place the ramekins under a broiler for 1-2 minutes, watching closely to avoid burning.
Notes
- For a chocolate twist, melt 2 ounces of dark chocolate and whisk it into the cream mixture before combining with the egg yolks.
- Experiment with different flavors by infusing the cream with citrus zest or spices like cinnamon or cardamom before mixing with the egg yolks.
- Prep Time: 20 minutes
- Cook Time: 35 minutes
- Category: Dessert
- Method: Baking
- Cuisine: French
Nutrition
- Serving Size: 1 serving
- Calories: 320
- Sugar: 5g
- Sodium: 50mg
- Fat: 28g
- Saturated Fat: 17g
- Unsaturated Fat: 11g
- Trans Fat: 0g
- Carbohydrates: 5g
- Fiber: 0g
- Protein: 6g
- Cholesterol: 210mg