





How to Make the Perfect Banana Pudding
Making the perfect Banana Pudding – USA is a delightful journey that combines simple ingredients into a creamy, dreamy dessert. I love how this recipe allows me to create something that feels indulgent yet is surprisingly easy to prepare. Let’s dive into the step-by-step process that will have your family and friends begging for seconds!
Step 1 – Prep Your Ingredients Quickly
Before you start cooking, gather all your ingredients. This not only saves time but also ensures a smooth cooking experience. I find that having everything ready makes the process feel less hectic, especially on busy days. Trust me, it’s a game-changer!
Step 2 – Begin Cooking
In a medium saucepan, whisk together the whole milk, granulated sugar, cornstarch, and salt over medium heat. As you stir constantly, watch the mixture transform into a thick, bubbling delight. This step usually takes about 5-7 minutes, and the aroma of sweet milk fills the kitchen, making it hard to resist sneaking a taste!
Step 3 – Combine Ingredients and Cook
Now, let’s add some richness! In a small bowl, whisk the egg yolks. Gradually add a few spoonfuls of the hot milk mixture to the yolks, whisking constantly to temper them. This step is crucial to avoid scrambling the eggs. Once combined, pour the egg yolk mixture back into the saucepan. Continue cooking for another 2-3 minutes, stirring until thickened. The pudding should be velvety and smooth, a true testament to your cooking skills!
Step 4 – Final Touches & Serving Suggestions
Remove the saucepan from heat and stir in the unsalted butter and vanilla extract until smooth. Allow the pudding to cool for about 15 minutes. In a 9×13 inch dish, layer half of the Nilla Wafers, followed by half of the sliced bananas, and then half of the pudding. Repeat the layers with the remaining ingredients. Cover the dish with plastic wrap and refrigerate for at least 4 hours, or overnight for the best results. The anticipation builds as the flavors meld together, creating a dessert that’s simply irresistible!
Introduction to Banana Pudding – USA
Ah, Banana Pudding – USA! This classic American dessert brings back fond memories of family gatherings and summer picnics. The moment I see that creamy, layered treat on the table, I’m transported back to my childhood, where every spoonful was a delightful experience. It’s no wonder this dessert has become a staple at celebrations across the country.
What I love most about Banana Pudding is its nostalgic appeal. The combination of ripe bananas, creamy pudding, and crunchy Nilla Wafers creates a symphony of textures and flavors that dance on your palate. Plus, it’s incredibly easy to prepare! With just a few simple steps, you can whip up a dessert that not only satisfies your sweet tooth but also impresses your guests.
In our busy lives, finding time to indulge in homemade treats can be a challenge. That’s why this recipe is perfect for health-conscious, busy adults like us. You can make it ahead of time, allowing the flavors to meld beautifully while you focus on other tasks. So, let’s dive into this delightful recipe and discover how to create the ultimate Banana Pudding that will have everyone asking for seconds!
Why You’ll Love This Delicious Low-Carb Banana Pudding Recipe
One of the best things about this Banana Pudding – USA recipe is its convenience. You can prepare it ahead of time, making it a perfect dessert for busy weeknights or special occasions. Just imagine coming home after a long day, knowing that a creamy, delicious dessert is waiting for you in the fridge. It’s like a sweet reward for all your hard work!
The rich flavors and textures of this pudding are truly a crowd-pleaser. The combination of velvety pudding, ripe bananas, and crunchy Nilla Wafers creates a delightful contrast that keeps everyone coming back for more. Each bite is a harmonious blend of sweetness and creaminess, making it hard to resist. I’ve served this at family gatherings, and it never fails to disappear within minutes!
What I appreciate most about this recipe is its simplicity. Whether you’re a novice cook or a seasoned pro, you’ll find that the steps are straightforward and easy to follow. With just a few basic ingredients, you can create a dessert that feels indulgent without the fuss. Plus, the joy of making something from scratch is incredibly rewarding. So, roll up your sleeves and let’s get started on this delightful journey to create the ultimate Banana Pudding!
Ingredients You’ll Need for This Recipe
To create the ultimate Banana Pudding – USA, you’ll need a handful of essential ingredients that work together to create a creamy, dreamy dessert. Here’s what you’ll need:
- Whole milk: Provides creaminess, making the pudding rich and smooth.
- Granulated sugar: Sweetens the pudding, balancing the flavors beautifully.
- Cornstarch: Thickens the mixture, giving it that perfect pudding consistency.
- Salt: Enhances flavor, bringing out the sweetness of the other ingredients.
- Egg yolks: Adds richness and creaminess, elevating the overall texture.
- Unsalted butter: Contributes to a smooth texture, making each bite melt in your mouth.
- Vanilla extract: Adds aromatic flavor, infusing the pudding with warmth.
- Ripe bananas: The star ingredient for flavor and texture, providing that classic banana taste.
- Nilla Wafers: Adds crunch and sweetness, creating a delightful contrast in each layer.
- Heavy whipping cream: For a luscious topping that makes the dessert feel indulgent.
- Powdered sugar: Sweetens the whipped cream, ensuring it’s perfectly fluffy and delicious.
For those looking to make this dessert a bit healthier, consider substituting Greek yogurt for half of the heavy cream in the topping. It adds a nice tang while still keeping the creaminess intact!
Don’t worry about memorizing everything just yet; exact measurements will be provided at the end of the recipe for your convenience.
How to Make the Perfect Banana Pudding
Making the perfect Banana Pudding – USA is a delightful journey that combines simple ingredients into a creamy, dreamy dessert. I love how this recipe allows me to create something that feels indulgent yet is surprisingly easy to prepare. Let’s dive into the step-by-step process that will have your family and friends begging for seconds!
Step 1 – Prep Your Ingredients Quickly
Before you start cooking, gather all your ingredients. This not only saves time but also ensures a smooth cooking experience. I find that having everything ready makes the process feel less hectic, especially on busy days. Trust me, it’s a game-changer!
Step 2 – Begin Cooking
In a medium saucepan, whisk together the whole milk, granulated sugar, cornstarch, and salt over medium heat. As you stir constantly, watch the mixture transform into a thick, bubbling delight. This step usually takes about 5-7 minutes, and the aroma of sweet milk fills the kitchen, making it hard to resist sneaking a taste!
Step 3 – Combine Ingredients and Cook
Now, let’s add some richness! In a small bowl, whisk the egg yolks. Gradually add a few spoonfuls of the hot milk mixture to the yolks, whisking constantly to temper them. This step is crucial to avoid scrambling the eggs. Once combined, pour the egg yolk mixture back into the saucepan. Continue cooking for another 2-3 minutes, stirring until thickened. The pudding should be velvety and smooth, a true testament to your cooking skills!
Step 4 – Final Touches & Serving Suggestions
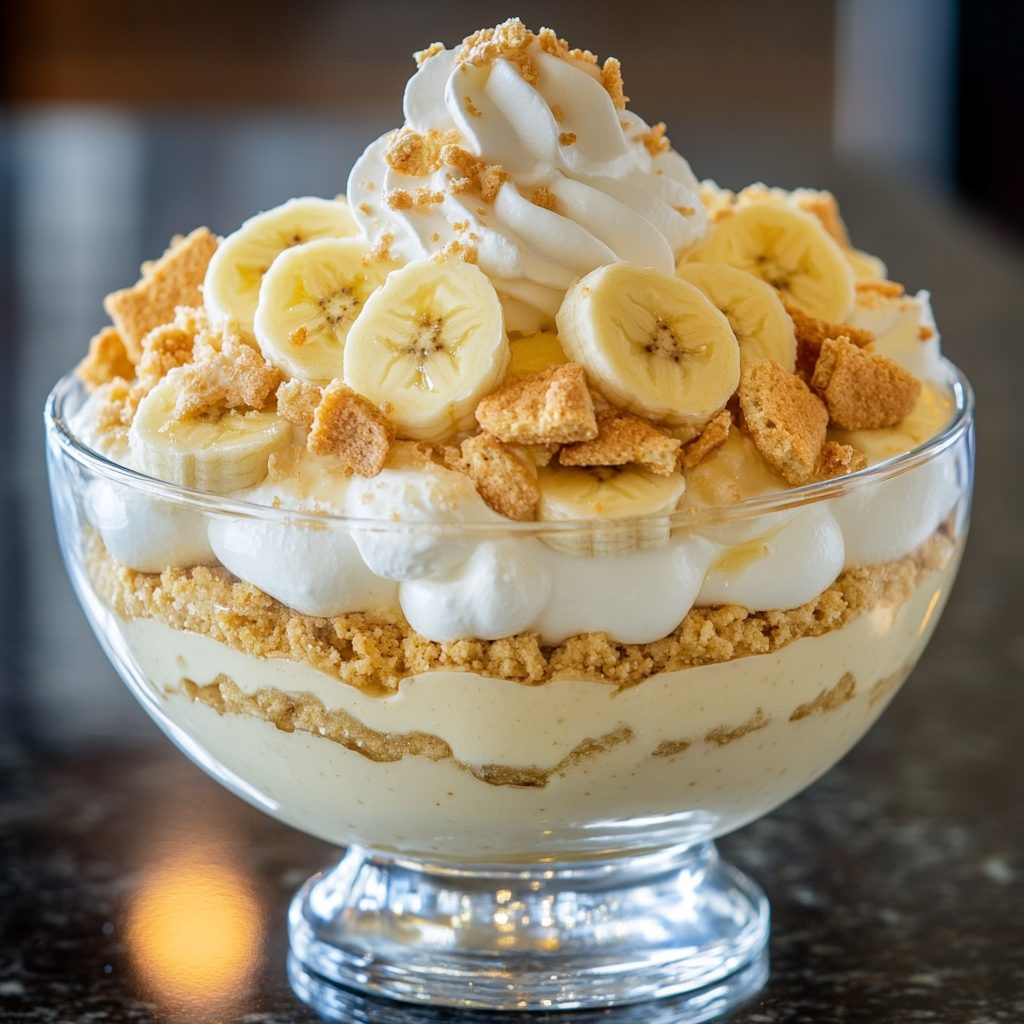
Remove the saucepan from heat and stir in the unsalted butter and vanilla extract until smooth. Allow the pudding to cool for about 15 minutes. In a 9×13 inch dish, layer half of the Nilla Wafers, followed by half of the sliced bananas, and then half of the pudding. Repeat the layers with the remaining ingredients. Cover the dish with plastic wrap and refrigerate for at least 4 hours, or overnight for the best results. The anticipation builds as the flavors meld together, creating a dessert that’s simply irresistible!
Expert Tips to Ensure Keto Cooking Success
As a passionate home cook, I’ve learned a few tricks along the way to ensure that my Banana Pudding – USA turns out perfectly every time. Here are some actionable tips that will elevate your dessert game and make your cooking experience even more enjoyable!
- Use ripe bananas for maximum flavor: The sweetness and creaminess of ripe bananas are essential for a delicious pudding. Look for bananas with a few brown spots; they’ll provide the best flavor and texture.
- Ensure the pudding is fully cooled before layering: Patience is key! Allowing the pudding to cool completely before layering it with the bananas and Nilla Wafers prevents the wafers from becoming soggy. This step ensures that each layer maintains its distinct texture.
- Experiment with different toppings for variety: While whipped cream is a classic choice, don’t hesitate to get creative! Consider adding a sprinkle of crushed nuts, a drizzle of sugar-free chocolate sauce, or even a dollop of Greek yogurt for a tangy twist. The possibilities are endless!
By following these tips, you’ll not only enhance the flavor of your Banana Pudding – USA but also enjoy the process of making it. Happy cooking!
Essential Kitchen Tools for This Keto Recipe
To create the ultimate Banana Pudding – USA, having the right kitchen tools on hand can make all the difference. Here’s a list of essential tools you’ll need to whip up this delicious dessert:
- Medium saucepan: A sturdy saucepan is crucial for cooking the pudding mixture evenly.
- Whisk: A good whisk helps you combine ingredients smoothly and prevents lumps in your pudding.
- Mixing bowls: Use these for whisking the egg yolks and combining other ingredients.
- 9×13 inch dish: This size is perfect for layering your pudding, bananas, and Nilla Wafers.
- Plastic wrap: Covering your dish with plastic wrap helps keep the pudding fresh while it chills in the fridge.
- Electric mixer: An electric mixer is ideal for whipping the heavy cream to fluffy perfection for your topping.
If you don’t have an electric mixer, a handheld whisk will work just fine, though it may take a bit more elbow grease! Remember, the right tools can make your cooking experience smoother and more enjoyable. Happy cooking!
Delicious Variations to Customize Your Keto Dish
One of the joys of making Banana Pudding – USA is the opportunity to get creative with flavors and textures. While the classic version is undeniably delicious, there are several delightful variations you can try to make this dessert your own. Here are some fun ideas to inspire your next batch!
- Add chocolate pudding: For a rich twist, consider layering in chocolate pudding between the banana layers. The combination of chocolate and banana is a match made in dessert heaven, creating a decadent chocolate banana pudding that will have everyone swooning!
- Use different cookies: Instead of the traditional Nilla Wafers, experiment with other cookies for a unique flavor profile. Try using almond flour cookies for a keto-friendly option, or even gingersnaps for a spicy kick. Each cookie will bring its own character to the dish, making it a fun surprise for your guests.
- Incorporate nuts: For added crunch and a nutty flavor, sprinkle in some chopped nuts like pecans or walnuts between the layers. Not only do they add texture, but they also enhance the overall flavor of the pudding, making each bite even more satisfying.
These variations allow you to tailor your Banana Pudding – USA to suit your taste preferences and dietary needs. So, don’t hesitate to get creative and make this classic dessert your own!
Best Keto-Friendly Sides & Beverage Pairings
When it comes to enjoying your Banana Pudding – USA, pairing it with the right sides and beverages can elevate your dessert experience. Here are some easy, keto-friendly options that complement the creamy sweetness of the pudding perfectly!
- Fresh berries: A light side of fresh berries, such as strawberries, raspberries, or blueberries, adds a burst of flavor and a refreshing contrast to the richness of the pudding. Their natural sweetness and vibrant colors make for a beautiful presentation!
- Sugar-free whipped cream: For those who want to indulge a little more, consider serving your banana pudding with a dollop of sugar-free whipped cream. It adds an extra layer of creaminess without the added carbs, making it a guilt-free treat!
- Iced tea or coffee: As refreshing beverage options, iced tea or coffee pairs wonderfully with the dessert. A chilled glass of unsweetened iced tea can cleanse your palate, while a hot cup of coffee complements the flavors beautifully, especially if you enjoy a splash of heavy cream in your brew.
These simple pairings not only enhance your Banana Pudding – USA experience but also keep your meal balanced and satisfying. Enjoy your delicious dessert with these delightful accompaniments!
FAQs About Making Banana Pudding at Home
As you embark on your journey to create the ultimate Banana Pudding – USA, you might have a few questions. Here are some common queries I’ve encountered, along with my answers to help you navigate the process smoothly!
- Can I make this pudding ahead of time? Absolutely! In fact, making your Banana Pudding ahead of time is highly recommended. It allows the flavors to meld beautifully, resulting in a more delicious dessert. Just be sure to cover it well and refrigerate it for at least 4 hours, or overnight for the best results.
- How long does banana pudding last in the fridge? When stored properly in an airtight container, your banana pudding can last in the fridge for about 3-4 days. However, keep in mind that the bananas may start to brown over time, so it’s best enjoyed fresh!
- Can I use almond milk instead of whole milk? Yes, you can substitute almond milk for whole milk, but keep in mind that it may alter the creaminess and flavor slightly. For a richer texture, consider using unsweetened almond milk or a blend of almond milk and heavy cream.
These FAQs should help clarify any concerns you might have while making your Banana Pudding – USA. Enjoy the process and happy cooking!
Final Thoughts on This Easy Keto-Friendly Banana Pudding
As I reflect on the joy of making this Banana Pudding – USA, I can’t help but smile at the memories it brings. There’s something truly special about creating a dessert that not only satisfies your sweet tooth but also evokes feelings of nostalgia and warmth. Each layer of creamy pudding, ripe bananas, and crunchy Nilla Wafers tells a story, one that’s meant to be shared with family and friends.
I encourage you to try this recipe and experience the delight it brings. Whether it’s for a special occasion or just a sweet treat after a long day, this banana pudding is sure to impress. Don’t forget to share your experiences and any creative twists you add along the way! Let’s foster a sense of community as we celebrate the joy of cooking and indulging in delicious desserts together. Happy cooking, and may your kitchen be filled with laughter and love!
Print
Banana Pudding – USA: Discover the Ultimate Recipe!
- Total Time: 4 hours 30 minutes
- Yield: 8 servings 1x
- Diet: Vegetarian
Description
A classic American dessert featuring layers of creamy banana pudding, ripe bananas, and Nilla Wafers, topped with whipped cream.
Ingredients
- 2 cups whole milk
- 1/2 cup granulated sugar
- 1/3 cup cornstarch
- 1/4 teaspoon salt
- 3 large egg yolks
- 2 tablespoons unsalted butter
- 1 teaspoon vanilla extract
- 4 ripe bananas, sliced
- 1 box (11 ounces) Nilla Wafers
- 1 cup heavy whipping cream
- 2 tablespoons powdered sugar
- 1 teaspoon vanilla extract
Instructions
- In a medium saucepan, whisk together the milk, granulated sugar, cornstarch, and salt over medium heat. Cook, stirring constantly, until the mixture thickens and begins to bubble, about 5-7 minutes.
- In a small bowl, whisk the egg yolks. Gradually add a few spoonfuls of the hot milk mixture to the egg yolks, whisking constantly to temper the eggs.
- Pour the egg yolk mixture back into the saucepan with the remaining milk mixture. Continue to cook for another 2-3 minutes, stirring until thickened.
- Remove the saucepan from heat and stir in the butter and vanilla extract until smooth. Allow the pudding to cool for about 15 minutes.
- In a 9×13 inch dish, layer half of the Nilla Wafers, followed by half of the banana slices, and then half of the pudding. Repeat the layers with the remaining ingredients.
- Cover the dish with plastic wrap and refrigerate for at least 4 hours, or overnight for best results.
- Before serving, whip the heavy cream with the powdered sugar and vanilla extract until soft peaks form. Spread the whipped cream over the top of the pudding.
Notes
- For a chocolate twist, add a layer of chocolate pudding between the banana layers.
- To make it a bit healthier, substitute Greek yogurt for half of the heavy cream in the topping.
- Prep Time: 20 minutes
- Cook Time: 10 minutes
- Category: Dessert
- Method: Stovetop and Refrigeration
- Cuisine: American
Nutrition
- Serving Size: 1 serving
- Calories: 320
- Sugar: 20g
- Sodium: 150mg
- Fat: 15g
- Saturated Fat: 9g
- Unsaturated Fat: 6g
- Trans Fat: 0g
- Carbohydrates: 40g
- Fiber: 1g
- Protein: 4g
- Cholesterol: 150mg


