





Why You’ll Love This Delicious Low-Carb Medovik Honey Cake Recipe
As a busy home cook, I know how challenging it can be to find time for baking, especially when you’re trying to stick to a healthy lifestyle. That’s why I absolutely adore this Medovik Honey Cake – Russia recipe. Not only is it a delightful treat, but it also offers a unique balance of flavors and textures that will impress your family and friends.
One of the best parts about this cake is its simplicity. With just a handful of ingredients, you can create a stunning dessert that looks as good as it tastes. The layers of honey-infused cake paired with creamy whipped topping create a symphony of flavors that dance on your palate. It’s like a warm hug on a plate!
Moreover, this recipe is incredibly versatile. You can easily customize it to suit your taste preferences or dietary needs. Whether you want to add a layer of fruit preserves for a burst of flavor or swap out heavy cream for coconut cream, the possibilities are endless. This adaptability makes it a perfect choice for health-conscious adults who still want to indulge in something sweet.
So, if you’re looking for a delicious dessert that won’t derail your healthy eating habits, this Medovik Honey Cake – Russia is the answer. It’s not just a cake; it’s an experience that brings joy and satisfaction to your busy life.
Introduction to Medovik Honey Cake – Russia
Let me take you on a delightful journey to Russia with the Medovik Honey Cake – Russia. This beloved traditional dessert has captured the hearts of many with its enchanting layers and rich, honey-infused flavor. Each slice is a testament to the artistry of Russian baking, showcasing a beautiful interplay of textures that is simply irresistible.
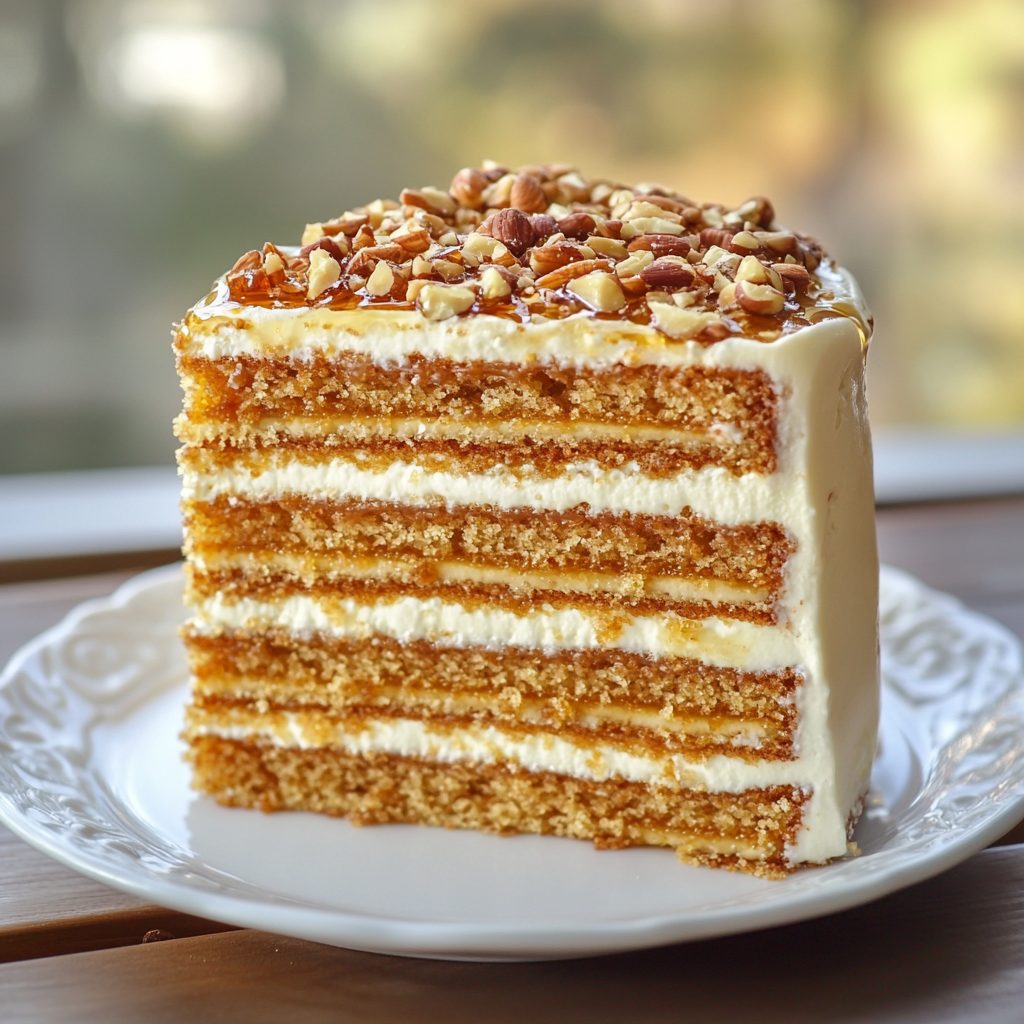
The unique layered structure of Medovik is what sets it apart. Imagine soft, moist cake layers that melt in your mouth, generously filled with creamy whipped topping and tangy sour cream. It’s like a sweet symphony, where every bite offers a new note of flavor. The combination of honey and vanilla creates a warm, inviting aroma that fills your kitchen, making it a perfect treat for any occasion.
For busy health-conscious adults like us, this cake is a dream come true. It’s not just about indulging in something sweet; it’s about creating a moment of joy amidst our hectic lives. With its straightforward recipe and the ability to prepare it ahead of time, the Medovik Honey Cake allows you to savor a delightful dessert without the stress. So, whether you’re celebrating a special occasion or simply treating yourself, this cake is sure to bring a smile to your face.
Why You’ll Love This Delicious Low-Carb Medovik Honey Cake Recipe
As a busy home cook, I know how challenging it can be to find time for baking, especially when you’re trying to stick to a healthy lifestyle. That’s why I absolutely adore this Medovik Honey Cake – Russia recipe. Not only is it a delightful treat, but it also offers a unique balance of flavors and textures that will impress your family and friends.
One of the best parts about this cake is its simplicity. With just a handful of ingredients, you can create a stunning dessert that looks as good as it tastes. The layers of honey-infused cake paired with creamy whipped topping create a symphony of flavors that dance on your palate. It’s like a warm hug on a plate!
Moreover, this recipe is incredibly versatile. You can easily customize it to suit your taste preferences or dietary needs. Whether you want to add a layer of fruit preserves for a burst of flavor or swap out heavy cream for coconut cream, the possibilities are endless. This adaptability makes it a perfect choice for health-conscious adults who still want to indulge in something sweet.
So, if you’re looking for a delicious dessert that won’t derail your healthy eating habits, this Medovik Honey Cake – Russia is the answer. It’s not just a cake; it’s an experience that brings joy and satisfaction to your busy life.
Ingredients You’ll Need for This Recipe
To create the delightful Medovik Honey Cake – Russia, you’ll need a few essential ingredients that work together to build its rich flavor and texture. Here’s a quick rundown of what you’ll need:
- All-purpose flour: Provides structure to the cake, ensuring it holds its shape while remaining tender.
- Granulated sugar: Sweetens the cake, balancing the flavors and enhancing the overall taste.
- Unsalted butter: Adds richness and moisture, contributing to the cake’s soft texture.
- Honey: Infuses a unique flavor that is characteristic of Medovik, giving it that signature sweetness.
- Eggs: Binds the ingredients together, helping the cake rise and maintain its structure.
- Baking soda: Acts as a leavening agent, ensuring the cake rises beautifully in the oven.
- Vanilla extract: Enhances the flavor profile, adding warmth and depth to the cake.
- Salt: Balances the sweetness, bringing out the flavors of the other ingredients.
- Sour cream: Adds moisture and a tangy flavor that complements the sweetness of the cake.
- Heavy cream: Used for the whipped topping, creating a luscious finish to each slice.
- Powdered sugar: Sweetens the whipped cream, making it light and fluffy.
For those looking to customize their cake, consider adding optional ingredients like fruit preserves between the layers for an extra burst of flavor. You can also substitute heavy cream with coconut cream for a dairy-free version that still tastes divine.
Exact measurements for each ingredient will be provided at the end of this recipe, ensuring you have everything you need to create this delicious dessert!
How to Make the Perfect Medovik Honey Cake
Creating the perfect Medovik Honey Cake – Russia is a delightful journey that combines simple steps with rich flavors. Let’s dive into the process, ensuring you capture every layer of this exquisite dessert!
Step 1 – Prep Your Ingredients Quickly
Before you start baking, it’s crucial to prepare all your ingredients. This not only streamlines the process but also ensures you won’t miss anything along the way. I recommend measuring out each ingredient and placing them in small bowls. This way, you can easily grab what you need as you go.
Additionally, preheating your oven to 350°F (175°C) is essential. A hot oven is key to achieving that perfect rise in your cake layers. Trust me, nothing beats the aroma of freshly baked cake wafting through your kitchen!
Step 2 – Begin Cooking
Now, let’s get to the fun part! In a large mixing bowl, cream together the softened unsalted butter and granulated sugar until the mixture is light and fluffy. This step is vital; it incorporates air into the batter, giving your cake that delightful texture. You’ll know it’s ready when it turns a pale yellow and feels airy to the touch.
Next, add in the honey and mix well. Then, beat in the eggs one at a time, followed by the vanilla extract. Each addition should be fully incorporated before moving on to the next. This layering of flavors is what makes the Medovik Honey Cake – Russia so special!
Step 3 – Combine Ingredients and Cook
In a separate bowl, whisk together the all-purpose flour, baking soda, and salt. Gradually add this dry mixture to your wet ingredients, mixing until just combined. Be careful not to overmix; you want to maintain that light texture. Overmixing can lead to a dense cake, and we definitely want to avoid that!
Once your batter is ready, divide it evenly among the three prepared cake pans. Bake for 20-25 minutes, or until a toothpick inserted into the center comes out clean. The anticipation of watching your cake rise is one of the best parts of baking!
Step 4 – Final Touches & Serving Suggestions
After the cakes have cooled in the pans for about 10 minutes, transfer them to a wire rack to cool completely. This step is crucial; frosting a warm cake can lead to a melty mess!
Once cooled, it’s time to layer your cake. Place one layer on a serving plate and spread a generous layer of sour cream on top, followed by a layer of whipped cream. Repeat this process with the second layer. Finally, place the last layer on top and cover the entire cake with the remaining whipped cream.
For the best flavor, refrigerate your Medovik Honey Cake – Russia for at least 4 hours or overnight. This chilling time allows the flavors to meld beautifully, making each bite a heavenly experience!
Expert Tips to Ensure Keto Cooking Success
As I’ve navigated the world of keto baking, I’ve learned a few tricks that can elevate your Medovik Honey Cake – Russia to new heights. Here are my top tips to ensure your cake turns out perfectly every time:
- Use room temperature ingredients: This is a game-changer! When your butter, eggs, and sour cream are at room temperature, they mix together more easily, creating a smoother batter. This results in a lighter, fluffier cake that melts in your mouth.
- Allow the cake to cool completely before frosting: Patience is key here! If you frost a warm cake, the frosting can slide off, creating a messy presentation. Letting your layers cool completely ensures that the whipped cream stays put, giving you that beautiful layered look.
- Experiment with different flavorings or add-ins: Don’t be afraid to get creative! You can add a splash of almond extract for a nutty twist or incorporate spices like cinnamon or nutmeg for warmth. If you’re feeling adventurous, try layering in some fruit preserves between the cake layers for an extra burst of flavor!
By following these expert tips, you’ll not only master the Medovik Honey Cake – Russia but also gain confidence in your keto baking journey. Happy baking!
Essential Kitchen Tools for This Keto Recipe
To create the delightful Medovik Honey Cake – Russia, having the right kitchen tools on hand can make all the difference. Here’s a list of essential tools you’ll need:
- Mixing bowls: A set of various sizes will help you easily mix your ingredients without any mess.
- Electric mixer: This is crucial for achieving that light and fluffy texture when creaming butter and sugar. If you don’t have one, a whisk can work, but it will require more elbow grease!
- Measuring cups and spoons: Accurate measurements are key to baking success, so make sure you have a reliable set.
- Cake pans (9-inch round): These are perfect for baking your cake layers evenly. If you don’t have round pans, you can use square ones, but adjust the baking time accordingly.
- Wire rack for cooling: This allows air to circulate around your cakes, preventing them from becoming soggy as they cool.
If you’re in a pinch, you can also use a hand whisk instead of an electric mixer, and a large pot can serve as a makeshift mixing bowl. Just remember, the right tools can make your baking experience smoother and more enjoyable!
Delicious Variations to Customize Your Keto Dish
One of the joys of baking the Medovik Honey Cake – Russia is the opportunity to make it your own. With a few simple tweaks, you can create a dessert that perfectly suits your taste preferences or dietary needs. Here are some delightful variations to consider:
- Adding fruit preserves between layers: For a burst of flavor, consider spreading a layer of fruit preserves, such as raspberry or apricot, between the cake layers. This not only adds a sweet and tangy contrast but also enhances the overall presentation with vibrant colors.
- Using coconut cream for a dairy-free option: If you’re looking for a dairy-free alternative, swap out the heavy cream for coconut cream. This will give your cake a rich, tropical flavor while keeping it creamy and delicious. Just make sure to chill the coconut cream beforehand for the best results!
- Incorporating spices like cinnamon or nutmeg: For an extra layer of warmth and depth, try adding a teaspoon of ground cinnamon or nutmeg to your batter. These spices complement the honey beautifully and create a cozy aroma that fills your kitchen as it bakes.
These variations not only allow you to personalize your Medovik Honey Cake – Russia but also keep it exciting every time you bake. Feel free to experiment and discover your favorite combinations!
Best Keto-Friendly Sides & Beverage Pairings
When it comes to enjoying your Medovik Honey Cake – Russia, pairing it with the right sides and beverages can elevate your dessert experience to new heights. Here are some easy, complementary keto-friendly options that will enhance the flavors of your cake:
- Fresh berries or a berry compote: The tartness of fresh berries, such as raspberries or strawberries, provides a refreshing contrast to the sweetness of the cake. You can also make a quick berry compote by simmering your favorite berries with a touch of sweetener until they break down into a delicious sauce. This adds a vibrant color and a burst of flavor to each slice!
- Herbal teas or coffee: A warm cup of herbal tea or a rich coffee pairs beautifully with the Medovik Honey Cake – Russia. The aromatic notes of tea, like chamomile or peppermint, can complement the honey flavors, while a bold coffee can enhance the cake’s richness. Consider serving your cake with a dollop of whipped cream on the side for an extra indulgent touch!
- Light salads with vinaigrette: For a refreshing side, a light salad dressed with a tangy vinaigrette can balance the sweetness of the cake. Think mixed greens with a lemon vinaigrette or a simple cucumber salad. The crispness of the vegetables will cleanse your palate and provide a delightful contrast to the creamy layers of the cake.
These keto-friendly sides and beverages not only complement the Medovik Honey Cake – Russia but also create a well-rounded dessert experience that you and your guests will love. Enjoy your baking and the delightful moments that come with sharing this special treat!
FAQs About Making Medovik Honey Cake at Home
As you embark on your journey to create the delightful Medovik Honey Cake – Russia, you may have some questions. Here are answers to common queries that can help you along the way:
- Can I make this cake ahead of time? Absolutely! The Medovik Honey Cake – Russia actually tastes even better after it has had time to chill and the flavors meld together. You can prepare the cake layers a day in advance and assemble it just before serving. Just remember to refrigerate it for at least 4 hours or overnight for the best results!
- How should I store leftovers? If you have any leftovers (which is rare, but it happens!), store the cake in an airtight container in the refrigerator. It will keep well for up to 3-4 days. Just be sure to cover it to prevent it from drying out and losing its delicious creaminess.
- Can I substitute ingredients for dietary restrictions? Yes, you can! If you need to make substitutions, consider using coconut cream instead of heavy cream for a dairy-free option. You can also replace granulated sugar with a keto-friendly sweetener like erythritol or monk fruit sweetener to keep it low-carb. Just be mindful of the sweetness level, as some sweeteners are more potent than sugar.
These FAQs should help you navigate any concerns you might have while making your Medovik Honey Cake – Russia. Enjoy the process and happy baking!
Final Thoughts on This Easy Keto-Friendly Medovik Honey Cake
As I reflect on the journey of creating the Medovik Honey Cake – Russia, I can’t help but feel a sense of joy and fulfillment. Baking this cake is not just about following a recipe; it’s about crafting a delightful experience that brings people together. The layers of honey-infused cake, the creamy whipped topping, and the tangy sour cream create a symphony of flavors that is sure to impress anyone who takes a bite.
Sharing this cake with family and friends is where the true magic happens. Watching their faces light up with delight as they savor each layer reminds me of the power of homemade treats. It’s a simple way to show love and care, especially in our busy lives where we often forget to pause and enjoy the little moments.
I encourage you to try this Medovik Honey Cake – Russia recipe in your own kitchen. Embrace the process, experiment with flavors, and make it your own. And when you do, I would love to hear about your experiences! Share your thoughts, tips, and any variations you’ve tried in the comments below. Let’s foster a community of passionate home cooks who celebrate the joy of baking together!
Happy baking, and may your kitchen be filled with the sweet aroma of this delightful cake!
Print
Medovik Honey Cake – Russia: Discover Its Delightful Layers!
- Total Time: 4 hours 55 minutes
- Yield: 10 servings 1x
- Diet: Vegetarian
Description
Medovik Honey Cake is a traditional Russian dessert known for its delightful layers and rich flavor.
Ingredients
- 3 cups all-purpose flour
- 1 cup granulated sugar
- 1/2 cup unsalted butter, softened
- 1/2 cup honey
- 2 large eggs
- 1 teaspoon baking soda
- 1 teaspoon vanilla extract
- 1/2 teaspoon salt
- 1 cup sour cream
- 1 cup heavy cream
- 1 tablespoon powdered sugar (for whipped cream)
Instructions
- Preheat your oven to 350°F (175°C). Grease and flour three 9-inch round cake pans.
- In a large mixing bowl, cream together the softened butter and granulated sugar until light and fluffy.
- Add the honey and mix well. Then, beat in the eggs one at a time, followed by the vanilla extract.
- In a separate bowl, whisk together the flour, baking soda, and salt. Gradually add the dry ingredients to the wet mixture, mixing until just combined.
- Divide the batter evenly among the three prepared cake pans. Bake for 20-25 minutes, or until a toothpick inserted into the center comes out clean.
- Allow the cakes to cool in the pans for 10 minutes before transferring them to a wire rack to cool completely.
- While the cakes are cooling, prepare the whipped cream. In a mixing bowl, beat the heavy cream and powdered sugar until stiff peaks form.
- Once the cakes are completely cool, place one layer on a serving plate. Spread a layer of sour cream on top, followed by a layer of whipped cream. Repeat with the second layer.
- Place the final layer on top and cover the entire cake with the remaining whipped cream.
- For best flavor, refrigerate the cake for at least 4 hours or overnight before serving to allow the flavors to meld.
Notes
- For a richer flavor, consider adding a layer of fruit preserves, such as raspberry or apricot, between the cake layers.
- You can also substitute the heavy cream with coconut cream for a dairy-free version.
- Prep Time: 30 minutes
- Cook Time: 25 minutes
- Category: Dessert
- Method: Baking
- Cuisine: Russian
Nutrition
- Serving Size: 1 slice
- Calories: 350
- Sugar: 20g
- Sodium: 200mg
- Fat: 18g
- Saturated Fat: 10g
- Unsaturated Fat: 8g
- Trans Fat: 0g
- Carbohydrates: 40g
- Fiber: 1g
- Protein: 5g
- Cholesterol: 70mg


